
Golden-edged pavlova cookies with soft centers earn repeat status fast because they hit that rare middle ground between crisp meringue shell and marshmallowy bite. The edges shatter lightly, the centers stay tender, and the dark chocolate keeps each cookie from tasting like plain sugar. They bake up with those little wrinkled peaks and caramelized patches that tell you the oven did its job.
What makes this version work is the handling. The egg whites need a clean bowl and steady whipping so they can hold a glossy base, and the sugar has to go in slowly enough to dissolve instead of staying gritty. Brown butter adds a butterscotch note, but it also means the batter needs just enough structure elsewhere to keep the cookies from spreading into flat disks. That balance is what gives you the crisp-tender contrast instead of a dry, fragile shell.
Below, I’ll walk through the parts that matter most: how to keep the meringue stable, when to fold in the chocolate, and how to know when the cookies are baked without overdoing them. If pavlova-style desserts have ever collapsed, cracked badly, or turned chewy in the wrong way, the notes here will help you steer around that.
The centers stayed soft and chewy while the edges turned perfectly crisp, and the browned butter gave them this caramel note that made them taste like a bakery cookie.
Love these pavlova cookies with crisp edges and soft centers? Save them to Pinterest for the next time you want a chocolate-studded cookie with caramelized brown butter.
The Trick Is Keeping the Meringue Glossy, Not Grainy
Pavlova-style cookies fail in one of two ways: the whites never build enough structure, or the sugar stays gritty and leaves the cookies unstable. The goal is a glossy meringue that holds stiff peaks and still looks smooth when you rub a little between your fingers. If it feels sandy, keep whipping; that sugar needs time to dissolve before the cookies go in the oven.
Brown butter changes the game here because it adds depth without weighing the batter down, but it also means you can’t rely on extra fat for forgiveness. Fold it in gently so you don’t knock out the air you’ve just built. The cookies should mound, not puddle. If they spread hard, the whites were underwhipped or the batter was overmixed after the chocolate went in.
What Each Ingredient Is Actually Doing in This Dish

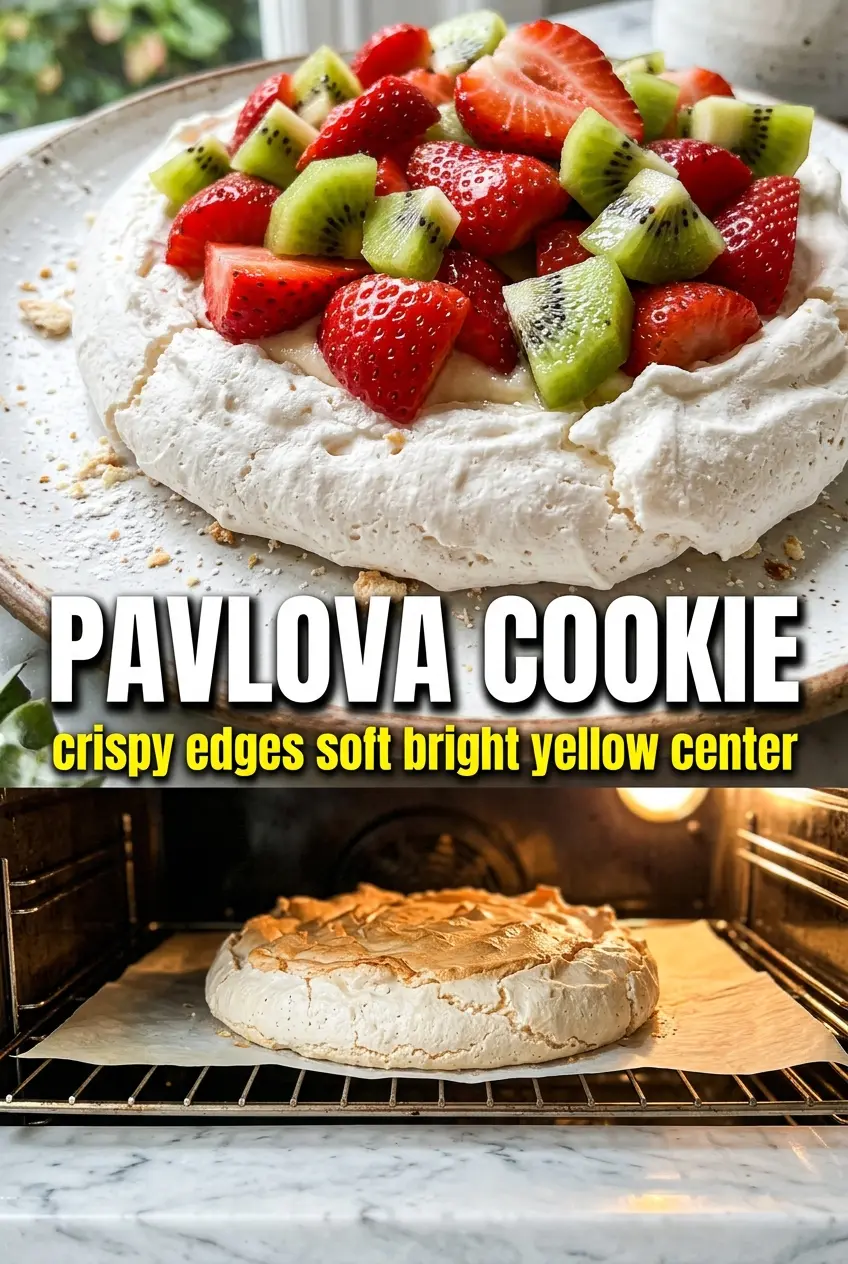
The image block above shows the exact look you’re after: crisp edges, soft centers, and those dark chocolate pockets that keep each bite from leaning too sweet.
- Egg whites — These carry the structure. They need to be completely free of yolk, and the bowl has to be grease-free or they won’t whip properly. Fresh whites hold a little better, but older whites still work if they’re at room temperature and whipped patiently.
- Granulated sugar — This sweetens, stabilizes, and gives the cookies that delicate shell. Add it slowly. Dumping it in all at once leaves you with heavy, unstable meringue and a gritty finish.
- Brown butter — This is where the caramel note comes from. Let it cool before using it so it doesn’t collapse the foam. If you skip it, the cookies still work, but they lose that toasted butterscotch depth.
- Dark chocolate — Use chopped chocolate, not tiny chips, if you want real pockets that melt into the cookie. Chips hold their shape more stubbornly, while chopped chocolate gives you better contrast against the airy base.
- Cream of tartar or a little acid — This helps the whites stay stable while whipping. Lemon juice can stand in if that’s what you have, but cream of tartar is steadier and doesn’t add any flavor you can taste.
Getting the Cookies From Whipped to Baked Without Losing the Lift
Building the Meringue
Start with room-temperature egg whites in a clean bowl and whip until they look foamy before adding the sugar. Once the sugar begins going in, keep the mixer running and add it slowly so it dissolves instead of turning the mixture heavy. You want stiff, glossy peaks that stand up straight but still look silky. If the meringue turns dull and dry, it has been overwhipped and will be harder to fold without breaking.
Folding in the Brown Butter and Chocolate
Let the browned butter cool until it’s just lukewarm, not hot. Hot butter can collapse the meringue in seconds. Fold it in with a light hand, then add the chocolate and stop as soon as it’s distributed. A few streaks are better than a deflated batter, because overmixing takes away the lift you worked to build.
Baking to the Right Finish
Spoon or pipe the cookies onto a lined baking sheet and give them a little space. Bake until the outside looks set and lightly golden at the edges, but the centers still have that soft marshmallow look. If you bake them until they feel firm all the way through, they’ll dry out instead of staying chewy in the middle. Let them cool on the sheet so they can finish setting without tearing.
How to Adapt This for Different Kitchens and Different Cravings
Dairy-Free Version
Use dairy-free dark chocolate and keep the brown butter out, since the flavor comes from the milk solids in the butter itself. If you want a toasted note back, add a pinch of espresso powder or a little vanilla. The cookies still bake up crisp and airy, but they lose that caramelized richness from the butter.
Gluten-Free by Default
This recipe is naturally gluten-free as long as your chocolate is certified gluten-free. That makes the texture even more important, because there’s no flour to absorb mistakes. Whip the whites properly and bake until the shell is set, and you won’t miss the wheat at all.
Extra Chocolate, Less Sweet
Swap part of the sugar for a little extra chopped dark chocolate on top if you want a sharper, less candy-like cookie. The result is richer and a bit more dramatic, but the meringue needs the full sugar amount to stay stable, so don’t reduce the base sweetness too far.
Storage and Reheating
- Refrigerator: Store in an airtight container for up to 3 days. The centers will soften a bit, but the cookies still hold up well.
- Freezer: Freeze fully baked cookies in a single layer, then transfer to a sealed container for up to 1 month. Thaw at room temperature so the exterior doesn’t sweat.
- Reheating: Warm briefly in a low oven for a few minutes if you want to revive some crispness. Don’t microwave them — it turns the meringue sticky and chewy in the wrong way.
Answers to the Questions Worth Asking
Pavlova Cookie
Ingredients
Equipment
Method
- Melt the unsalted butter in a saucepan over medium heat, stirring until it turns golden and smells nutty, 4-6 minutes, with visible toasted brown milk solids at the bottom.
- Remove from heat and let the brown butter cool 5-10 minutes until warm but not hot, so it won’t deflate the meringue.
- Preheat the oven to 300°F (150°C) and line a sheet pan with parchment for easy release.
- In a stand mixer, whip egg whites and fine salt on medium-high until they form soft peaks, 2-3 minutes, with a glossy surface.
- Gradually add granulated sugar while mixing on high until the meringue becomes thick and glossy and you can rub a little between your fingers and it feels mostly dissolved, 4-6 minutes.
- Sprinkle in cornstarch and add white vinegar and vanilla extract, mixing on low just until combined, 30-45 seconds.
- Drizzle in the cooled brown butter in a thin stream with the mixer running on low, 20-30 seconds, until the mixture looks evenly streaked and glossy.
- Fold in chopped dark chocolate gently with a spatula until evenly distributed, stopping when you no longer see dry chocolate streaks.
- Scoop meringue into 8-10 mounds on the sheet pan, spacing apart, and keep the edges slightly higher for a crisp rim.
- Bake at 300°F (150°C) for 25-35 minutes until the edges are set and lightly golden while the centers remain soft-looking.
- Turn off the oven, crack the door slightly, and let the cookies dry inside for 10-15 minutes, until the tops feel dry to the touch.
- Cool completely on the sheet pan for at least 20 minutes so the exterior stays crisp and the center sets.