
Fluffy vanilla sponge and silky pink buttercream make birthday cake worth keeping in the regular rotation, not just pulling out once a year. The crumb stays light without turning dry, and the frosting sets up with enough structure to hold a swirl without feeling heavy. When a cake slices cleanly and still tastes like a proper celebration, it earns repeat status fast.
The part that matters most here is balance. The sponge needs enough fat and air to stay tender, but not so much sugar that it turns fragile under the frosting. The buttercream works because it’s beaten until pale and smooth, then adjusted with just enough tang to keep the sweetness from taking over. That little bit of contrast is what keeps each bite from feeling flat.
Below, you’ll find the small decisions that make a birthday cake actually worth baking: how to keep the layers even, why the frosting texture matters, and what to change if you want a different finish without losing that classic party-cake feel.
The cake stayed incredibly soft for two days, and the buttercream held its shape even after sitting out during the party. I also loved that the vanilla flavor came through instead of just tasting like sugar.
Save this birthday cake for the next time you need a fluffy vanilla layer cake with buttercream that actually holds its swirl.
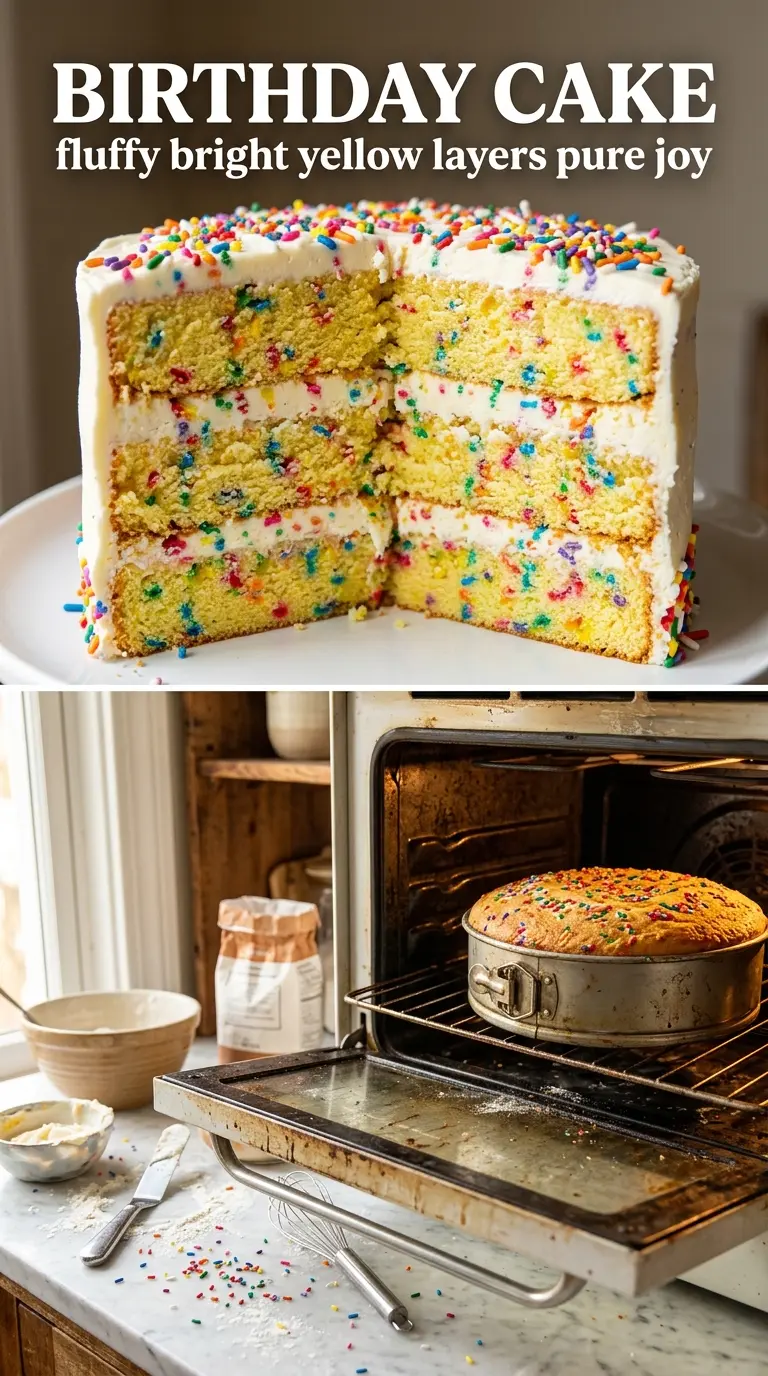
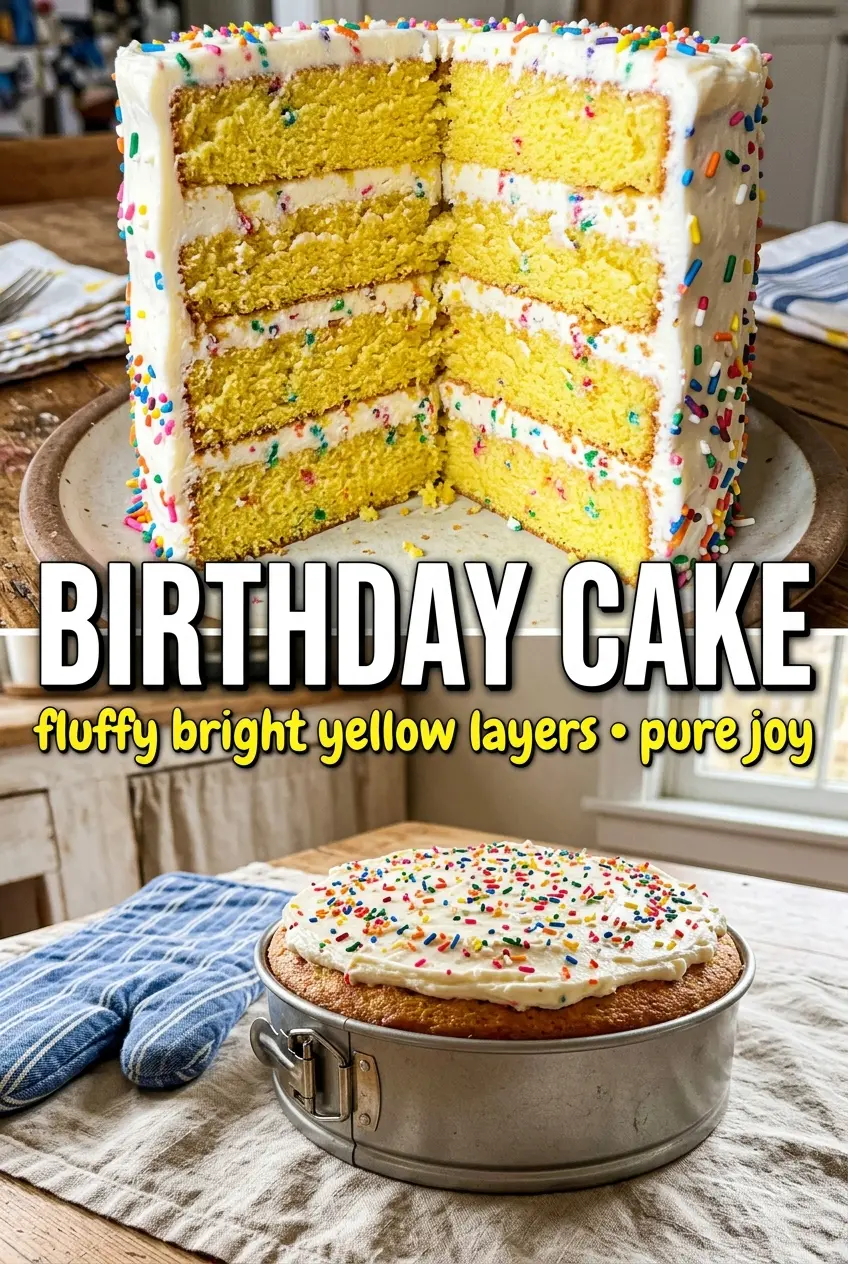
The Difference Between a Light Crumb and a Dry Birthday Cake
Birthday cake fails for the same boring reasons over and over: too much flour, not enough mixing where it counts, or frosting that gets piled on before the layers have finished cooling. A cake can look tall and pretty and still eat like cardboard if the batter never gets properly aerated or the oven runs too hot. The goal here is a fine, tender crumb that still has enough structure to stand up under frosting.
The other trap is overbaking by a few minutes. That small window turns a soft vanilla cake into something noticeably tighter and drier once it cools. Pull the layers when the center springs back and a tester comes out with a few moist crumbs, not wet batter. The cakes finish setting as they rest, and that carryover is part of getting the texture right.
- Room-temperature butter and eggs — They emulsify faster, which gives you a smoother batter and a more even crumb. Cold ingredients leave little pockets behind and make it harder to build that soft texture.
- Cake flour — This is one place where the lower protein matters. All-purpose flour works in a pinch, but the crumb will be a little sturdier and less delicate.
- Buttercream thickness — The frosting should be spreadable, not loose. If it’s too soft, it slides and warms the cake layers; if it’s too stiff, the cake tears as you frost.
What Each Ingredient Is Actually Doing in This Cake
- Butter — It gives the cake richness and helps trap air during creaming, which is part of what makes the crumb light. Use good butter if you can, because the flavor is noticeable in a simple vanilla cake.
- Granulated sugar — Sugar does more than sweeten here; it helps tenderize the crumb and keeps the cake moist. Cutting it too far changes the structure, not just the taste.
- Vanilla — This is the flavor that defines the whole cake, so use the best vanilla you have. Clear imitation vanilla can work in frosting if color matters more than depth, but real vanilla gives a fuller, warmer finish.
- Buttermilk or sour cream — The slight tang balances the frosting and keeps the cake from tasting one-note. If you don’t have either, plain yogurt thinned with a spoonful of milk is the closest swap.
- Butter for the frosting — Beat it until it turns pale before adding sugar. If you rush this stage, the frosting stays dense and won’t hold those clean swirls.
Building the Layers Without Losing the Soft Crumb
Creaming the Base
Beat the butter and sugar until the mixture looks lighter in color and a little fluffy around the edges. That’s not decoration; it’s the air that gives the cake lift. If you stop too early, the cake bakes up heavy and tight. Scrape the bowl well so the butter near the bottom doesn’t stay unmixed and leave streaks in the batter.
Mixing the Batter Gently
Add the dry ingredients in stages and stop mixing as soon as the batter comes together. Overmixing develops gluten, and that’s how a tender birthday cake turns chewy. The batter should look smooth but not whipped, with no pockets of flour hiding at the bottom of the bowl.
Baking Until the Center Springs Back
Divide the batter evenly so the layers bake at the same rate. Pull them when the tops are set and the middle bounces back lightly under a fingertip. If the edges start pulling away hard from the pan, it’s already gone past ideal. Let the cakes rest in the pans just long enough to firm up before turning them out, or they can crack while still hot.
Frosting and Finishing
Let the layers cool completely before you touch the frosting. Even a little warmth melts buttercream fast and ruins the clean finish. Spread a thin crumb coat first, chill briefly if needed, then add the final layer of frosting. That extra step keeps loose crumbs out of the outer coat and gives you a smoother surface for piping or swirls.
How to Adapt This for Different Birthdays
Dairy-Free Version With a Softer Finish
Use a good dairy-free butter substitute in both the cake and frosting, and swap the buttermilk for unsweetened plant milk mixed with a little lemon juice. The cake will still be tender, but the flavor is a bit less rich and the frosting may need a touch more vanilla to taste balanced.
Gluten-Free Adjustment That Still Slices Cleanly
Use a cup-for-cup gluten-free flour blend that includes xanthan gum. The cake will be a little more delicate, so let it cool fully before moving the layers and chill it briefly before slicing for the neatest cuts.
Cupcake Version for Easier Serving
Portion the batter into lined muffin tins and shorten the bake time until the tops spring back. Cupcakes lose the layered look, but they gain portability and serve a crowd without the stress of slicing a tall cake.
Storage and Reheating
- Refrigerator: Store covered for up to 4 days. The cake stays moist, but the buttercream firms up in the fridge.
- Freezer: The unfrosted layers freeze well for up to 2 months when wrapped tightly. Frosted slices can also be frozen, though the buttercream may lose a little of its smooth finish after thawing.
- Reheating: Bring refrigerated cake to room temperature before serving. Cold cake tastes tighter and the frosting can feel waxy, so let it sit out until the crumb softens again.
Answers to the Questions Worth Asking
Birthday Cake
Ingredients
Equipment
Method
- Preheat oven to 350°F and line two 8-inch cake pans with parchment circles, then lightly grease the sides so the cakes release cleanly.
- In a mixing bowl, whisk eggs and sugar until pale and slightly thick, about 2-3 minutes, then whisk in vanilla and lemon juice until combined.
- Add flour, baking powder, and salt and mix just until no dry streaks remain.
- Stream in milk and melted butter, then mix on low until smooth, about 30-45 seconds, scraping the bowl once.
- Divide batter evenly between pans and bake until the centers spring back and a toothpick comes out clean, 25-35 minutes.
- Cool cakes in pans for 10 minutes, then turn out onto a rack to cool completely, about 1 hour, before frosting.
- With a stand mixer, beat softened butter on medium until creamy, about 1-2 minutes, then add powdered sugar in batches on low.
- Add heavy cream, vanilla, lemon juice, salt, and pink gel food coloring, then mix on medium until silky and thick enough to hold a swirl, about 1-2 minutes.
- If frosting feels too stiff, beat in cream 1 tsp at a time; if too loose, add powdered sugar 1-2 tbsp at a time to reach pipeable consistency.
- Place one cooled cake layer on a serving plate and spread a layer of frosting over the top, then stack the second layer and apply a thin crumb coat.
- Chill the cake for 15 minutes so the crumb coat sets, then finish with a thicker swirl layer of frosting, keeping the pattern smooth.
- Slice and serve after frosting sets slightly, at room temperature, for cleaner swirl lines.