
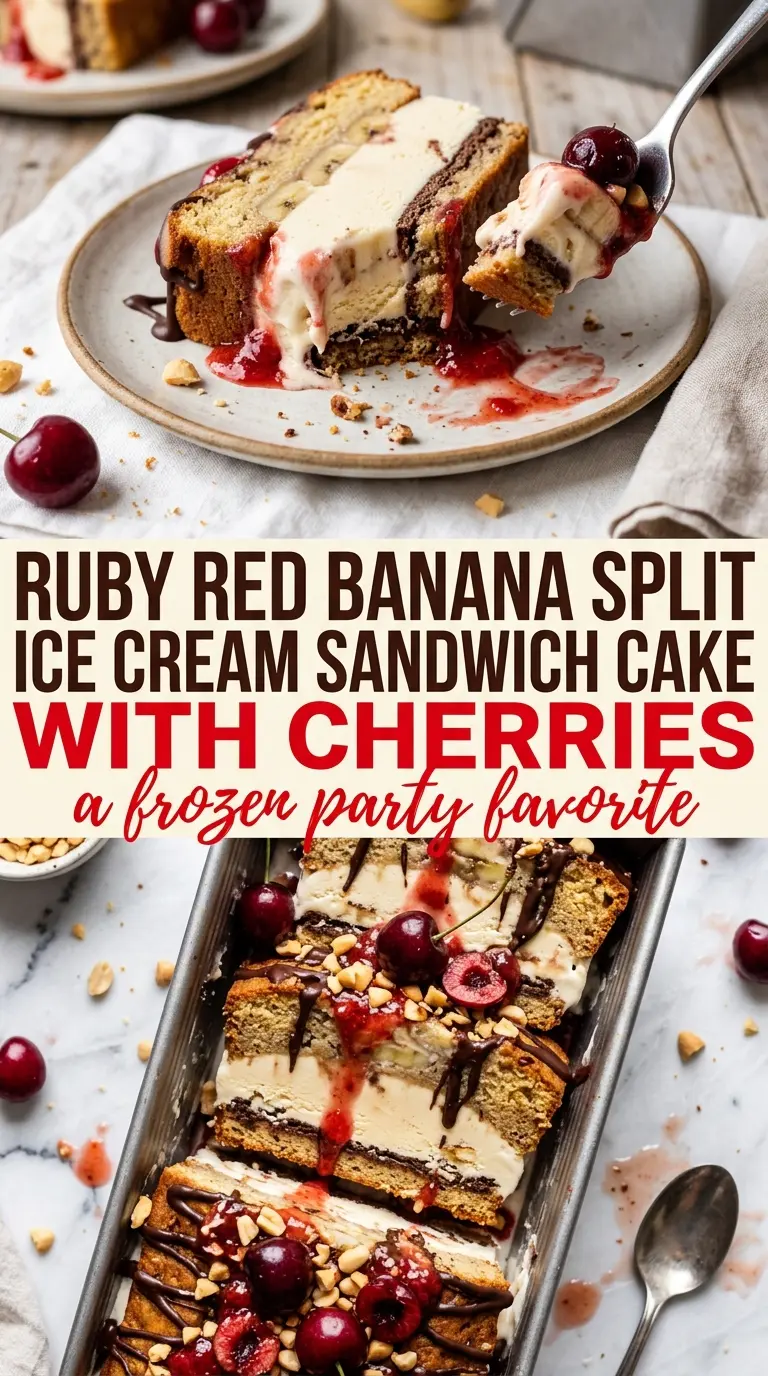
Layers of ice cream sandwiches, bananas, strawberry sauce, and whipped topping turn into a frozen cake that slices cleanly, eats like a banana split, and disappears fast once it hits the table. The best part is how the ice cream sandwiches soften just enough in the freezer to mimic cake layers without turning soggy, while the fruit and sauces keep every bite from tasting flat or one-note.
This version works because the bananas sit between sturdy frozen layers instead of getting mixed into the cream, which keeps their texture intact and stops the whole dessert from sliding apart. The strawberry sauce adds that classic banana split brightness, and the chocolate drizzle gives the top a glossy finish without needing any baking at all. A handful of chopped peanuts brings the crunch that keeps the dessert from eating like pure soft serve.
Below you’ll find the layering order that gives the cleanest slices, plus the one small resting step that makes serving easier. I also included a few smart swaps if you want to change the topping or use a different brand of ice cream sandwiches.
The layers held together better than I expected, and letting it sit out for 10 minutes before slicing made perfect squares. My kids kept picking out the peanut and cherry pieces first.
Banana Split Ice Cream Sandwich Cake is the kind of frozen dessert that looks festive, slices neatly, and disappears fast at a cookout.
The Layer That Keeps This Dessert from Sliding Apart
The biggest mistake with an ice cream sandwich cake is building it like a trifle. Once the ice cream softens, loose layers start drifting, and the whole thing turns messy when you try to cut it. This dessert stays tidy because the sandwiches act as the structure, and the sauces stay in thin layers instead of being poured on in heavy pools.
Bananas need to be sliced fairly thin so they tuck into the dessert without forcing the layers apart. If they’re cut too thick, they bulge the middle and make the cake harder to slice. The freeze time matters here too: four hours is enough to set the dessert, but overnight gives the cleanest cuts and the best texture.
What Each Ingredient Is Actually Doing in This Dish
- Ice cream sandwiches — These are the backbone of the cake. Use a brand that softens evenly rather than one with an overly hard cookie shell, or the slices can crack instead of cutting cleanly.
- Bananas — Ripe but still firm bananas bring the classic banana split flavor without turning mushy. If yours are very soft, slice them right before assembling so they don’t darken as fast.
- Whipped topping — This gives the top a stable, fluffy finish that freezes well. Whipped cream can work, but it softens faster and doesn’t hold the same neat edges after thawing.
- Chocolate and strawberry sauce — Thick dessert sauces are worth using here because thin syrup runs into the layers. If your chocolate sauce is extra stiff, warm it for just a few seconds so it drizzles instead of tearing the topping.
- Chopped peanuts — The peanuts matter for texture as much as flavor. Leave them coarse so they give a real crunch against the soft frozen layers.
- Maraschino cherries — These finish the banana split look and add that bright, sweet pop on top. Drain them well first so they don’t bleed red liquid into the whipped topping.
Building the Frozen Layers in the Right Order
Start with a tight base
Line the 9×13 pan with the first layer of ice cream sandwiches, trimming pieces as needed so the bottom is snug. Gaps in the base lead to uneven slices later, so press the pieces together just enough to create one flat surface. If the sandwiches are too frozen to cut cleanly, let them sit for a minute or two before trimming.
Stack the fruit and sauces lightly
Add the banana slices in an even layer, then drizzle on the strawberry sauce and some of the chocolate sauce. Keep the sauces in a thin layer rather than flooding the pan, because too much liquid makes the dessert slide when it freezes and thaws. A light drizzle gives you ribbons of flavor without turning the middle watery.
Repeat, then finish with the topping
Build the second round of layers the same way, ending with whipped topping on top. Spread it all the way to the edges so the desserts underneath are sealed in and don’t dry out in the freezer. Finish with the remaining chocolate sauce, peanuts, and cherries before freezing, because once the cake is set, those toppings stay cleaner on the surface.
Freeze until firm enough to slice cleanly
Four hours is the minimum for a pan this size, but the dessert is easier to serve if it gets a longer freeze. If you cut it too early, the middle squishes and the slices lose their shape. Let it sit at room temperature for 5 to 10 minutes before serving so the knife glides through the layers instead of cracking them.
What to Change When You Want a Different Version
Make it dairy-free
Use dairy-free ice cream sandwiches and a non-dairy whipped topping. The texture stays close to the original, though the dessert will taste a little less rich and a little more like a frozen snack cake than a classic banana split.
Skip the peanuts
Leave them off if you need a nut-free dessert, or replace them with crushed pretzels for a salty crunch. Pretzels bring a different kind of contrast, less classic than peanuts but still good against the soft frozen layers.
Use a different cookie base
Homemade cookie ice cream sandwiches work well if you want a more bakery-style result. The cake will taste less nostalgic and a little more rich, but the layering method stays the same.
Storage and Reheating
- Refrigerator: This dessert doesn’t hold well in the fridge because the layers soften and collapse. Keep it frozen until serving.
- Freezer: It freezes well for up to 1 week when covered tightly with plastic wrap and foil. After that, the bananas start to darken and the top can pick up freezer flavor.
- Reheating: Don’t reheat it. Let it sit at room temperature for 5 to 10 minutes before slicing so the layers soften just enough for a clean cut.