
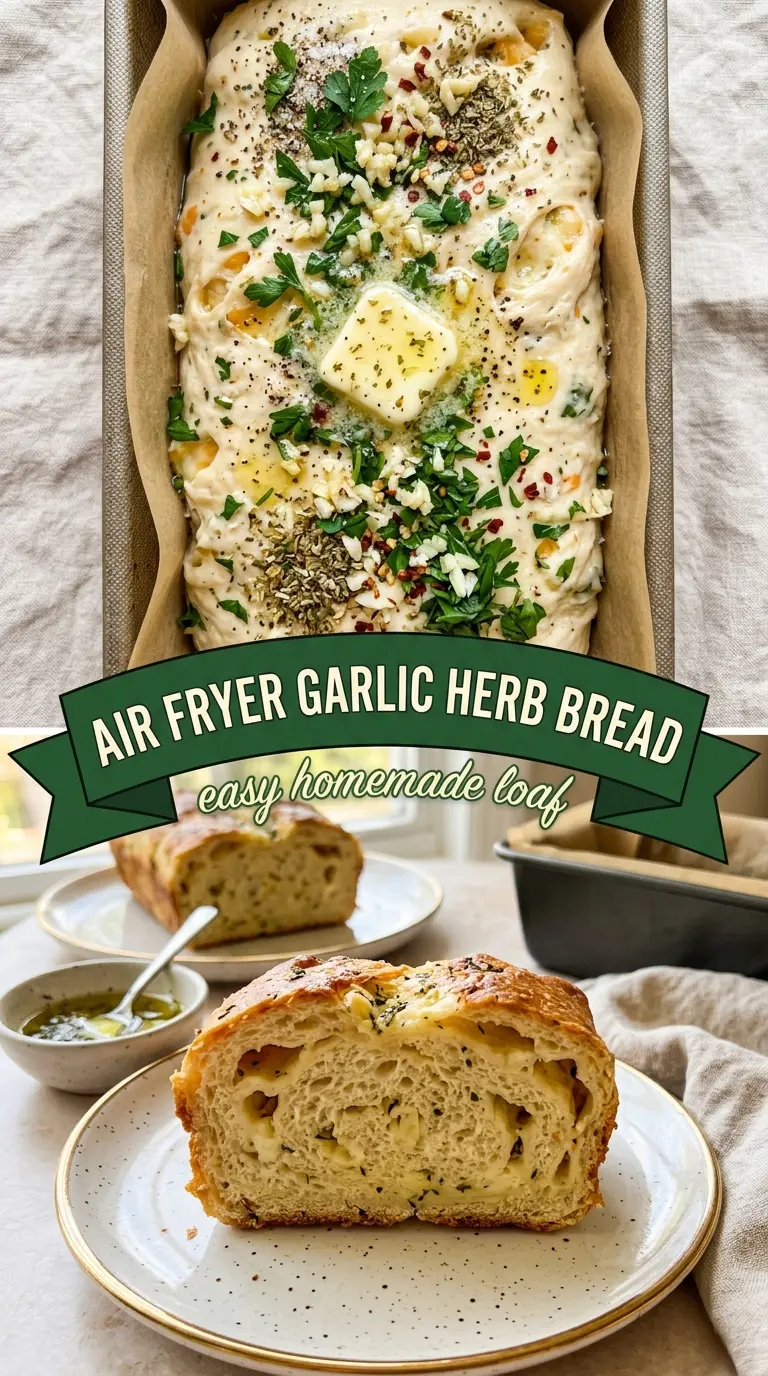
Golden, crackly air fryer bread with a soft, airy crumb earns a permanent place at the table fast. The outside picks up a thin, crisp shell while the inside stays tender and pull-apart soft, with garlic and herbs running through every bite. It’s the kind of loaf that disappears while it’s still warm, especially when you tear off a piece and catch the steam inside.
What makes this version work is the balance between a simple yeast dough and the air fryer’s intense circulating heat. The dough only needs a modest amount of yeast, a warm rise, and enough hydration to stay light instead of dense. The garlic and herbs go right into the dough so the flavor is built in, not sprinkled on top as an afterthought. Keep the dough soft but manageable, and the crust will brown before the crumb dries out.
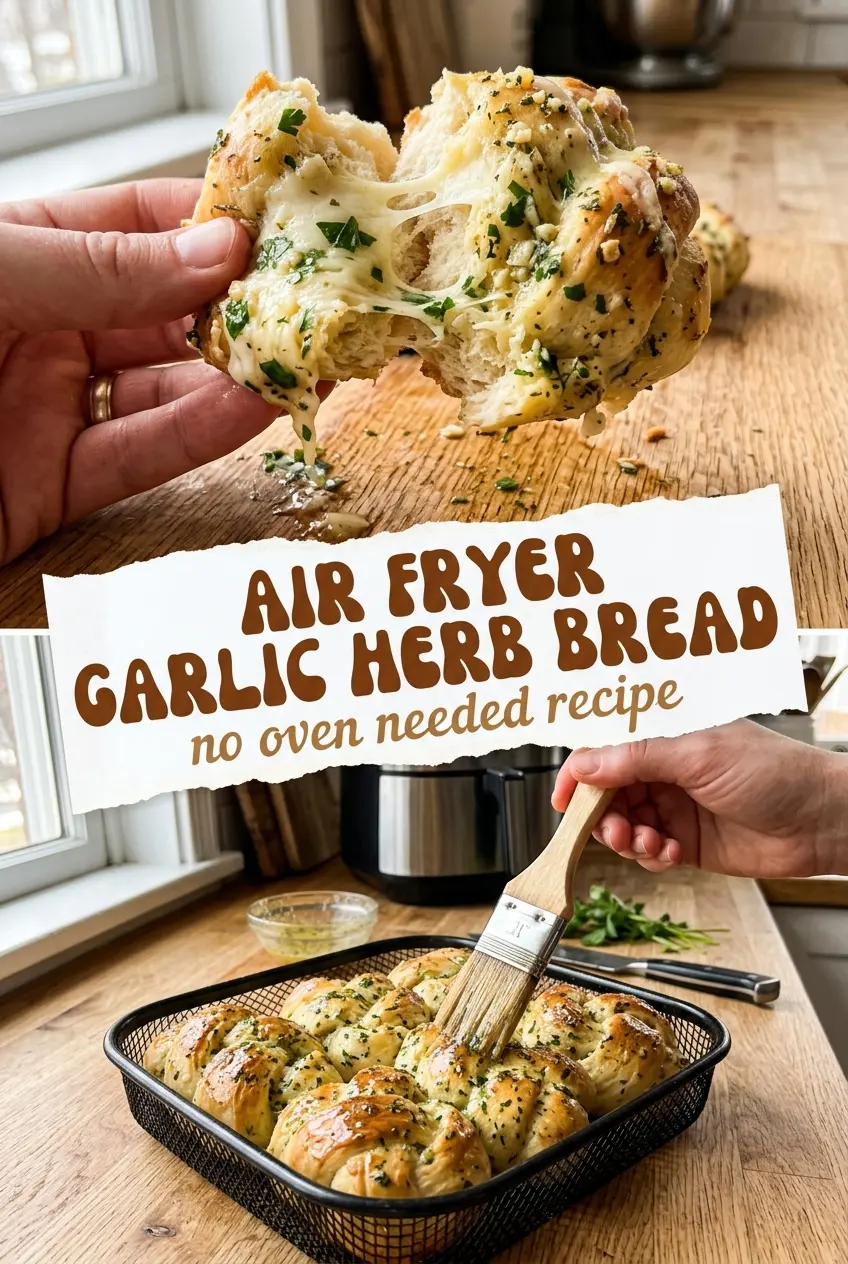
The crumb stayed soft and the garlic didn’t burn, which is exactly where my last try went wrong. We tore into it straight from the basket and it was gone in minutes.
Save this air fryer garlic herb bread for the night you want a crackly crust and soft, herb-packed slices without turning on the oven.
The Small Dough Changes That Keep Air Fryer Bread from Turning Dense
The biggest mistake with air fryer bread is treating it like a quick biscuit dough. This still needs yeast time, and the rise matters because the air fryer is hot enough to brown the outside long before a tight dough has a chance to open up inside. If the loaf feels heavy before it goes in, it will bake up squat and bready instead of light.
The other issue is moisture. Too much flour on the bench or in the bowl makes the dough stiff, and stiff dough does not expand well in the basket. A soft, slightly tacky dough gives you a loaf with a tender crumb and those little irregular pockets that make torn bread worth eating.
What Each Ingredient Is Actually Doing in This Dish
- Flour — Regular all-purpose flour gives a soft, familiar crumb. Bread flour works too if you want a little more chew, but it will make the loaf a touch firmer.
- Yeast — Active dry or instant yeast both work here. If you use active dry, give the dough the full rise time so it can wake up properly.
- Warm water — Warm, not hot. If it feels uncomfortable on your wrist, it is too hot and can slow or kill the yeast.
- Olive oil — This adds tenderness and keeps the crumb from drying out in the air fryer. A neutral oil works in a pinch, but you’ll lose some of the savory background flavor.
- Garlic and fresh herbs — Fresh herbs give this bread its clean, bright finish. Dried herbs work if that’s what you have, but use less because they read stronger once baked.
Building the Dough So the Air Fryer Can Do Its Job
Mixing the Dry Ingredients First
Stir the flour, yeast, salt, garlic, and herbs together before the liquid goes in so everything distributes evenly. That keeps one bite from turning into a pocket of salt or a clump of herbs. If you’re using finely minced garlic, keep it small so it blends into the dough instead of leaving wet streaks.
Adding Water and Oil
Pour in the warm water and olive oil, then mix until the dough comes together into a shaggy mass. It should look rough at first, and that’s fine. The mistake here is adding too much flour too early; wait until you’ve mixed before judging the texture, because the dough often tightens as it hydrates.
Kneading and Rising
Knead until the dough feels smooth and elastic, then let it rise until it has clearly puffed, about an hour depending on the room. You’re not waiting for it to double perfectly in a stopwatch sense; you’re waiting for visible lift and a softer feel when pressed. If the dough stays tight and bounces back instantly, it needs more time.
Shaping and Air Frying
Shape the loaf so it fits your basket without crowding, then air fry at 320°F until the crust is golden and the loaf sounds hollow when tapped. If the top browns too quickly, the loaf is getting color before it’s finished inside, so tent loosely with foil for the last part of the cook. Let it cool a few minutes before slicing so the crumb finishes setting instead of turning gummy.
Three Ways to Adjust This Bread Without Losing the Good Parts
Dairy-Free as Written
This bread is naturally dairy-free if you keep the oil-based dough as written. That makes it a good option when you want a savory bread without butter or milk in the mix.
Make It Cheesier
Fold in a small handful of finely grated Parmesan after the first mix. Too much cheese can weigh the dough down and make the crust greasy, so keep the amount modest and let the garlic stay in charge.
Swap the Herbs by Season
Parsley keeps the flavor fresh, but rosemary, thyme, or chives all work well if you want a stronger herb note. Use a lighter hand with rosemary because it can dominate the loaf fast.
Make Ahead and Reheat
This bread keeps well for a day or two, and it reheats nicely in the air fryer. Rewarm it briefly so the crust crisps back up; microwaving softens the crust and makes the loaf feel dull.
Storage and Reheating
- Refrigerator: Store in an airtight container for up to 3 days. The crust softens a little in the fridge, but the loaf still reheats well.
- Freezer: Freeze sliced or whole, wrapped tightly, for up to 2 months. Thaw at room temperature before reheating so the center doesn’t stay cold while the outside crisps.
- Reheating: Warm in the air fryer at a lower temperature until the crust comes back to life. If you blast it on high, the outside gets hard before the middle is warm.
Answers to the Questions Worth Asking
Air Fryer Garlic Herb Bread
Ingredients
Equipment
Method
- In a bowl, mix flour, yeast, salt, garlic and fresh herbs until evenly combined, using a dry-to-dry stir for uniform distribution. Add water and olive oil and stir until a shaggy dough forms, then knead until smooth and elastic.
- Knead the dough on a lightly floured surface until it springs back when pressed, about 6–10 minutes. If it feels overly sticky, sprinkle a small amount of flour a little at a time.
- Shape the dough into a ball, place it in a covered bowl, and let it rise for 1 hour in a warm spot until puffy and slightly doubled. Visual cue: when you press gently with a fingertip, the indentation should slowly spring back.
- Punch down the risen dough gently, then shape into a loaf and place it on a sheet pan. Let it sit for 5 minutes while the air fryer preheats to 320°F.
- Air fry the loaf at 320°F for 20 min until the top is deep golden and the crust looks set. Visual cue: the loaf should sound hollow when tapped on the bottom, and the crust should appear crackly.