
Golden, waffle-textured pizza pockets give you the best part of pizza in a format that’s crisp on the outside and molten in the middle. The dough cooks into deep little ridges that hold onto sauce, the cheese stays stretchy instead of running everywhere, and the edges seal up just enough to keep the filling tucked inside. What comes out of the waffle iron tastes like a cross between a hand pie and a slice of pepperoni pizza, only faster and with more crunch.
The trick is in the dough and the heat. Refrigerated pizza dough works because it’s sturdy enough to press and seal, but still soft enough to cook through in a few minutes. Sauce has to stay light or the pockets can burst open, and the cheese needs to be shredded so it melts before the crust overbrowns. A hot waffle iron gives you that crisp shell without needing a full oven preheat, which is why these disappear fast.
Below, you’ll find the little details that keep the filling inside, the crust from sticking, and the center from turning soggy. There’s also a smart swap for the filling if you want to change the flavor without changing the method.
The waffle iron gave these such a crisp crust, and the cheese stayed tucked inside instead of leaking out everywhere. I used a little less sauce like you said and they came out perfect for lunchboxes the next day.
Waffle Iron Pizza Pockets turn simple refrigerated dough into crisp, melty handheld pizza pockets with almost no cleanup.
The Hidden Reason These Don’t Leak in the Waffle Iron
Most waffle-iron pizza pockets fail for one of two reasons: too much filling or a weak seal. Sauce turns the dough slick, and slick dough won’t fuse the way it should. That’s why the filling here stays modest and the edges get pressed before the iron closes. The goal is not to stuff them to the brim. The goal is to trap enough cheese and pepperoni to taste rich while still letting the dough weld shut under heat and pressure.
Another thing people miss is timing. If the waffle iron isn’t fully hot, the dough softens before it crisps and the filling has more time to escape. A properly heated iron starts setting the exterior almost immediately, which helps the seam stay put. Once you hear the steam calm down and the pocket looks deeply golden, it’s ready. Pull it too early and the center can stay gummy; leave it too long and the cheese starts forcing its way out.
What the Dough, Cheese, and Sauce Are Each Doing Here

Refrigerated pizza dough — This is the structure that makes the whole thing possible. It’s already elastic enough to stretch, but it bakes into a firm shell that can survive pressure from the waffle iron. Homemade dough works if it’s soft and not too sticky, but the canned version is the easiest route and honestly the most reliable for quick lunches.
Mozzarella — Shredded mozzarella melts smoothly and gives you those stretchy, browned pockets inside the crust. Fresh mozzarella has too much moisture for this method and can make the center soggy, so stick with low-moisture shredded cheese. If you want more flavor, mix in a little provolone or a sharp Italian blend.
Pizza sauce — Use just enough to flavor the filling. Too much sauce turns the inside slippery and makes the seal harder to hold. Thick sauce is best here, and if yours is loose, simmer it for a few minutes first or blot it with a spoon before assembling.
Pepperoni — Thin slices bring salt, spice, and enough fat to taste like pizza without adding extra prep. If the slices are large, cut them in half so they sit flat and don’t bunch up at the seam. That small step keeps the pockets easier to press closed.
Press, Fill, and Cook Until the Edges Go Crisp
Warming the Iron First
Heat the waffle iron all the way before the dough goes near it. If the plates are only partially hot, the dough sticks before it sets and you lose that clean, crisp release. A light coat of cooking spray helps, but heat is what does most of the work here. You want the iron hot enough that the dough starts sizzling the moment it hits the plates.
Building the Pocket
Roll the dough out and cut squares that give you a little overhang around the waffle grid. That extra edge is what gets pressed together and sealed. Spoon on a thin layer of sauce, then cheese, then pepperoni, then a small pinch of Italian seasoning. Keep the filling centered and leave the borders bare, or the seam won’t hold when you close the iron.
Sealing and Cooking
Top with the second dough square and press the edges together before closing the lid. Don’t worry if it looks a little rustic; the heat finishes the job. Cook for 4 to 5 minutes until the pockets are deep golden and the crust feels firm when nudged with tongs. If cheese starts escaping early, the iron was too full or the seam was left too wet.
Cooling Before the First Bite
Let them rest for a couple of minutes after cooking. The filling is molten right away, and cutting or biting in too soon will send hot cheese out the side. That short rest also lets the crust crisp up a little more, which is what gives you that good crackle when you bite through it. Serve with extra pizza sauce for dipping while the centers are still warm and stretchy.
How to Change the Filling Without Changing the Method
Sausage or Ham Instead of Pepperoni
Swap in cooked crumbled sausage or diced ham for a milder, meatier pocket. Keep the pieces small so they don’t tear the dough or crowd the seam. Sausage gives you a richer, heavier filling, while ham makes the pockets a little saltier and more kid-friendly.
Vegetarian Pizza Pockets
Skip the pepperoni and use finely chopped sautéed mushrooms, peppers, or olives instead. Cook watery vegetables first so they don’t steam the dough from the inside. You’ll lose a little of the salty, cured flavor, but the pockets still taste like real pizza and stay crisp.
Gluten-Free Version
Use a gluten-free pizza dough that’s meant to be rolled and baked, not a batter-style mix. Gluten-free dough is usually more fragile, so roll it a little thicker and move it carefully into the iron. The texture will be a touch more tender and less chewy, but the crisp exterior still works well.
Storage and Reheating
- Refrigerator: Store leftovers in an airtight container for up to 3 days. The crust softens a little as it sits, but it reheats better than you’d expect.
- Freezer: Freeze fully cooled pockets in a single layer, then transfer to a bag for up to 2 months. Reheat straight from frozen for best texture.
- Reheating: Use a toaster oven, oven, or air fryer at 375°F until hot and crisp. The microwave will warm the center but leaves the crust limp, which is the quickest way to lose the waffle texture.
Questions I Get Asked About This Recipe
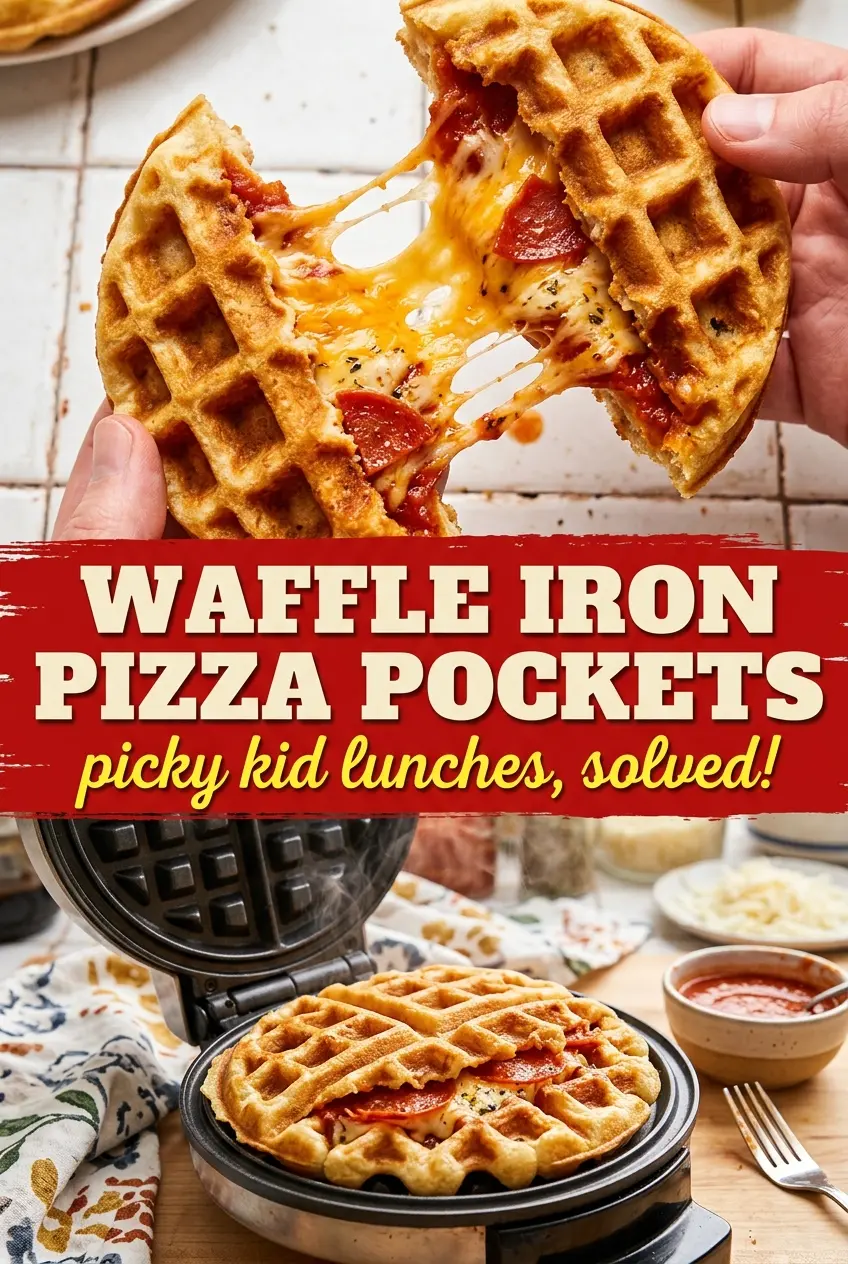
Waffle Iron Pizza Pockets
Ingredients
Equipment
Method
- Preheat the waffle iron and lightly coat the plates with cooking spray so the dough won’t stick (visual cue: evenly glossed surface).
- Roll out the refrigerated pizza dough and cut it into squares slightly larger than your waffle iron grid (visual cue: squares that can overlap the edges).
- Place one dough square in the iron and top it with pizza sauce, mozzarella, pepperoni, and Italian seasoning (visual cue: full coverage over the center).
- Cover with a second dough square and press the edges to seal (visual cue: seam looks flattened and closed).
- Close the waffle iron and cook for 4–5 minutes until golden brown and crisp (visual cue: steam decreases and the crust looks set).
- Let the pockets cool slightly before serving with extra pizza sauce for dipping (visual cue: easier handling without burn).