
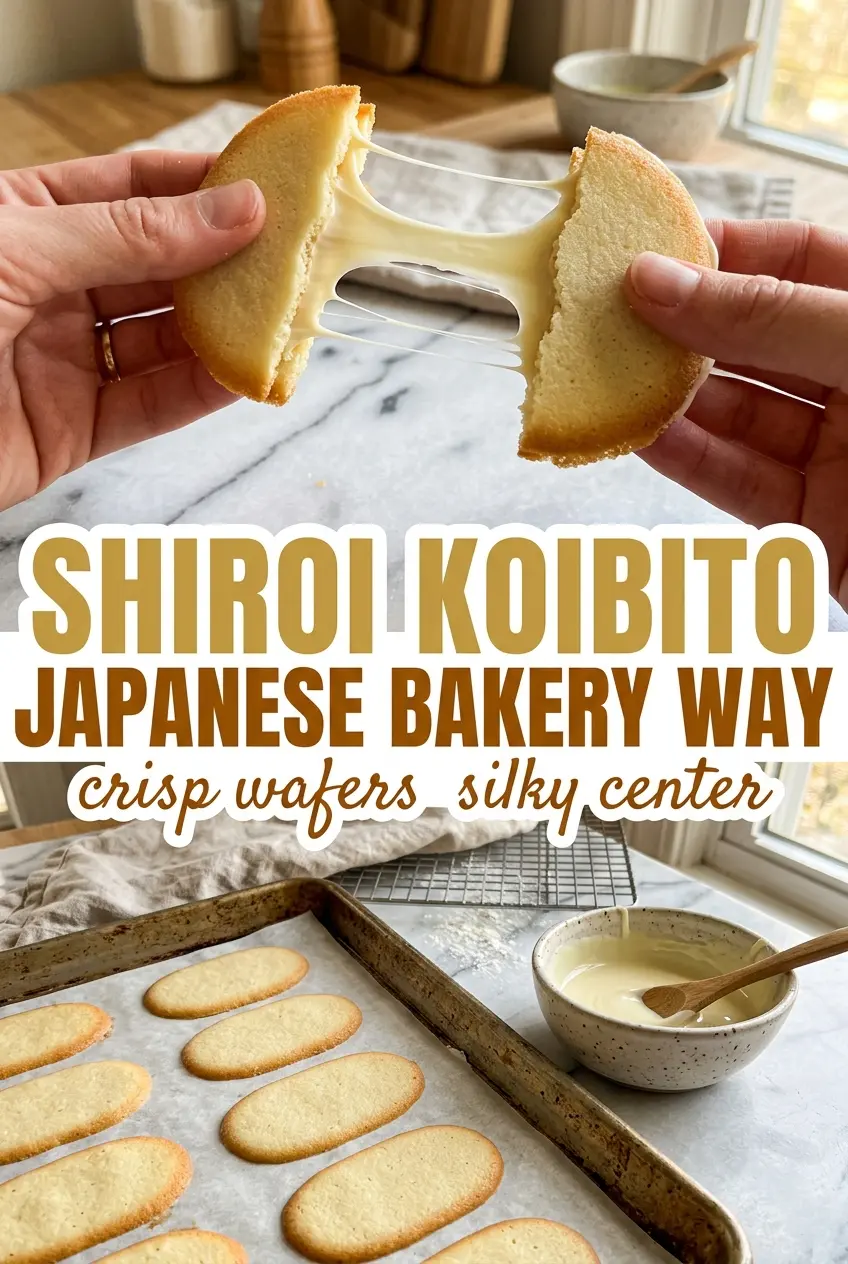
Shiroi Koibito cookies have that rare bakery-style snap: thin, crisp edges, a pale tender center, and a clean white chocolate finish that melts without turning the cookie soggy. The charm is in the contrast. You get a delicate langue de chat wafer that feels light and elegant, then a smooth layer of white chocolate that turns each bite into something polished enough for a gift box.
The texture comes from a batter that stays airy instead of dense. Whipped egg whites lighten the dough, while cake flour keeps the cookies fine and delicate rather than chewy. Spreading the batter into thin ovals and letting them bake just until the edges take on a faint gold color gives you that signature crispness. Bake them too long and they lose their pale look; bake them too short and they never get the dry snap that makes these cookies special.
Below you’ll find the small details that matter here, including how to keep the batter light, how to spread the cookies evenly, and what to do if your white chocolate thickens before you finish sandwiching them.
The cookies baked up thin and crisp with those little golden edges, and the white chocolate stayed smooth after chilling. I followed the timing exactly and they had that bakery-style snap I was hoping for.
These Shiroi Koibito Cookies turn out crisp, pale, and perfectly chocolate-filled every time.
The Little Tricks That Keep These Cookies Pale and Crisp
These cookies look simple, but a few small choices decide whether they bake up light and refined or spread into something flat and dull. The first is the egg whites. Whipping them to soft peaks adds lift without making the batter unstable. If they go dry or grainy, they won’t fold in cleanly and you’ll lose the delicate structure that gives these wafers their snap.
Temperature matters too. Softened butter creams smoothly with the sugar, trapping air from the start. Cake flour keeps the crumb fine because it has less protein than all-purpose flour, so the cookies set with a tender bite instead of turning bready. The real mistake is overworking the batter after the flour goes in; once you fold in the whites, stop as soon as everything looks combined. That’s how you keep the cookies thin and delicate instead of dense.
What Each Ingredient Is Doing in This Cookie

- Unsalted butter — This gives the cookies their rich base and helps the batter spread into thin, even ovals. Use softened butter, not melted butter, or the batter will lose the air you need for a light wafer.
- Granulated sugar — Sugar does more than sweeten here. It helps the edges crisp and gives the cookies that delicate sandy snap when they cool.
- Egg whites — Whipped to soft peaks, they add lift without the heaviness of whole eggs. There isn’t a perfect substitute if you want the same airy texture, so don’t skip the whipping step.
- Cake flour — This is the ingredient that keeps the cookies tender and fine. All-purpose flour works in a pinch, but the result will be a little firmer and less lacy.
- White chocolate — Choose a bar or chips you actually like to eat, because the flavor comes through in a thin layer. If it’s too thick to spread, let it cool just until fluid but not hot, or it can melt the cookies when you sandwich them.
- Vanilla — A small amount rounds out the white chocolate and keeps the cookies from tasting flat. Use the real thing if you have it; this is one place where the flavor is noticeable.
Spreading, Baking, and Sandwiching Without Losing the Texture
Whipping the Whites First
Start with a clean bowl and whisk the egg whites until they hold soft peaks. They should look glossy and billowy, not dry or foamy. If the bowl has any grease on it, the whites won’t whip properly and the batter will bake up flatter. Set them aside right away so they don’t overwhip while you work the butter mixture.
Building the Base
Cream the butter and sugar until the mixture turns lighter in color and looks fluffy around the edges of the bowl. Stir in the vanilla, then add the sifted flour and salt gently. Once the flour goes in, the batter gets thick fast, so keep the motion light and stop as soon as no dry streaks remain. Overmixing here tightens the batter and takes away the delicate texture you want.
Folding in the Air
Add the whipped whites in two additions. The first batch loosens the mixture, and the second folds in more easily without deflating everything. Use a spatula and work from the bottom of the bowl upward. If you stir hard, the batter loses volume and the cookies spread less evenly in the oven.
Shaping the Ovals
Spoon or spread the batter into thin oval shapes on parchment-lined baking sheets using an offset spatula. Keep them as even as you can so they bake at the same pace. Thin is the goal here; thick cookies won’t resemble the bakery version and they’ll lose that crisp bite. If the batter seems sticky, chill it briefly rather than adding more flour.
Baking to the Right Color
Bake until the edges are just light golden and the centers look set, about 10 to 12 minutes. You want color only at the border, not across the whole cookie. If you wait until they look deeply browned in the oven, they’ll finish too hard once cool. Let them cool fully on the pan so they firm up without breaking.
Adding the White Chocolate Filling
Spread melted white chocolate on the flat side of half the cookies, then top with the remaining cookies to make sandwiches. Work with chocolate that’s smooth and spreadable but not hot enough to soften the wafers. If it starts to seize or thicken, warm it gently in short bursts. Chill just until set, then store them carefully so the shells don’t crack.
Three Ways to Make These Cookies Fit Your Kitchen
Gluten-Free Version
Use a 1:1 gluten-free baking flour that includes xanthan gum. The cookies will still be delicate, but they may spread a touch more and the edges can be a little more fragile, so let them cool fully before moving them off the pan.
Dairy-Free Swap
Use a plant-based butter that behaves like regular butter and a dairy-free white chocolate. The texture will still be crisp, but the flavor will lean a little sweeter and less creamy, so choose a better-tasting chocolate if you can.
Vanilla Bean Version
Swap the vanilla extract for vanilla bean paste if you want a more pronounced aroma and tiny flecks in the cookies. It won’t change the structure, but it does make the finished cookies feel a little more special and bakery-like.
Smaller Bite-Size Cookies
Pipe or spread smaller ovals and shave a minute or two off the bake time. They’ll be crisper at the edges and great for gifting, but they set fast, so don’t wait too long to fill and sandwich them.
Storage and Reheating
- Refrigerator: Store in an airtight container for up to 5 days. The cookies stay crisp, though the white chocolate may soften slightly at room temperature.
- Freezer: Freeze the unfilled cookies for up to 2 months. I don’t recommend freezing the finished sandwiches if you want the neatest texture, because the chocolate can bloom a bit after thawing.
- Reheating: These aren’t meant to be reheated. Let frozen cookies thaw at room temperature and fill them after they come back to crispness. Microwaving will soften the wafers and ruin the snap.
Answers to the Questions Worth Asking
Shiroi Koibito Cookies
Ingredients
Equipment
Method
- Preheat the oven to 350F and line two baking sheets with parchment paper.
- Whip the egg whites to soft peaks in a clean bowl and set aside.
- Cream the butter and sugar until pale, then stir in the vanilla extract.
- Sift the cake flour and salt over the butter mixture and fold in gently.
- Fold the whipped egg whites into the batter in two additions, keeping the mixture airy.
- Spread the batter into thin oval shapes on the prepared sheets using an offset spatula.
- Bake for 10-12 minutes at 350F until the edges turn light golden, then cool completely on the pan.
- Spread melted white chocolate over the flat side of half the cookies.
- Sandwich with a second cookie, then chill until set.