
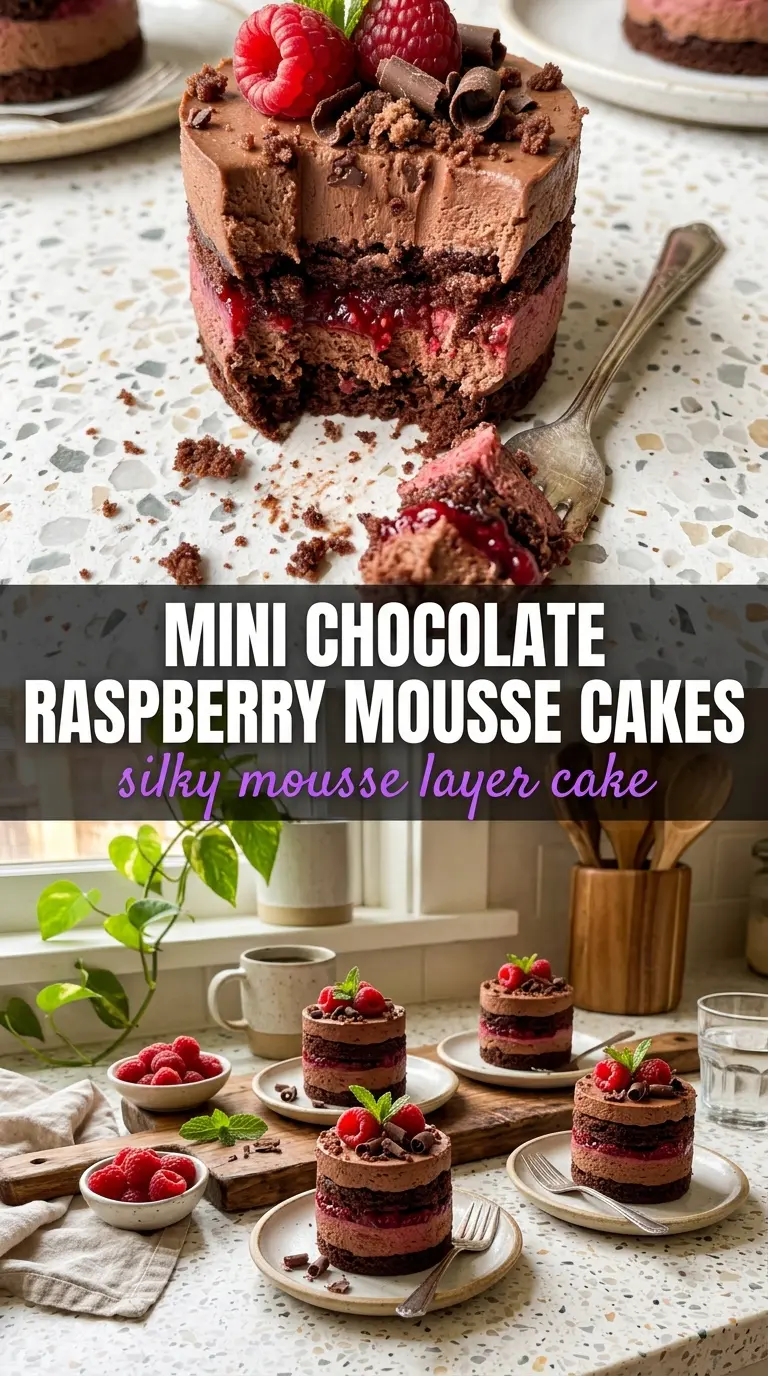
Mini chocolate raspberry mousse cakes have that rare dessert look that makes people pause before they take a bite, then go back in for a second one because the balance is so good. The chocolate cake stays tender under the mousse, the raspberries cut through the richness, and the whole thing eats like a little plated dessert instead of a heavy slice of cake. Individual portions also solve the biggest problem with mousse cakes: you get a clean, elegant finish without wrestling a full-size cake out of a pan.
What makes this version work is the structure. The cake round gives the dessert something sturdy to sit on, the raspberries add freshness and a little tartness, and the mousse needs enough chill time to set before the whipped cream goes on top. If you rush the chilling step, the layers slide around and the finish looks messy instead of polished. A short garnish of chocolate shavings is enough here; the texture contrast matters more than piling on extras.
Below you’ll find the exact order that keeps the layers neat, plus a few practical swaps if you need to work with what you have. The details matter with a dessert this small, and the good news is that once you know the rhythm, it’s straightforward to make.
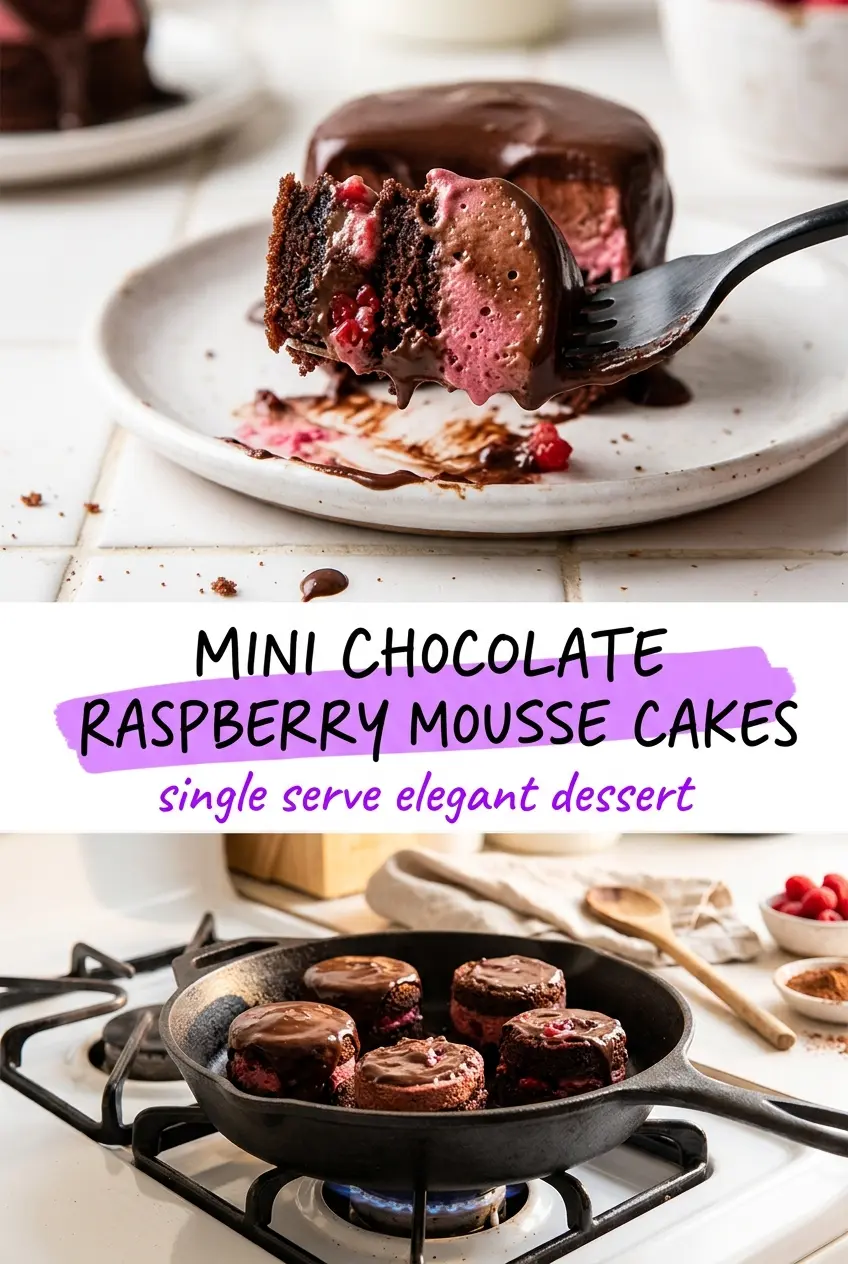
The mousse set up beautifully after the full chill, and the raspberries kept the dessert from tasting too heavy. Mine looked just like a bakery dessert, and the cake rounds held together perfectly.
Mini chocolate raspberry mousse cakes are the kind of dessert that needs a full chill to keep the layers clean and the finish bakery-smooth.
The Part Most People Get Wrong: Building Mini Mousse Cakes That Hold Their Shape
The mistake with desserts like this is stacking soft fillings on a base that hasn’t been set up to carry them. A mousse cake in a small format needs enough structure in the bottom layer and enough chill time in the top layer, or the whole thing turns into a pretty puddle the second you try to serve it. The cake round isn’t just there for flavor. It gives the mousse something to sit on so each piece lifts cleanly from the plate.
Raspberries add another layer of complexity because they’re juicy. If they’re piled on too thick or tucked into a very warm mousse, they leak color and moisture into the cream. That’s not a disaster, but it does soften the look. Keep the berries in a single layer and work with a mousse that’s already thick enough to mound.
- Chocolate cake layer — A sturdy, moist chocolate cake works best. Anything too airy can collapse under the mousse, while a denser cake gives the dessert clean slices and a better base.
- Fresh raspberries — Fresh berries matter here because frozen raspberries release too much liquid as they thaw. If you only have frozen, thaw them completely and drain them well before adding them.
- Chocolate mousse — This is the center of the dessert, so use a mousse that already holds a spoonable shape. If it’s loose, chill it first until it mounds instead of flowing.
- Whipped cream — A lightly sweetened whipped cream adds a soft finish and keeps the dessert from feeling dense. If you use canned topping, it won’t hold the same shape or give the same clean look.
- Chocolate shavings — These aren’t just decoration. They add a crisp finish that keeps each bite from being all soft texture.
How to Layer the Cakes So the Mousse Stays Clean and Tall
Cutting the Base Rounds
Bake the chocolate cake layer until the center springs back and a tester comes out with just a few moist crumbs. Once it cools, cut it into neat rounds with a cookie cutter or ring mold. If the cake is warm when you cut it, the edges tear instead of staying crisp, and that rough edge shows through the finished dessert.
Building the Berry Layer
Set the raspberries over each cake round in a single layer. Press them down only enough that they sit in place. Too much pressure crushes the fruit and starts the juices running into the cake, which makes the base look stained before you even add the mousse.
Adding the Mousse
Spoon or pipe the chocolate mousse over the berries and let it dome naturally. The mousse should be thick enough to hold a rounded top without sliding off the fruit. If yours is soft, chill it for a bit before assembling; otherwise the layers won’t stay distinct and the dessert loses that clean, layered look.
The Chill That Sets the Shape
Refrigerate the assembled cakes for at least 4 hours. This is the part that firms the mousse and helps the flavors settle together. If you top them with whipped cream too early, it can sink or smear into the mousse, so wait until the cakes feel set before finishing.
Finishing With Cream and Chocolate
Add the whipped cream and chocolate shavings right before serving. That keeps the cream looking fresh and the shavings crisp. If you wait too long, the garnish softens in the fridge and loses the clean contrast that makes these little cakes stand out.
How to Adapt These Mini Mousse Cakes for Different Kitchens and Diets
Gluten-Free Base
Use a gluten-free chocolate cake or brownie-style base cut into rounds. A brownie base gives you a fudgier bite and more stability, while a lighter gluten-free cake keeps the texture closer to the original.
Dairy-Free Version
Use a dairy-free chocolate cake, coconut-based or plant-based mousse, and a stabilized non-dairy whipped topping. The result still tastes rich, but the finish is a little softer, so keep the chill time generous.
Strawberry Instead of Raspberry
If raspberries aren’t in the house, sliced strawberries work well. They’re milder and less tart, so the dessert reads a little sweeter and a little less sharp against the chocolate.
Storage and Reheating
- Refrigerator: Store the assembled cakes covered for up to 2 days. The raspberries will soften a bit, but the structure stays good if the mousse was fully chilled first.
- Freezer: These can be frozen without the whipped cream garnish for up to 1 month. Wrap them individually and thaw overnight in the refrigerator; the texture will be slightly less airy after freezing, but still pleasant.
- Reheating: Don’t reheat these. Serve them cold straight from the refrigerator. Warming breaks the mousse and turns the cake base soggy.
Questions I Get Asked About This Recipe
Mini Chocolate Raspberry Mousse Cakes
Ingredients
Equipment
Method
- Bake the chocolate cake layer until set and cooked through, then let it cool before cutting into small rounds.
- Cut the cooled cake into small rounds so each mini cake can be topped evenly.
- Layer fresh raspberries over each cake round, spreading them into an even layer with visible berries in the center.
- Top each round with a dollop of chocolate mousse, shaping it into a dome so the mousse reaches the edges of the cake.
- Chill the assembled mini chocolate raspberry mousse cakes for 4 hours to set the mousse firmly for clean single-serve slices.
- Top each mini cake with whipped cream in a generous dollop so it cushions the mousse surface.
- Finish with chocolate shavings and serve immediately for the sharp, textured chocolate garnish.