
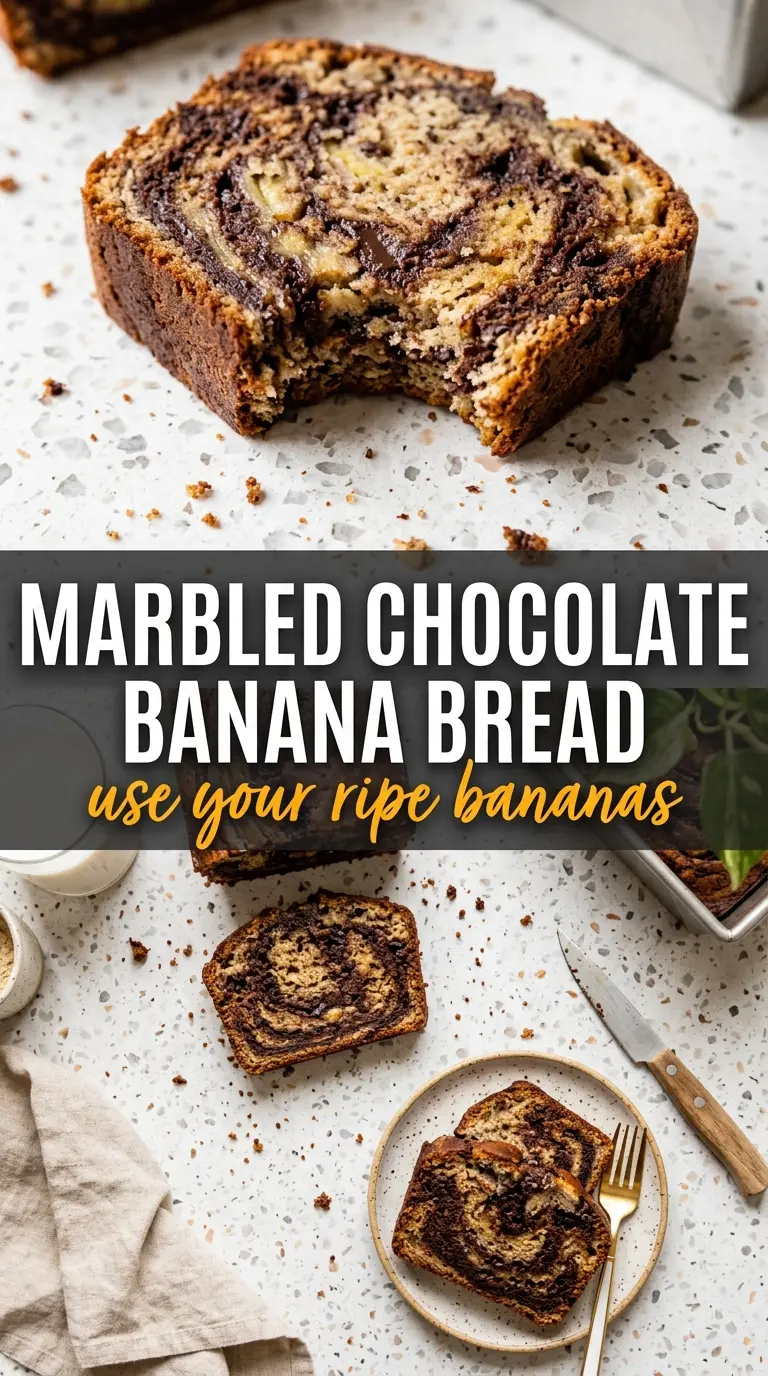
Marbled chocolate banana bread bakes up with a deep golden crust, a tender banana crumb, and those dramatic chocolate ribbons that make every slice look like it came from a bakery. The banana flavor stays front and center, but the melted chocolate cuts through the sweetness with a rich, glossy swirl that keeps each bite interesting. It’s the kind of loaf that disappears quickly because it feels familiar and a little special at the same time.
What makes this version work is the balance in the batter. The bananas bring moisture and natural sweetness, the butter adds richness, and the egg gives the loaf enough structure to hold the swirl without turning dense. The chocolate goes in melted, not chopped, so it streaks through the batter in clean ribbons instead of sinking into heavy pockets.
The best part is how reliable the marbling is once you know when to stop swirling. A few good passes with a knife are enough. Go farther and the pattern muddies into one brown loaf instead of those bold slices you’re after.
The chocolate swirled right through the loaf and the banana crumb stayed soft for two days. I used very ripe bananas and the slices came out clean instead of gummy.
Save this marbled chocolate banana bread for the loaf that gives you bakery-style slices and a clean chocolate swirl every time.
The Swirl That Stays Distinct Instead of Disappearing
The trick with marbled banana bread is not mixing the chocolate too much. Once the banana batter is finished, the melted chocolate should sit on top in ribbons and get folded through with just enough movement to create contrast. Overmixing turns the whole loaf the same shade and robs you of the slice-reveal effect that makes this recipe worth baking.
The other thing that matters is batter texture. If your bananas are extra large or the mixture looks loose before the flour goes in, the loaf can bake up heavy and the swirl can sink. A thicker batter holds the marbling in place as the heat sets the structure around it.
What Each Ingredient Is Actually Doing in This Dish
- Bananas — Use very ripe bananas with plenty of brown spots. They mash smoothly and bring the sweet, fragrant base this loaf depends on. If yours are only lightly speckled, the bread will still work, but the flavor will be flatter.
- Melted butter — Butter gives the loaf a softer, richer crumb than oil does. It also helps the banana flavor taste rounder. If you need to swap it, neutral oil works, but the bread loses a little of that warm bakery flavor.
- Sugar — This loaf uses regular sugar for sweetness and for the light crust that forms on the outside. Brown sugar would make it a little moister and deeper-tasting, but the crumb would be softer and less clean around the chocolate swirls.
- Flour — All-purpose flour gives the bread enough structure to support the chocolate without turning cakey. Stir it in only until the flour disappears. A heavy hand here is what makes banana bread tough.
- Melted chocolate — Melted chocolate is what gives you the dramatic marbling. Chips can work, but they tend to stay in chunks instead of streaking through the batter. Use chocolate that melts smoothly so the swirl stays glossy and defined.
Building the Batter and Protecting the Swirl
Mashing the Bananas First
Mash the bananas until mostly smooth, but don’t chase every small lump. A little texture is fine and helps the loaf feel more homemade. Stir in the melted butter and sugar while the bananas are still loose, because that early mixing helps dissolve the sugar and spreads the fat evenly through the batter.
Adding the Egg Before the Flour
Whisk the egg in until the batter looks glossy and cohesive. This is the point where the mixture should start to feel like a real batter instead of mashed fruit. If the egg streaks stay visible, keep mixing just until they disappear. That’s enough. Too much stirring here builds strength you don’t need in a quick bread.
Folding in the Flour Gently
Add the flour and fold only until no dry patches remain. The batter will look thick, and that’s what you want. If you beat it hard, the loaf turns dense and can bake with tunnels instead of a fine crumb. Stop as soon as the flour is absorbed so the banana flavor stays soft and the final texture stays tender.
Creating the Chocolate Marble
Pour the batter into the pan, then drizzle the melted chocolate over the top in thin lines or small pools. Run a knife through the batter in wide figure-eight motions, just a few times, and stop when you see distinct dark streaks. If you keep going, the chocolate disappears into the batter and you lose the contrast. The goal is a visible pattern in every slice, not a uniform chocolate loaf.
Baking Until the Center Sets
Bake at 350°F until the top is deep golden and the center springs back when pressed lightly. If the chocolate makes the top look a little soft, check the middle with a tester rather than trusting the surface alone. Banana bread can look done before the center is actually set, and pulling it too early leaves a gummy line through the middle. Let it cool in the pan briefly before turning it out so the swirl firms up cleanly.
How to Adapt This Banana Bread Without Losing the Marbled Effect
Make it dairy-free
Swap the butter for melted coconut oil or a neutral oil. Coconut oil gives the loaf a faint coconut note and a slightly firmer crumb once cooled, while neutral oil keeps the flavor closer to classic banana bread. The swirl still works the same way as long as the chocolate is fully melted and not too thick.
Use whole wheat flour for a deeper, nuttier loaf
Replace up to half the all-purpose flour with white whole wheat flour. The bread gets a little heartier and less delicate, but it still stays moist because of the bananas and butter. Go all the way to 100% whole wheat only if you want a denser loaf with a stronger wheat flavor.
Add chopped walnuts for more texture
Fold in a small handful of walnuts after the flour goes in. They add crunch and a toasted edge that plays well with the chocolate, but too many nuts crowd the batter and make the slices crumble. Keep the additions modest so the marbling still steals the show.
Storage and Reheating
- Refrigerator: Store tightly wrapped for up to 4 days. The crumb stays moist, though the chocolate ribbon firms up a little once chilled.
- Freezer: This freezes well. Wrap the fully cooled loaf or individual slices in plastic, then foil, and freeze for up to 3 months.
- Reheating: Warm slices in a low oven or toaster oven until just heated through. High heat dries the crumb fast, so don’t microwave it too long unless you want a soft, slightly chewy slice.
Answers to the Questions Worth Asking

Marbled Chocolate Banana Bread
Ingredients
Equipment
Method
- Mash the bananas and mix in melted butter and sugar until smooth and cohesive, with no large sugar pockets visible.
- Whisk in the egg until the mixture looks glossy and well combined.
- Fold in the flour just until no dry streaks remain, stopping as soon as the batter comes together.
- Pour the batter into a pan and swirl the melted chocolate through the top using a knife to create dark ribbons.
- Bake at 350F for 55 min, until the loaf is deep golden and a toothpick inserted in the center comes out with a few moist crumbs.