
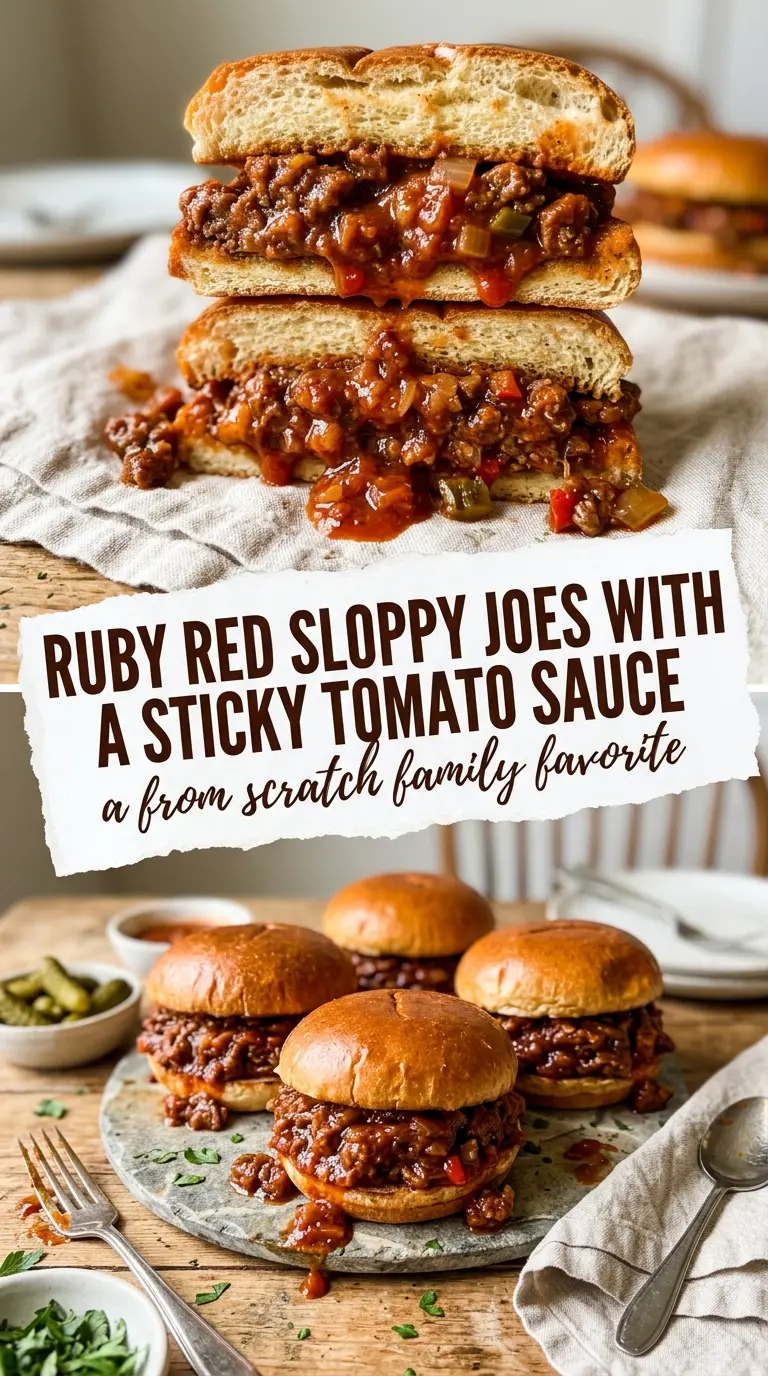
Homemade sloppy joes hit that sweet spot between messy and comforting: saucy ground beef, soft onions, tender peppers, and a tangy brick-red filling that soaks just enough into a toasted bun without turning it to mush. The best version has body. It clings to the meat instead of pooling on the plate, and the balance of ketchup, mustard, Worcestershire, and a little brown sugar keeps it bold without tasting one-note.
What makes this version work is the way the beef and vegetables brown together before the sauce goes in. That first minute of color builds the savory base, and the tomato paste gets stirred in before the liquids so it can cook out its raw edge. Then the whole pan simmers long enough to tighten up into a spoonable filling instead of a thin meat sauce. If you’ve had sloppy joes that slid right off the bun, the problem was usually too much liquid or not enough simmer time.
Below, I’ll show you the small timing details that keep the sauce thick and the buns from falling apart, plus a few smart swaps if you want to adapt it for your pantry or your diet.
The sauce thickened up perfectly and the ketchup-mustard balance was spot on. I used it for lunch sandwiches and my kids asked for it again the next night.
Save these saucy homemade sloppy joes for a fast weeknight dinner with a thick, tangy beef filling and toasted buns.
The Secret to Sloppy Joes That Stay on the Bun
The difference between a good sloppy joe and a soggy mess comes down to thickness. The filling needs to simmer until the liquid turns glossy and coats the meat, not until it looks like soup in a skillet. If you stop too soon, the ketchup and water stay loose and run straight through the bun. If you go too far, the sauce tightens into a sticky paste, which means it’s lost that soft, spoonable texture.
Browned beef matters here too. When the meat gets a little color before the sauce goes in, you get a deeper savory base that keeps the filling from tasting flat. The onion and bell pepper soften into the mixture, but they should still have enough body to disappear into the sauce rather than turn limp and watery. That’s what gives you the classic sloppy joe texture without the canned taste.
If the pan looks dry before the simmer starts, that’s fine. The ketchup and water will loosen everything as they heat, and the sauce will pull together in the last few minutes.
What Each Ingredient Is Actually Doing in This Dish
- Lean ground beef — This gives the filling its hearty texture without leaving too much grease in the pan. You can use a slightly fattier blend, but you’ll want to drain it well after browning so the sauce doesn’t separate or taste oily.
- Sweet onion and green bell pepper — These soften into the meat and add the classic sloppy joe background flavor. Red pepper works if that’s what you have, but green pepper gives a sharper edge that stands up better against the sweet ketchup.
- Tomato paste — This is the ingredient that deepens the sauce fast. Stir it into the beef and vegetables before adding the wet ingredients so it can cook for a moment and lose that raw tomato bite.
- Ketchup, brown sugar, mustard, and Worcestershire — This is the backbone of the sauce. Ketchup brings the tomato base, brown sugar rounds it out, mustard sharpens it, and Worcestershire adds the savory depth that keeps the filling from tasting like sweetened tomato.
- Toasted buns — Don’t skip the toasting. A lightly crisp bun gives the filling something sturdy to sit on, and it buys you a few extra minutes before the sauce starts soaking through.
Building the Filling So It Thickens Instead of Running
Brown the Meat and Vegetables Together
Warm the oil first, then add the beef, onion, and bell pepper at the same time. The goal is to get the meat browned in spots while the vegetables soften and pick up the fond on the bottom of the pan. If the pan looks crowded and the mixture starts steaming instead of sizzling, the meat won’t brown well, so use a skillet wide enough to keep the ingredients in contact with the heat.
Cook Out the Tomato Paste
Once the garlic is fragrant, stir in the tomato paste until it disappears into the meat. This short step matters because tomato paste tastes flat and metallic when it hasn’t had a chance to cook a little. You’re looking for a darker, richer color before the ketchup goes in.
Let the Sauce Reduce Gently
Add the ketchup, water, brown sugar, Worcestershire, mustard, salt, pepper, and red pepper flakes, then lower the heat to a steady simmer. The mixture should bubble lazily, not boil hard. Hard boiling can make the sauce tighten unevenly and splatter grease, while a gentle simmer gives you a cohesive filling that thickens in about 10 minutes.
Toast the Buns Right Before Serving
Toast the buns while the filling finishes. You want them warm and lightly crisp, with enough structure to catch the sauce without collapsing under it. Spoon the meat mixture on generously, but don’t overpack the bun before the first bite or the filling will squeeze out the sides.
Three Ways to Adjust This Without Ruining the Texture
Make it leaner with ground turkey
Ground turkey works well, but it needs a little help because it doesn’t bring the same built-in richness as beef. Use the same seasoning, keep the tomato paste, and don’t skip the simmer, since turkey can taste dry if you rush it. If the mixture looks a bit pale, a splash more Worcestershire or an extra teaspoon of tomato paste brings back depth.
Make it gluten-free
The filling itself is naturally gluten-free as long as your Worcestershire sauce is certified gluten-free. Serve it on gluten-free buns or over baked potatoes if you want a sturdier base than most gluten-free sandwich bread can give you. That keeps the experience messy in the right way, not crumbly.
Lower the sugar without losing balance
Cut the brown sugar back by half if you want a less sweet sauce. The ketchup already carries sweetness, so the filling still tastes complete. If you remove the sugar entirely, add a teaspoon of apple cider vinegar or a little extra mustard to keep the sauce from tasting blunt.
Storage and Reheating
- Refrigerator: Store the filling in an airtight container for up to 4 days. The sauce thickens as it chills, which actually helps the texture.
- Freezer: It freezes well for up to 2 months. Cool it completely first, then portion it flat in freezer bags so it thaws evenly.
- Reheating: Reheat gently on the stove over low heat with a splash of water if needed. The common mistake is blasting it in the microwave until the edges dry out while the center stays cold.
Answers to the Questions Worth Asking

Homemade Sloppy Joes
Ingredients
Equipment
Method
- Warm the olive oil in a large skillet over medium-high heat until it shimmers. Keep it moving so the surface heats evenly.
- Add the beef, onion, and bell pepper, breaking the meat into crumbles, then cook about 5 minutes until browned and the vegetables are tender. Stir occasionally for even browning and softening.
- Stir in the garlic and cook until fragrant, about 20 seconds, then drain any excess grease. Watch for a fragrant aroma without browning the garlic.
- Stir in the tomato paste until combined, then add the ketchup, water, brown sugar, Worcestershire, mustard, salt, pepper, and red pepper flakes. Mix thoroughly so the sauce looks brick-red and cohesive.
- Simmer gently over medium heat for 10 minutes until thickened. You should see the sauce reduce and cling to the meat as you stir.
- Spoon the filling onto toasted buns and serve warm. Heap it high and let the sauce settle slightly before eating.