
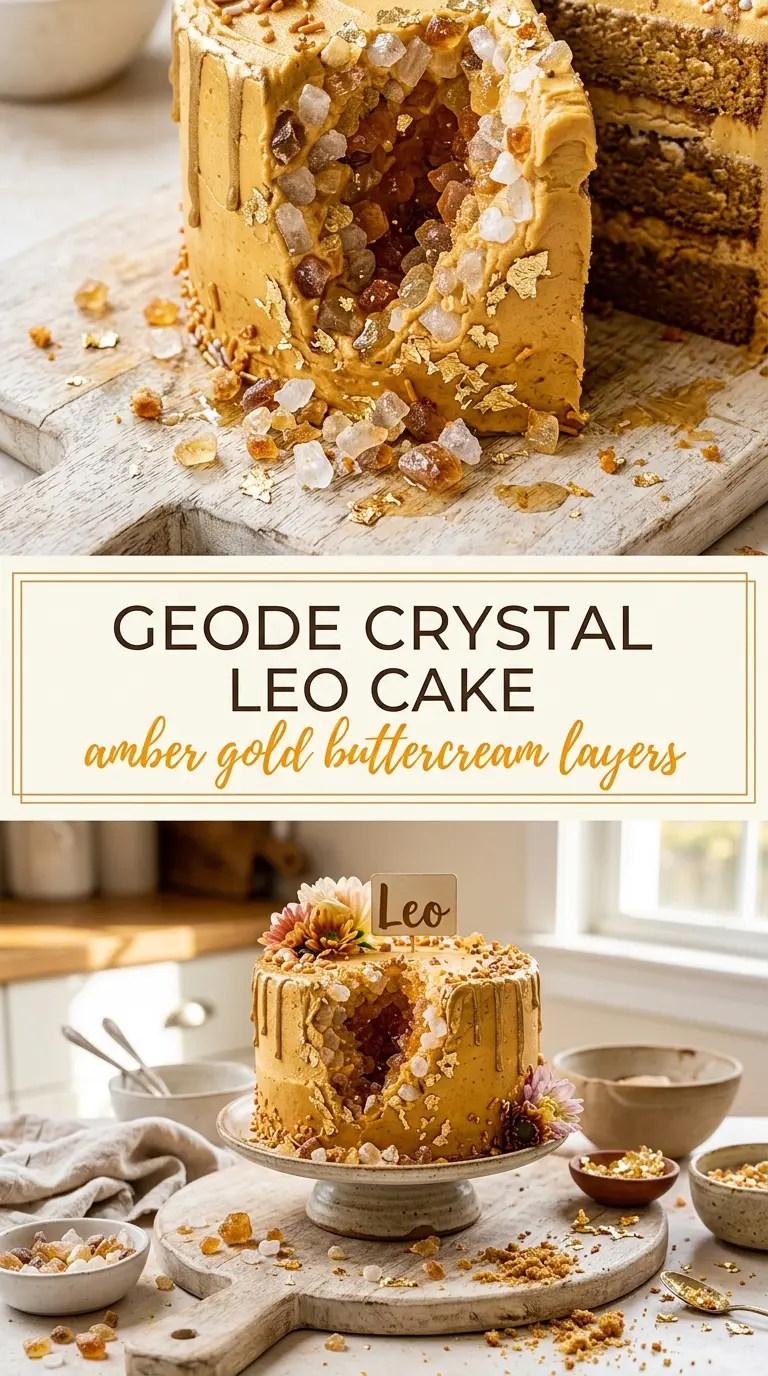
A Geode Crystal Leo Cake turns the usual birthday cake cut into a real reveal. The soft, buttery layers slice cleanly around a sparkling cavity of amber candy, and that contrast is what makes every wedge feel special: tender cake outside, crunchy crystal center inside, with gold dust catching the light on top. It looks dramatic on the table, but the effect comes from a few very simple moves done with care.
The cake itself is built like a sturdy vanilla layer cake, which matters because the cavity needs a crumb that can hold its shape without crumbling into the filling. Buttermilk keeps the crumb soft and gives the layers enough richness to stand up to carving. The rock candy goes in after baking, once the layers are cool and trimmed, so it stays glossy and intact instead of melting into the frosting. The gold luster dust is the final detail that makes the whole design read as geode-inspired instead of just “frosted cake with candy in it.”
Below, you’ll find the technique details that keep the cavity neat, the best way to handle the candy so it doesn’t crack at the wrong moment, and a few smart variations if you want to change the color palette or work with what you already have.
The cake layers stayed tender even after carving the center, and the rock candy looked incredible once I piled it into the cavity. I was worried the filling would make the cake unstable, but it sliced cleanly and held together.
Love the sparkling amber center and gold finish on this Geode Crystal Leo Cake? Save it to Pinterest for the celebration cake that always gets the first slice reveal.
The Part That Keeps the Geode Slice from Collapsing
The mistake with a geode cake is usually carving too aggressively or filling it with candy before the cake has fully cooled. Warm cake tears instead of cutting cleanly, and that means the cavity edges get ragged and weak. Let the layers cool all the way down, then use a serrated knife to cut a controlled well from the center of one layer only. Leave a sturdy border around the edge so the top and sides still have something to hold onto.
The filling also needs a little restraint. Rock candy gives you the crystal look, but if you pack the cavity too tightly, the weight can push against the frosting and make the slice slump. A loose fill looks better anyway, because the crystals need space to catch the light.
What Each Ingredient Is Actually Doing in This Dish
- Cake flour swap: You can use cake flour for a slightly finer crumb, but the structure will be a touch softer. If you do, handle the layers gently when you carve the cavity.
- Buttermilk: This keeps the crumb tender and adds enough tang to balance the sugar. If you don’t have it, mix 1 cup milk with 1 tablespoon lemon juice or vinegar and let it sit for 5 minutes.
- Rock candy shards: These are the visual centerpiece. Regular crushed candy will melt or look cloudy faster, so use actual hard crystal shards if you want that geode effect to stay sharp.
- Gold luster dust: A little goes a long way. Dust it on dry frosting for a metallic finish; if the frosting is too wet, it will streak instead of shine.
Building the Layers, Filling the Center, and Getting the Reveal Right
Creaming the Base
Beat the butter and sugar until the mixture looks pale and fluffy, not just combined. That extra air gives the cake lift and keeps the crumb from turning dense under the weight of the carved center. Add the eggs one at a time so the batter stays smooth; if it looks slightly curdled before the flour goes in, that’s normal and it will come together.
Alternating the Flour and Buttermilk
Add the flour and buttermilk in turns, starting and ending with flour. This keeps the batter emulsified and prevents overmixing, which would tighten the crumb and make the cake harder to carve later. Stop mixing as soon as the last streaks disappear. Overworked batter bakes up tougher and can crack when you hollow it out.
Baking and Cooling the Layers
Bake the batter in two pans at 350°F until the tops spring back and a tester comes out with a few moist crumbs. The layers need to be fully set before you move them, or the carved one can split at the center. Cool them completely on a rack. A warm cake will smear into the frosting and turn the cavity into a mess.
Carving the Geode Cavity
Use one layer as the carved layer and keep the second layer whole for the top. Cut a rounded cavity in the center, leaving a thick border around the outside edge and enough cake at the bottom so the fill doesn’t leak through. Turn the knife slowly and clean out the center in chunks instead of scraping, which helps the edges stay crisp. Set the removed cake aside for snacking or cake pops.
Frosting, Filling, and Finishing
Frost the exterior first so the cake feels stable before the candy goes in. Fill the cavity with the amber rock candy shards, letting them mound slightly above the cut edge for a natural crystal look. Dust the finished cake with gold luster dust right before serving so it stays bright. If you add it too early, moisture from the frosting will dull the shine.
How to Adapt This for Different Looks, Diets, and Occasions
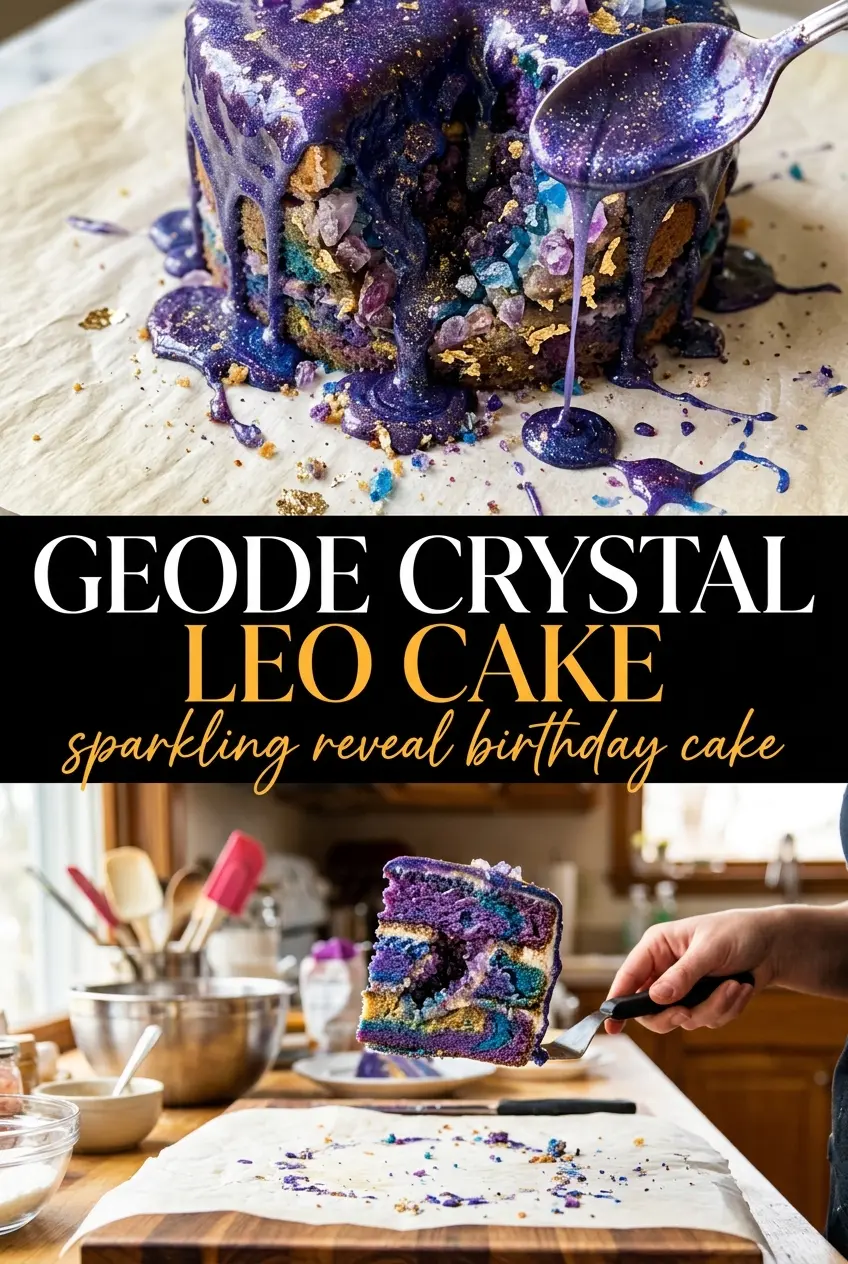
Make It a Different Gemstone Color
Swap the amber rock candy for blue, pink, or clear shards and adjust the finishing dust to match. The structure stays the same, but the whole cake changes personality the minute the cavity is filled. Clear candy gives the most realistic crystal look, while colored candy reads more playful and celebratory.
Gluten-Free Version
Use a 1:1 gluten-free flour blend that includes xanthan gum. The cake will be a little more delicate when carved, so chill the layers for 20 to 30 minutes before cutting the cavity. That small step firms the crumb and makes the geode shape easier to clean up.
Dairy-Free Adaptation
Replace the butter with a plant-based baking stick and use a dairy-free buttermilk made from non-dairy milk plus lemon juice. The texture stays soft, though the flavor will be a little less rich than the original. Choose a frosting that firms up well so the candy can rest cleanly against it.
Storage and Reheating
- Refrigerator: Store covered for up to 3 days. The candy may soften slightly from humidity, but the cake will stay moist.
- Freezer: Freeze the unfrosted cake layers well wrapped for up to 2 months. Don’t freeze the finished candy-filled cake, because the shards lose their shine and can pick up moisture.
- Reheating: This cake is best served at room temperature. If it’s been chilled, let slices sit out for 30 to 45 minutes before serving so the butter in the crumb softens again. Microwaving will melt the frosting and cloud the candy.
Answers to the Questions Worth Asking
Geode Crystal Leo Cake
Ingredients
Equipment
Method
- Preheat the oven to 350°F and place two pans ready for baking.
- In a stand mixer, cream butter and sugar until light and fluffy, about 3-5 minutes, with the mixture turning paler in color (visual cue: fluffy ribbons).
- Beat in eggs one at a time until fully incorporated (visual cue: batter looks smooth and glossy).
- Alternate adding flour and buttermilk in batches, mixing just until each addition is combined so the batter stays thick and smooth (visual cue: no visible streaks of flour).
- Divide batter between the two pans and bake at 350°F for 30 minutes, until the center springs back when gently pressed and a toothpick comes out clean (visual cue: tops are lightly golden).
- Cool layers in the pans for 10 minutes, then unmold and cool completely before carving a cavity in one layer (visual cue: cavity edges are clean, not crumbled).
- Fill the carved cavity with amber rock candy shards so they sit in a tight, sparkling mound (visual cue: amber shards catch the light).
- Frost the exterior to seal the look of the geode, covering any exposed cake edges (visual cue: smooth, even coat).
- Dust the frosted exterior with gold luster dust so it forms a shimmering finish (visual cue: glitter-like specks across the surface).