
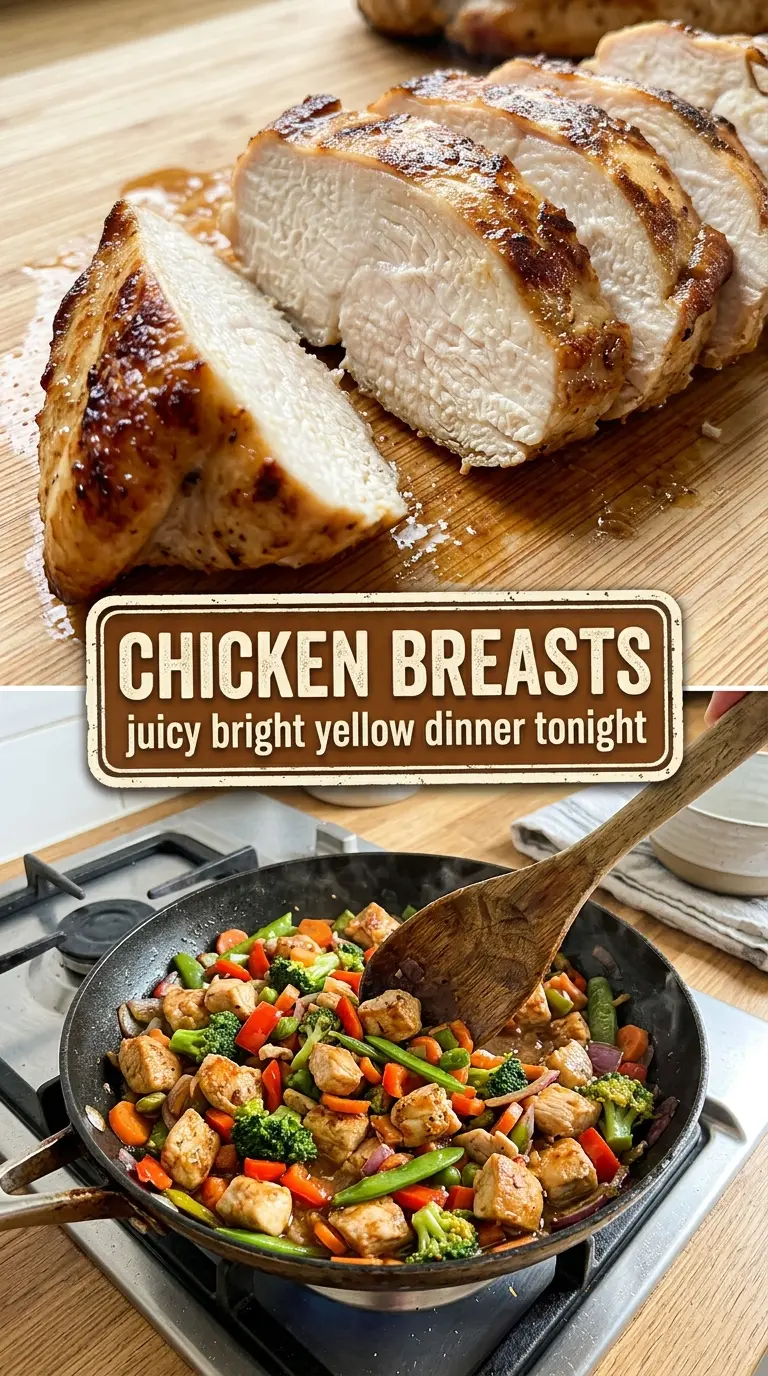
Golden-seared chicken breasts with crisp, caramelized edges and a juicy center earn a permanent place in the dinner rotation because they solve the two biggest complaints about boneless chicken: bland flavor and dry meat. When they’re cooked well, the outside picks up a deep brown crust while the inside stays tender enough to slice cleanly without losing juices all over the cutting board.
The difference comes down to two things: seasoning the meat generously and giving it enough space in the pan to sear instead of steam. A quick pat dry before it hits the heat matters more than most people think, because surface moisture is the enemy of browning. Garlic and herbs work here because they cling to the browned exterior and make the chicken taste like it spent a lot longer in the pan than it actually did.
Below, I’m walking through the part that really matters — the sear, the timing, and the small cues that tell you when to pull the pan off the heat so the chicken stays juicy. There’s also a practical note on what to do if your breasts are thicker than average, because that’s usually where dinner goes sideways.
I finally got chicken breasts that stayed juicy all the way through, and the pan drippings made an amazing quick sauce. The edges were nicely browned instead of pale and rubbery, which never happens for me.
Save these golden-seared chicken breasts for the nights when you want crisp edges, juicy centers, and a pan sauce from the drippings.
The Sear Is Doing More Work Than the Oven Ever Will
Chicken breasts fail for a simple reason: people rush the browning and then keep cooking until the meat turns chalky. The pan is where the flavor starts. If the chicken goes into a crowded skillet or sits wet from the package, it will steam first and brown second, which means pale skin, soft edges, and a weaker finish.
The fix is a dry surface, enough fat to coat the pan, and enough time for the first side to release naturally. If you try to move it too early, the crust tears and the pan temperature drops. Let it sit until the underside turns deep golden and the chicken lifts without resistance. That’s the point where the flavor has actually developed.
- Chicken breasts — Use pieces that are similar in thickness so they finish at the same time. If one side is much thicker, pound it lightly or slice it horizontally into cutlets for faster, more even cooking.
- Oil or butter — Oil handles the heat best for the sear. Butter adds flavor, but it burns if the pan is too hot, so I usually use a mix or add a small amount near the end.
- Garlic and herbs — Fresh garlic can scorch fast, so it works best once the chicken has already browned. Dried herbs are fine here, but crush them between your fingers first so they wake up in the pan.
- Salt and pepper — Salt does more than season the surface; it helps the chicken taste like chicken instead of a blank protein. Pepper is better added before cooking than after, because it perfumes the crust as it browns.
What Each Minute in the Pan Is Actually Doing
Pat the chicken dry and season it all over before it ever touches the skillet. That dry surface is what gives you browning instead of pale, slippery meat. If the breasts are very thick, cut them into even pieces or pound them lightly so the center doesn’t lag behind the outside.
Building the First Crust
Heat the pan until the oil shimmers, then lay the chicken down and leave it alone. You should hear a steady sizzle, not an angry sputter or a weak hiss. If the heat is too low, the chicken will soak up fat and turn greasy; if it’s too high, the outside will darken before the inside cooks through.
Turning Without Tearing the Surface
Flip only when the first side releases easily and shows a deep golden crust. That crust is delicate at first, so forcing the turn will rip it away and leave the pan full of stuck bits instead of flavor on the meat. The second side usually cooks faster than the first, which is normal because the pan is already hot.
Finishing Gently
Once the chicken is nearly done, lower the heat and let the last few minutes work slowly. If you’re adding garlic or herbs, stir them in late so they don’t burn before the chicken finishes. Pull the pan off the heat when the juices run clear and the center reads done, then rest the chicken for a few minutes so the juices settle back into the meat instead of running out when you slice it.
Three Ways to Adjust These Chicken Breasts Without Ruining the Texture
Make it dairy-free with oil instead of butter
Use a neutral oil or olive oil for the whole cook and skip the butter finish. You lose a little richness, but you keep the clean sear and the chicken still gets plenty of flavor from the browned bits in the pan.
Turn it into a lower-carb main with extra herbs and no sauce
The chicken itself already fits a low-carb approach, so the real move is to lean on herbs, garlic, and a strong crust instead of a starch-heavy glaze. You’ll get a cleaner, more savory finish that works well with vegetables or salad.
Use chicken cutlets for a faster weeknight version
Slice the breasts in half horizontally or buy thin cutlets and shorten the cook time. The thinner pieces brown faster and stay tender, but they also go from done to overdone quickly, so keep the heat controlled and watch the color closely.
Storage and Reheating
- Refrigerator: Store in an airtight container for up to 4 days. The crust softens a little, but the chicken stays useful for salads, wraps, and quick dinners.
- Freezer: Freezes well for up to 2 months if you wrap the pieces tightly and let them cool first. Thaw overnight in the fridge so the surface doesn’t turn rubbery from rapid reheating.
- Reheating: Warm gently in a covered skillet over low heat with a splash of water or broth. High heat dries out the meat fast, which is the most common mistake people make with leftover chicken breasts.
Answers to the Questions Worth Asking

Chicken Breasts
Ingredients
Equipment
Method
- Pat the chicken breast dry, then coat both sides with olive oil for better browning.
- Season all over with kosher salt, black pepper, garlic powder, dried thyme, and dried rosemary until evenly coated.
- Heat a cast iron skillet over medium-high until it shimmers, then place the chicken breast in a single layer and avoid moving it.
- Cook for 5-7 minutes without flipping, until the edges look deep golden and caramelized.
- Flip and continue cooking for 5-7 minutes more, until the second side is also browned.
- Reduce heat to medium and cook for 8-12 minutes more, turning once, until the thickest part reaches 165°F and the juices run clear.
- Rest the chicken breast for 3-5 minutes before serving so the interior stays tender.