
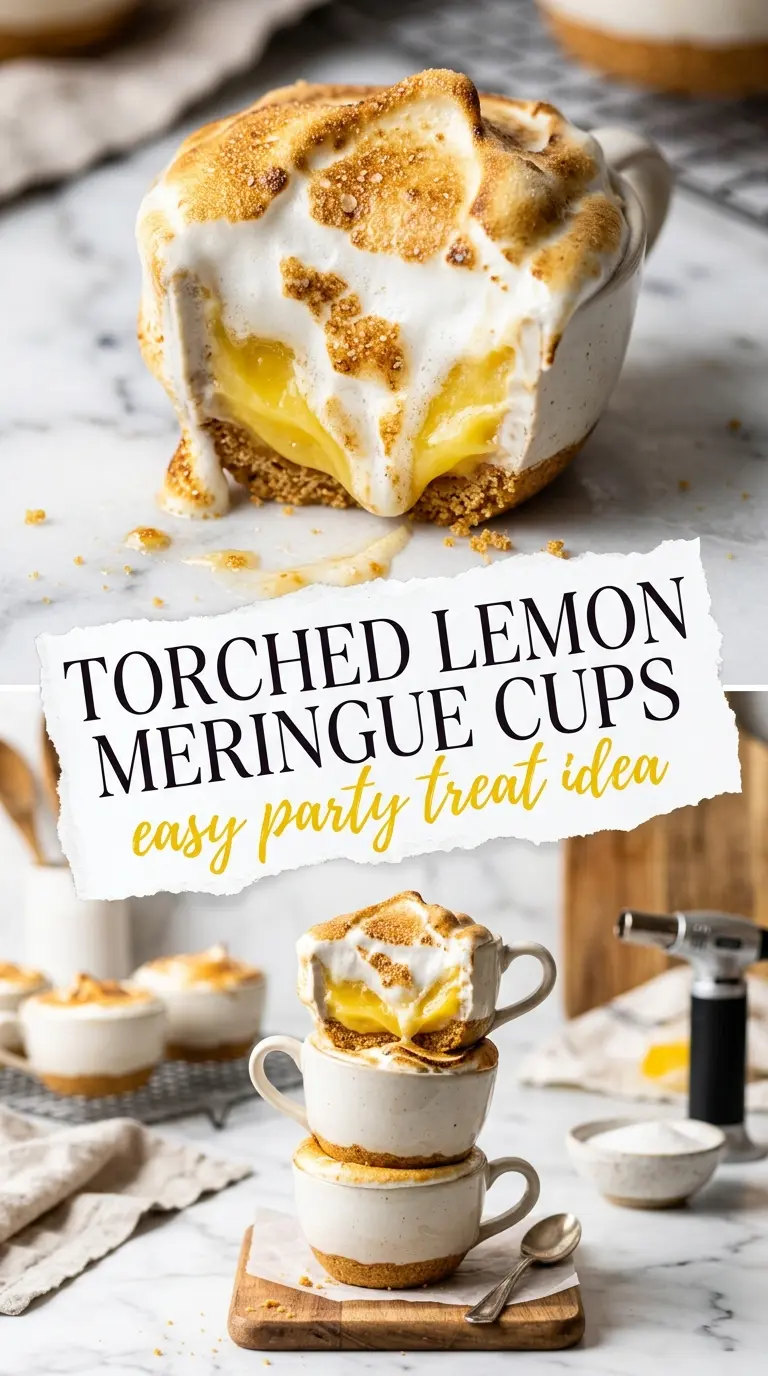
Golden cookie cups with a glossy lemon curd center and a toasted meringue cap hit that sweet-tart sweet spot that keeps people reaching for a second one. The cookie stays tender at the edges, the curd stays bright and sharp, and the meringue brings just enough caramelized sweetness to tie it all together. They look fancy on a platter, but the process is straightforward once you know how to keep each layer from getting soggy or sliding around.
The trick is building the cups first and letting them cool completely before the lemon curd goes in. Warm cookie dough will slump if you rush it, and even a thick curd can loosen the base if the cups are still hot. The meringue goes on last and gets torched just until the peaks turn golden, which gives you that bakery-style finish without baking the whole dessert again.
The cookie cups held their shape perfectly and the lemon curd stayed nice and clean in the center. I torched the meringue right before serving and got those golden peaks without melting anything.
Love the crisp cookie shell and torched meringue on these lemon meringue cookie cups? Save them to Pinterest for the next time you want a mini dessert that looks polished and tastes bright.
The Part That Keeps Cookie Cups from Going Soft
Most cookie cup desserts fail in the same place: the shell is baked, but it never gets enough structure before the filling goes in. With lemon meringue cookie cups, the shell needs to cool all the way down so it can act like a little pastry case instead of a warm, fragile cookie. That cooling time matters more than people think.
The other issue is moisture. Lemon curd is thick, but it still wants to soak into a warm cookie base if you add it too soon. Bake the cups until the edges are set and lightly golden, then press them gently if they’ve puffed, let them cool in the tin for a few minutes, and move them to a rack before filling. That gives you a crisp edge and a soft center that holds up under the curd.
What Each Ingredient Is Actually Doing in This Dish
- Sugar cookie dough — Store-bought dough works well here because it spreads predictably and bakes into a sturdy shell. If you use homemade dough, keep it on the firmer side so the cups don’t collapse in the muffin tin.
- Lemon curd — Thick, spoonable curd is what you want. If yours is loose, chill it first so it sits neatly in the cups instead of running over the edges.
- Meringue topping — A stable meringue or meringue-style topping pipes cleanly and holds the torching better than a thin whipped topping. If you’re using a homemade meringue, beat it to glossy medium-stiff peaks so it keeps shape after you pipe it.
- Lemon zest — This is small, but it wakes up the whole dessert. Use fresh zest right before serving so the oils stay bright and fragrant.
Building the Layers Without Breaking the Shell
Pressing and Baking the Cups
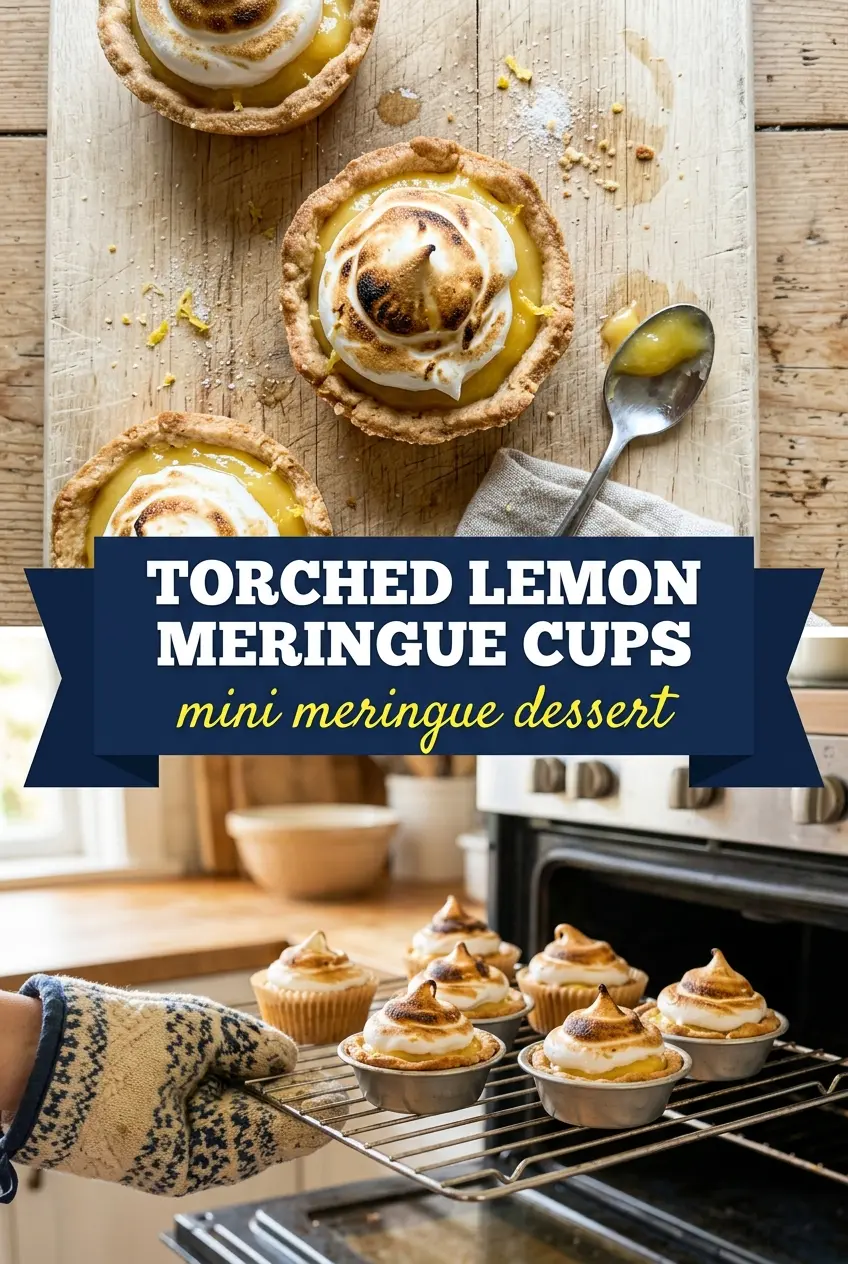
Divide the cookie dough evenly and press it into a mini muffin tin, pushing it up the sides to form a shallow well. The dough should look compact and even, not thick in the middle, or you’ll end up with a domed cookie instead of a cup. Bake just until the edges are set and lightly golden. If they puff too much in the center, press them down gently with the back of a spoon while they’re still warm.
Cooling Before the Filling Goes In
Let the cookie cups sit in the pan for a few minutes, then move them to a rack and wait until they’re fully cool. This is where people get impatient and lose the crisp base. If the cups are even a little warm, the curd softens the cookie and the bottoms can turn tacky. A cool shell gives you a clean bite all the way through.
Filling and Torching the Meringue
Spoon or pipe the lemon curd into each cooled cup, filling just to the top without overstuffing. Pipe the meringue in a tall swirl so the peaks catch the torch first and develop color fast. Use a kitchen torch in short passes until the tips are golden and the rest stays white. If you hold the flame in one spot, the sugar can scorch before the meringue gets that toasted look.
Use a Graham Cracker Shell Instead
If you want a more tart-and-custardy dessert feel, swap the sugar cookie dough for a pressed graham-style base. The texture becomes a little more crumbly and less buttery, but it gives the lemon filling a classic pie-like backdrop.
Make Them Gluten-Free
Use a gluten-free sugar cookie dough that holds shape well when chilled. The key is firmness, not just flavor; if the dough is too soft, it spreads before it sets and you lose the cup shape.
Berry-Lemon Version
Add a small spoonful of blueberry or raspberry preserves under the lemon curd for a fruitier, deeper filling. The jam adds color and a little extra sweetness, but keep the layer thin or it can overpower the clean lemon flavor.
Storage and Reheating
- Refrigerator: Store assembled cookie cups in a single layer for up to 2 days. The meringue may soften a little, but the shells stay best when they’re kept cold and dry.
- Freezer: Freeze the baked, unfilled cookie cups only. The lemon curd and meringue don’t thaw well here, and they’ll turn watery after freezing.
- Reheating: These are meant to be served chilled or at cool room temperature, not reheated. If the shells were made ahead, let them sit out for 10 to 15 minutes before filling so the curd doesn’t seize on contact.
The Questions That Come Up Before the First Batch Disappears
Torched Lemon Meringue Cookie Cups
Ingredients
Equipment
Method
- Preheat the oven to 350F. Press the sugar cookie dough into a mini muffin tin to form cups, ensuring the dough reaches the sides.
- Bake at 350F for 10 min. Cool until the cups hold their shape and are no longer hot to the touch, about 10 min.
- Spoon lemon curd into each cookie cup. Fill until you have a glossy layer that comes near the top edge.
- Pipe the meringue topping on top of the lemon curd in each cup. Torch the meringue until golden with toasted, golden-tipped peaks.
- Garnish with lemon zest. Add it lightly so it sits on top of the torched meringue.