
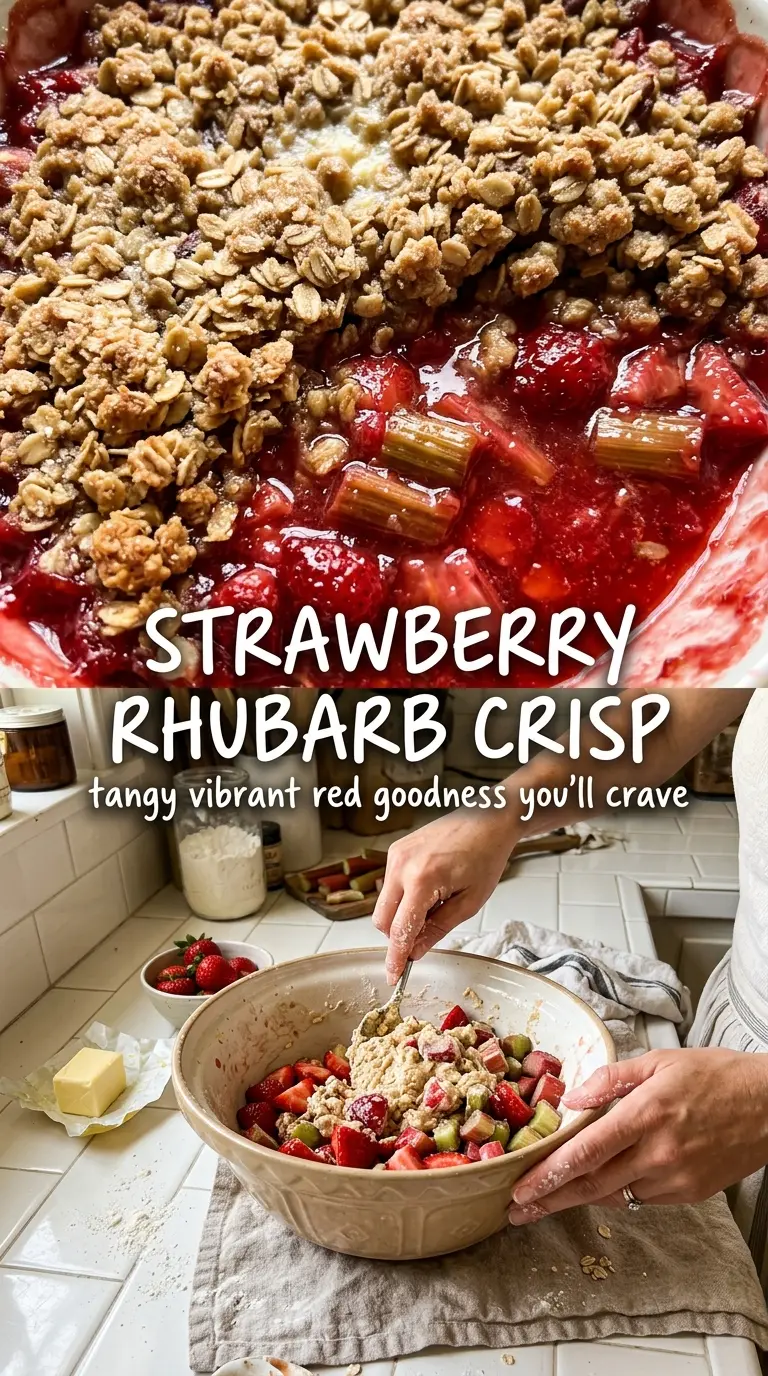
Tender strawberries and tart rhubarb bubble up under a buttery oat topping, and the payoff is all contrast: jammy fruit underneath, crisp and craggy crumbs on top. The filling turns glossy and thick instead of watery, so every spoonful holds its shape without losing that bright, tangy edge that makes this dessert worth coming back to.
The trick is giving the fruit enough sugar to draw out juices, then enough starch to turn those juices into a real syrup as it bakes. Rhubarb softens fast, but strawberries can collapse into mush if you cut them too small, so the fruit needs to be cut into sturdy, even pieces. The topping matters just as much: melted butter won’t give you the same nubby texture as cold butter rubbed into the dry ingredients, and that texture is what keeps the top crisp instead of sandy.
You’ll find the little details below that keep the filling from turning runny and the topping from going pale. There’s also a swap guide for when you need a gluten-free version or only have frozen fruit on hand.
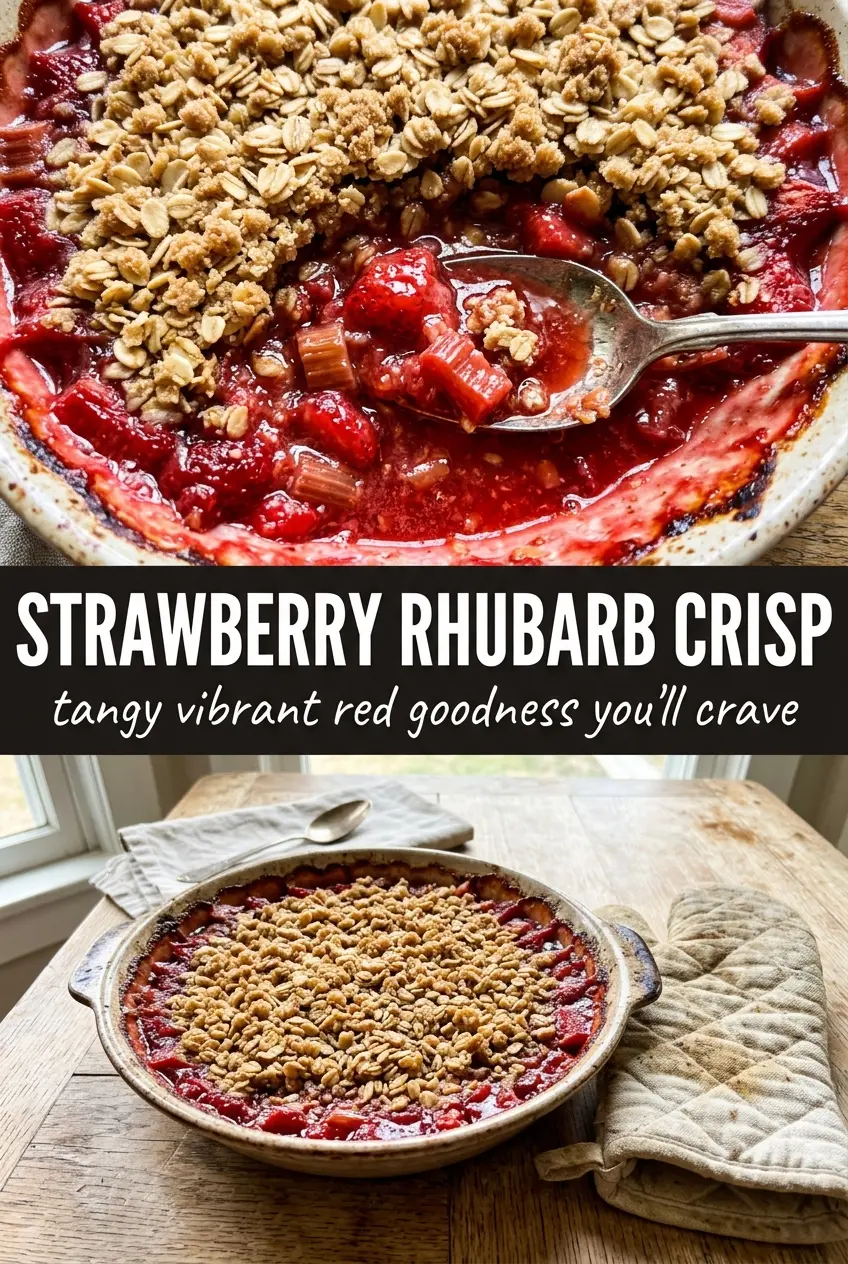
The filling set up beautifully and wasn’t watery at all, and the oat topping stayed crisp even after sitting out for a bit. I loved how the rhubarb stayed tangy against the sweet strawberries.
Keep this strawberry rhubarb crisp on hand for the nights when you want a tangy fruit dessert with a shattering oat topping.
The Fruit Turns Watery When You Skip This One Step
Rhubarb and strawberries both give off a lot of juice, which is exactly why crisp filling can slide from glossy to soupy if the balance is off. The answer isn’t just adding more flour and hoping for the best. You need enough thickener to catch the juices, but not so much that the filling turns pasty or dull.
Let the fruit sit with the sugar for a few minutes before it goes into the pan. That draws out the moisture early and helps the starch work with the liquid instead of fighting it in the oven. If your crisp has ever baked up with a dry top and a loose center, the fruit probably didn’t get enough time or the filling was cut too thick to soften evenly.
- Strawberries — Use berries that are ripe but still firm. Soft berries break down too fast and disappear into the filling.
- Rhubarb — Fresh rhubarb gives the cleanest tart flavor, but frozen works if you thaw and drain it first. If you use frozen rhubarb straight from the bag, the filling can turn watery before it has a chance to thicken.
- Cornstarch — This is the thickener that gives the juices a clean, glossy set. Flour works in a pinch, but it takes more of it and leaves the filling a little cloudier.
- Old-fashioned oats — Quick oats make a softer, tighter topping. Old-fashioned oats keep the crumble open and crisp.
What Each Part of the Crisp Is Doing in the Pan
The fruit layer needs a mix of sugar and starch so it bakes into a spoonable filling instead of a puddle. Rhubarb brings the sharpness, strawberries bring the sweetness, and the sugar pulls both together without burying that tart edge. If you want a brighter finish, a little lemon zest wakes the whole pan up without making it taste lemony.
The topping is where texture lives. Brown sugar adds a deeper note and helps the crumbs brown, while butter coats the dry ingredients and gives you those uneven crags that turn crunchy in the oven. A pinch of salt matters more than people think; it keeps the topping from tasting flat once the fruit underneath gets sweet.
Brown sugar: This brings moisture and a caramel note that plain white sugar can’t match. Light or dark both work, but dark sugar gives a deeper, richer topping.
Butter: Cold butter cut into the dry ingredients makes the topping crisp and layered. Melted butter will make a denser, more cookie-like crumble.
Flour: This binds the topping and helps it hold those crumbs together. A 1:1 gluten-free baking flour works well here if you need a gluten-free version.
Building the Crisp So the Bottom Bakes as Well as the Top
Mixing the Fruit First
Toss the strawberries and rhubarb with sugar, cornstarch, and any citrus zest before you add them to the baking dish. The fruit should look lightly coated, not buried in dry powder, and after a few minutes you’ll see juice starting to pool in the bowl. That’s a good sign. If you skip this step and dump everything straight into the pan, the thickener never distributes evenly and you end up with pockets of runny syrup.
Making the Crumble
Cut the butter into the oat mixture until you have a mix of fine crumbs and some larger clumps. Those clumps are what bake into the crisp, crunchy bits people fight over. If everything looks sandy, the topping will bake up dry and dull. If the butter is too warm, it will smear through the flour and oats and the whole layer can turn greasy.
Baking Until the Center Bubbles
The crisp is done when the top is deeply golden and the fruit juices are bubbling through the edges and in the center, not just around the rim. That bubbling is your cue that the starch has activated and the filling has thickened. Pull it too early and the middle stays thin once it cools. Let it rest for at least 15 minutes after baking so the filling settles before you scoop it.
Make It Gluten-Free Without Losing the Crunch
Swap the flour in the topping for a good 1:1 gluten-free baking blend and keep the oats certified gluten-free. The topping still bakes up crisp because the structure comes from the oats and butter, not from wheat flour alone.
Using Frozen Fruit When Fresh Rhubarb Isn’t in Season
Frozen strawberries and rhubarb both work, but thaw them first and drain off the excess liquid before mixing with the sugar and starch. That extra liquid is the main reason frozen fruit crisps turn loose, so starting with drier fruit gives you a better set.
Making It Less Sweet and More Tart
Reduce the sugar in the filling a little and add a touch more lemon zest. The strawberries will still taste bright, but the rhubarb gets to stay front and center instead of being buried under sweetness.
Storage and Reheating
- Refrigerator: Store covered for up to 4 days. The topping softens a little, but the flavor stays good.
- Freezer: Baked crisp freezes well for up to 2 months. Cool it completely, wrap tightly, and thaw in the fridge before reheating.
- Reheating: Warm in a 325°F oven until the edges are bubbling again. The microwave will soften the topping, so use it only if you don’t mind losing the crunch.
Answers to the Questions Worth Asking
Strawberry Rhubarb Crisp
Ingredients
Equipment
Method
- Heat the oven to 375°F and place a sheet pan on the middle rack to catch drips while baking.
- Toss the rhubarb, strawberries, sugar, cornstarch, lemon juice, and cinnamon together in a bowl until coated and glossy.
- Combine the rolled oats, flour, brown sugar, salt, and cinnamon in a bowl.
- Cut the cold butter into cubes and rub it into the dry mixture until it looks like coarse crumbs with some larger clumps.
- Spread the fruit filling into an even layer in a baking dish, then sprinkle the crisp topping over the top.
- Bake at 375°F for 30-35 minutes, until the filling is bubbling and the topping is deep golden brown with crisp edges.
- Let the crisp cool for 15-20 minutes before serving so the juices thicken and the topping stays crisp.