
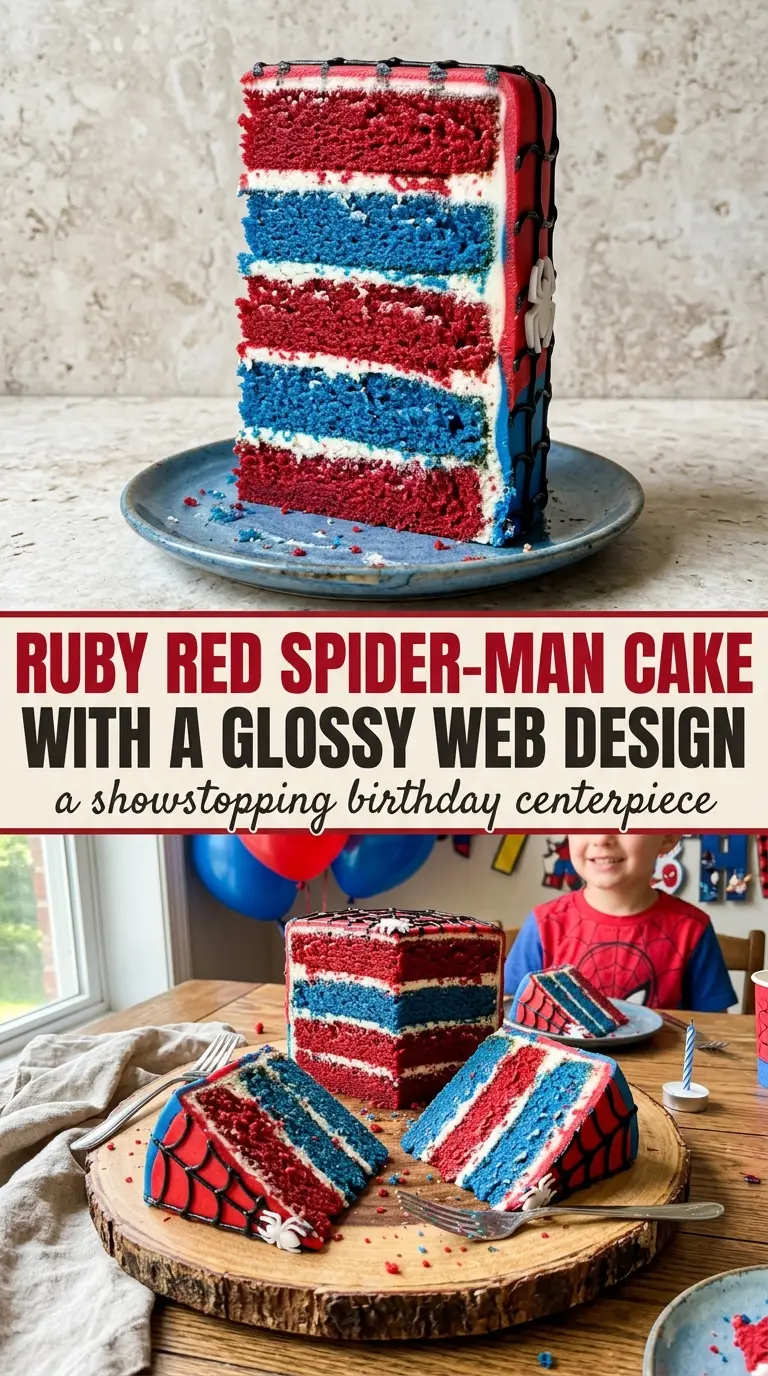
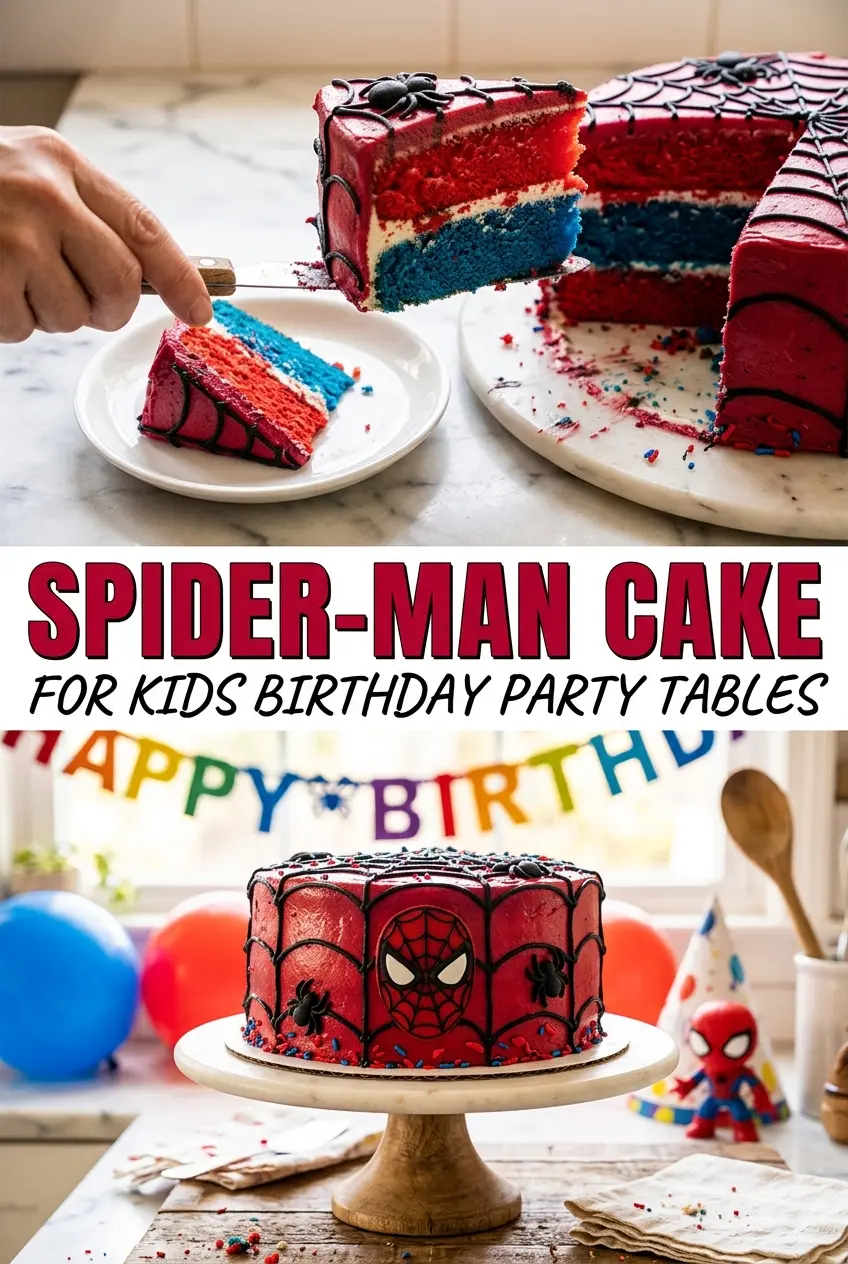
Spider-Man cake gets its charm from the surprise inside: bold red and blue vanilla layers tucked under a smooth red buttercream and a sharp black spiderweb finish. It looks like a party centerpiece, but the real win is that the cake itself stays soft and sliceable instead of drying out under all that color and frosting. That balance matters. A pretty cake is nice; a cake that tastes like something people go back for is the one worth repeating.
The batter here is a straightforward butter cake, which gives you enough structure to stack without turning dense. Dividing the batter after mixing keeps the crumb even, and using gel coloring instead of liquid keeps the colors bright without thinning everything out. The frosting is a classic American buttercream, which pipes cleanly and holds the spiderweb details better than a looser frosting would. If you rush the cooling step, the whole design starts sliding, so patience pays off here.
Below, I walk through the parts that matter most: keeping the cake layers even, tinting the batter without overmixing, and getting that web design to look crisp instead of muddy. There’s also a few notes on making it ahead, because birthday cake gets a lot easier when you don’t have to finish it an hour before guests arrive.
The cake layers stayed super soft and the red and blue colors baked out bright, not gray. I was nervous about the spiderweb, but the buttercream held its shape and the whole cake sliced cleanly.
Love the bold red-and-blue Spider-Man cake layers? Save this one to Pinterest for the birthday when you want a superhero cake that slices clean and looks party-ready.
The Trick to Keeping the Colors Bright Instead of Muddy
Spider-Man cake can go wrong fast if the batter gets overmixed after the coloring goes in. Once the flour is added, every extra stir develops more gluten and turns the crumb tighter. That’s how you end up with a cake that looks festive but eats like a brick.
The other common problem is using too much liquid coloring. Gel color gives you the strong red and blue you want without watering down the batter. It also bakes more predictably, which matters when you want one layer to stay red and the other to stay blue after 30 minutes in the oven.
- Gel food coloring — This is where the color comes from. Liquid coloring works in a pinch, but you’ll need more of it and the batter can thin out before the color gets bold enough.
- Butter — Softened butter gives the cake a tender crumb and helps the frosting whip up smooth later. If it’s too warm, the batter can look curdled and the cake bakes up greasy.
- Powdered sugar for the frosting — This is what makes the buttercream sturdy enough for piping. If your kitchen is warm, sift it first so the frosting doesn’t end up gritty.
- Vanilla extract — The flavor stays classic and kid-friendly, which lets the visual design do its job without the cake tasting flat.
Building the Batter, Frosting, and Web in the Right Order
Cream the Butter Until It Looks Pale and Full
Start with butter and sugar and keep beating until the mixture looks lighter in both color and texture, about 3 minutes. It should look fluffy and slightly increased in volume, not just glossy. If you stop too early, the cake won’t have the same lift or tenderness, and the crumb will feel heavier than it should.
Mix the Dry Ingredients Just Enough
Sift the flour, baking powder, and salt together so the leavening is evenly distributed. Add the dry ingredients in alternating turns with the milk, and stop mixing as soon as the batter disappears. If you keep going after that point, the cake loses its soft crumb and bakes up with a tougher edge.
Split, Tint, and Bake Without Waiting Around
Divide the batter evenly into two bowls and tint each bowl with gel color until the shade is bold. Work quickly once the color is in so the batter goes into the pans before it starts sitting too long. Bake until a toothpick comes out clean and the tops spring back lightly when touched. If the centers jiggle, give them a few more minutes; pulling them too early can leave the middle gummy under the frosting.
Frost Cold Layers for a Cleaner Finish
Let the cakes cool completely before stacking. Warm cake melts frosting, and melted frosting can’t hold the web design. Beat the buttercream until smooth, tint most of it red, then frost the cake in a thick, even layer before piping the black web lines on top and down the sides.
How to Adapt This Spider-Man Cake for Different Parties
Make it dairy-free
Use a high-quality plant-based butter in both the cake and frosting, plus an unsweetened non-dairy milk. The cake stays close in texture, though the frosting may be a little softer, so chill it briefly before piping the web.
Go with a different hero color scheme
The same batter works for any comic-themed cake. Swap the red and blue coloring for whatever colors you need, but keep the gel colors concentrated so the crumb doesn’t get wet or streaky.
Turn it into cupcakes
Divide the batter into lined muffin tins and bake until the centers spring back. You’ll lose the tall stacked look, but the colors still show up well, and the spiderweb piping turns into an easy swirl or small web on top.
Storage and Reheating
- Refrigerator: Store covered for up to 4 days. The frosting firms up in the fridge, but the cake stays moist if it’s sealed well.
- Freezer: Freeze unfrosted layers wrapped tightly for up to 2 months. Frosted slices can be frozen too, but the web design won’t look as sharp after thawing.
- Reheating: Let slices come to room temperature on the counter instead of microwaving them. A microwave softens the frosting unevenly and can make the cake feel gummy around the edges.
Answers to the Questions Worth Asking
Spider-Man Cake
Ingredients
Equipment
Method
- Preheat the oven to 350°F and line two 9-inch round cake pans with parchment paper, then set them on a sheet pan for stability.
- Sift together the flour, baking powder, and salt until evenly blended, then spread it out briefly so it cools slightly before mixing.
- Cream the butter and sugar until light and fluffy, about 3 minutes, then scrape the bowl so the mixture stays smooth.
- Add the eggs one at a time and stir until incorporated, then mix in the vanilla extract.
- Alternate adding the dry ingredients and milk, mixing until just combined to keep the crumb tender.
- Divide the batter into two bowls and tint one red and one blue with gel food coloring, then stir until the color is uniform.
- Pour each batter into a prepared pan and bake for 25 to 30 minutes at 350°F, until a toothpick comes out clean.
- Cool the cakes completely in their pans before frosting so the buttercream won’t melt.
- Beat the frosting ingredients until smooth, tint most of it red with gel food coloring, then adjust with 2 to 3 tablespoons milk if needed for spreadable texture.
- Frost the stacked layers with the red buttercream, keeping the sides even for clean piping.
- Pipe a black spiderweb design across the top and sides, using steady pressure and letting the lines sit slightly before adding the next strand.