
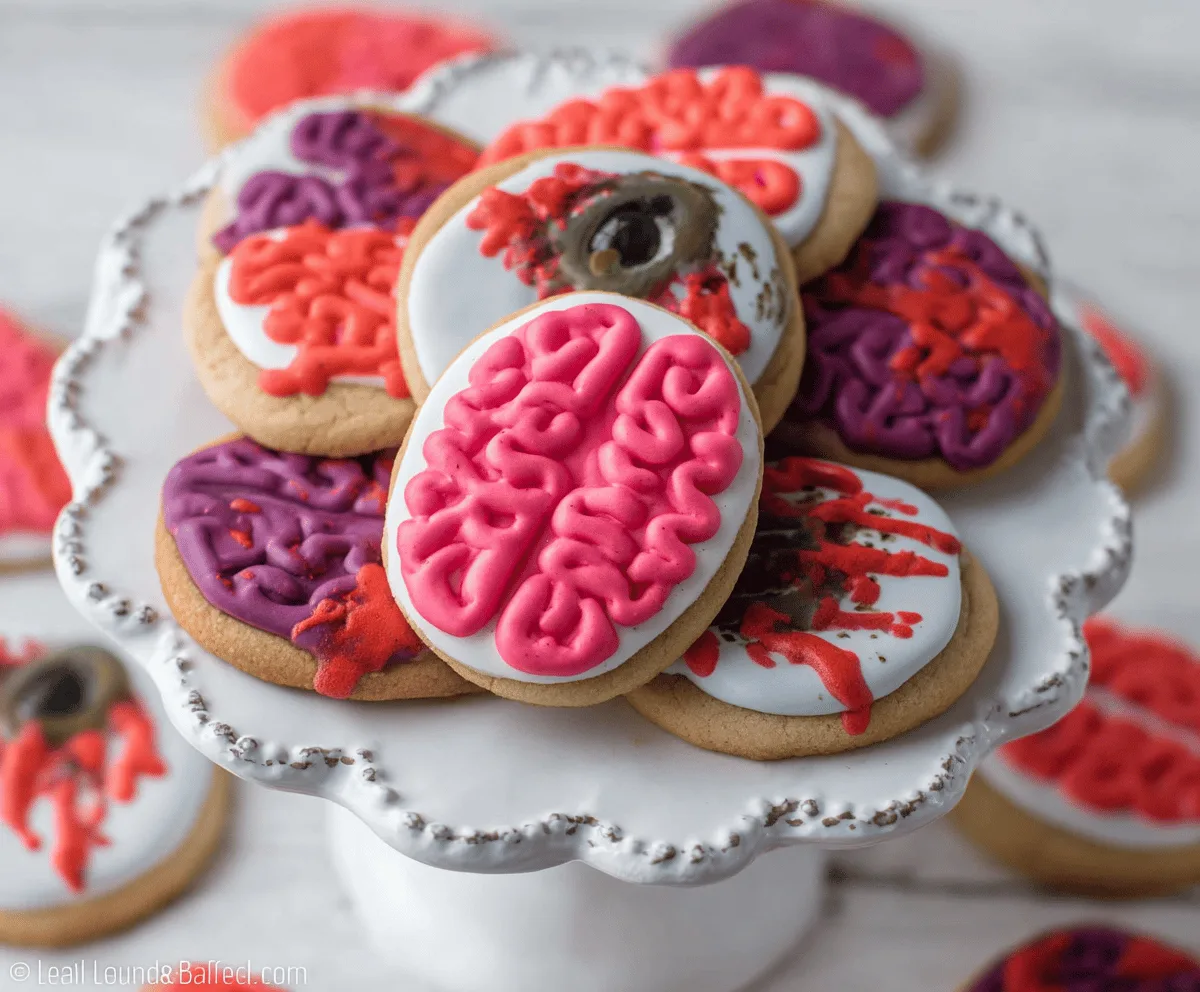
Zombie Brain Cookies are a fun and spooky treat that looks just like little creepy brains on your plate! These cookies mix soft, chewy cookie dough with a gooey, pink frosting piped cleverly to create the squiggly, brain-like texture. It’s a playful dessert that’s perfect for Halloween or any time you want to add a bit of creepy fun to your snack list.
I love making these cookies because the decorating part is such a blast – it’s like turning baking into a little art project. I usually have my kids help pipe the frosting, and we end up laughing at how silly and real the brains look. My tip? Don’t worry if your frosting isn’t perfect; the messy, wiggly look is exactly what makes these cookies so charming!
These cookies are great for a party or just a special treat. I like serving them with a cold glass of milk or even some hot chocolate when the weather gets crisp. They always grab people’s attention, and I swear they vanish from the plate faster than any other cookie I make. It’s a fun way to share a few giggles around the table while enjoying something sweet.
Key Ingredients & Substitutions
Butter: Unsalted butter gives you more control over salt levels in both the cookie and frosting. If you need dairy-free, try a plant-based butter substitute.
Cocoa powder: Using unsweetened cocoa adds rich chocolate flavor. Dutch-processed cocoa works too and gives a smoother taste.
Fondant or modeling chocolate: Fondant is easier to shape, while modeling chocolate tastes better. If you want to skip these, try thick royal icing for the brain decoration.
Gel food coloring: Gel colors are best—they give bright hues without making the frosting or fondant runny. Liquid colors can alter texture, so use gels when possible.
How Do You Create the Realistic Brain Texture on the Cookies?
Making the brain look real is all about those winding folds and ridges. Here’s how:
- Form oval brain shapes from tinted fondant or modeling chocolate, about the size of the cookie.
- Use a small piping tip, straw, or toothpick to press curved lines and swirl patterns gently into the surface.
- Run your fingers lightly over the shapes to soften edges and add natural folds.
- Paint some purple “veins” into crevices with diluted gel coloring for added detail and a creepy effect.
- Don’t worry if it’s a bit messy—the imperfect look makes the brains more realistic and fun.
Taking your time at this step really pays off by making the cookie decorations stand out and impress your guests!
Equipment You’ll Need
- Mixing bowls – I use them to prepare the cookie dough, frosting, and fondant so everything stays organized.
- Hand or stand mixer – makes creaming butter and mixing frosting so much easier and quicker.
- Baking sheets and parchment paper – prevents sticking and helps cookies bake evenly.
- Rolling pin – helps get the fondant or modeling chocolate smooth and even for shaping.
- Small piping tips or toothpicks – perfect for pressing detailed grooves into the fondant brains.
- Fine paintbrush or toothpick – for adding the purple veins with gel food coloring.
- Cooling rack – keeps the cookies crisp and cool before decorating.
Flavor Variations & Add-Ins
- Use different cookie flavors like vanilla, peanut butter, or cinnamon to match your theme or taste preference.
- Try teal or purple frosting for a more spooky or colorful effect instead of green.
- Add edible glitter or shimmer powder for a shiny, gooey look on the brains.
- Mix in small candies or sprinkles on top of the frosting for extra texture and fun details.
Zombie Brain Cookies
Ingredients You’ll Need:
For the Chocolate Cookie Base:
- 1 cup (2 sticks) unsalted butter, softened
- 1 cup granulated sugar
- 1 large egg
- 1 tsp vanilla extract
- 1 ¾ cups all-purpose flour
- ½ cup unsweetened cocoa powder
- ½ tsp baking powder
- ¼ tsp salt
For the Green “Brain Stem” Frosting:
- 1 cup unsalted butter, softened
- 3–4 cups powdered sugar, sifted
- 2–3 tbsp milk or heavy cream
- Green gel food coloring
For the Pink/Purple Brain Topping (Fondant or Modeling Chocolate):
- 12 oz (about 340g) fondant or modeling chocolate, tinted pale pink (a few drops of pink gel food coloring)
- Purple gel food coloring for painting veins
How Much Time Will You Need?
You’ll spend about 30 minutes preparing and baking the cookies, plus extra time for cooling and decorating—plan for roughly 1.5 to 2 hours total. The decorating part is fun but detailed, so take your time for the best spooky effect!
Step-by-Step Instructions:
1. Make the Chocolate Cookie Base
Preheat your oven to 350°F (175°C) and line baking sheets with parchment paper. In a large bowl, beat the softened butter and sugar until light and fluffy. Mix in the egg and vanilla extract. In another bowl, whisk the flour, cocoa powder, baking powder, and salt. Gradually blend dry ingredients into the wet mixture. Drop tablespoon-sized scoops onto the baking sheet, flattening slightly. Bake for 10–12 minutes, until edges are firm but centers still soft. Let cookies cool completely before decorating.
2. Prepare the Green “Brain Stem” Frosting
Beat softened butter until creamy. Add powdered sugar and milk alternately, mixing until smooth and spreadable. Stir in green gel food coloring until you reach a bright green shade. Spread a thin layer on each cooled cookie to form the “stem” for your brain.
3. Prepare the Brain Fondant or Modeling Chocolate
Knead pink gel food coloring into fondant or modeling chocolate until you get a pale pink color. Shape pieces into ovals about the size of your cookies, mimicking a small brain.
4. Create the Brain Texture
Using a toothpick or small piping tip, press curved lines and grooves into the fondant to copy the brain’s folds and ridges. Use your fingers to twist and swirl the shapes so they look natural and a bit messy, like a real brain.
5. Add Purple Veins
Mix a few drops of purple gel food coloring with a drop of clear vanilla extract or water. With a fine brush or toothpick, paint light streaks and blotches along the brain crevices, making it look creepy and realistic.
6. Assemble the Zombie Brain Cookies
Place each brain-shaped fondant piece on top of the green-frosted cookie, pressing gently to stick. Optionally, brush some clear edible glaze or corn syrup on the fondant to give it a shiny, wet brain look.
7. Serve and Enjoy
Arrange your creepy cookies on a plate and watch them disappear quickly at your next spooky party! Store any leftovers in an airtight container for several days.
Can I Use Regular Food Coloring Instead of Gel?
You can, but gel food coloring is best because it provides vibrant colors without thinning your frosting or fondant. If using liquid color, add it sparingly to avoid changing the texture.
How Should I Store These Zombie Brain Cookies?
Store them in an airtight container at room temperature for up to 3 days. If your kitchen is warm, refrigerate them to keep the frosting and fondant firm, but bring to room temperature before serving.
Can I Make the Cookies Ahead of Time?
Yes! Bake and cool the cookies a day in advance, then frost and decorate on the day you plan to serve for the freshest look and texture.
What Can I Use Instead of Fondant for the Brain Decoration?
If you don’t have fondant or modeling chocolate, pipe thick royal icing in brain-like swirls or try soft cream cheese frosting tinted pink—just keep in mind it won’t hold its shape quite as well.