
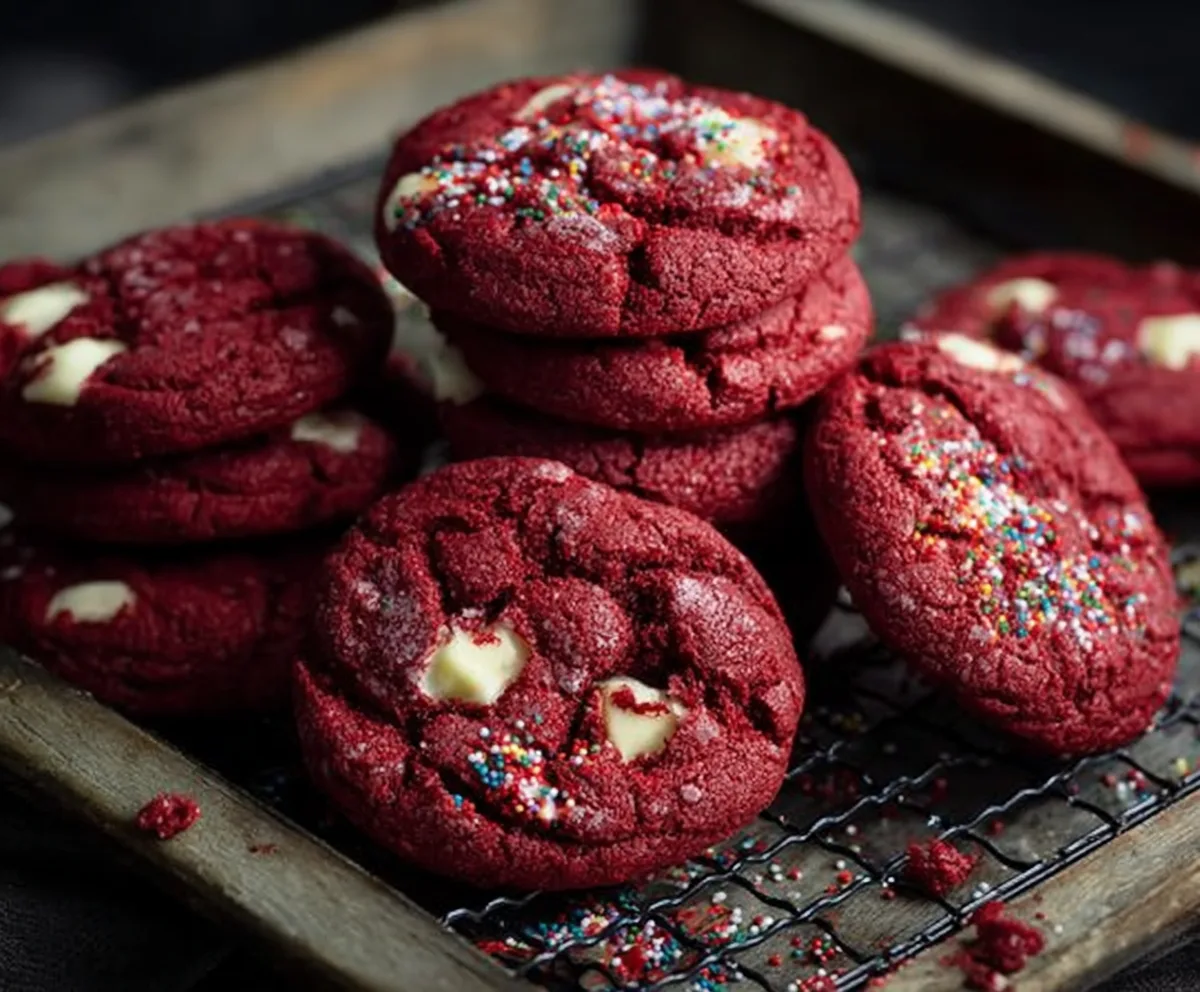
Red velvet cookies are a fun twist on the classic red velvet cake, bringing that rich cocoa flavor and vibrant red color into a soft, chewy cookie form. They’re just the right balance of sweet and chocolatey, often featuring cream cheese frosting or white chocolate chips to make them extra special.
I love baking these cookies when I want something a little festive or eye-catching on the dessert table. The red color always gets a “wow” from friends, and the texture is just perfect—not too cakey, not too crunchy. I find that chilling the dough before baking helps them keep a great shape and stay nice and tender.
These cookies are great for sharing at parties or just enjoying with a glass of milk while you relax at home. I usually make a batch during the holidays or for special occasions, but honestly, they’re so delicious that they don’t need a reason! Plus, they make any day feel a little brighter with that pop of color.
Key Ingredients & Substitutions
All-Purpose Flour: This gives the cookies their structure. You can swap in whole wheat flour for a nuttier flavor, but expect a denser cookie.
Cocoa Powder: Unsweetened cocoa creates that classic mild chocolate touch in red velvet. Use Dutch-processed cocoa for a smoother taste, though natural cocoa works fine too.
Butter: Softened unsalted butter adds richness and tenderness. You can substitute with margarine or coconut oil if needed, but flavor and texture will vary.
Red Food Coloring: This is key for the iconic red color. Gel food coloring gives a more vibrant color with less liquid added. For a natural option, beet powder works but changes the taste slightly.
White Chocolate Chips: These add sweetness and a creamy contrast. You can skip or add mini marshmallows for a different twist.
Cream Cheese Frosting: Combines cream cheese and butter for a tangy and smooth topping. For a lighter version, try mixing Greek yogurt in.
How Do You Get Soft and Chewy Red Velvet Cookies?
Softness comes from the balance of butter and sugars, plus careful baking time. Here’s how to ensure chewy cookies:
- Cream the butter and sugars well until light and fluffy—this traps air for softness.
- Don’t overmix when adding dry ingredients; overworking develops gluten and makes cookies tough.
- Use both granulated and brown sugar: brown sugar adds moisture that keeps cookies chewy.
- Watch baking time closely. Cookies should look set but still soft in the center when taken out.
- Cool on baking sheets for a few minutes before moving; this helps them set up without becoming hard.
- Chilling dough for 30 minutes (optional) helps control spread and improves texture.
Equipment You’ll Need
- Mixing bowls – I use different sizes for mixing dry and wet ingredients; they make prep easier.
- Electric hand or stand mixer – helps you cream the butter and sugars smoothly and quickly.
- Measuring cups and spoons – for accurate ingredient ratios, which are key for perfect texture.
- Cookie scoop or tablespoon – ensures uniform cookies that bake evenly.
- Parchment paper or silicone baking mats – prevents sticking and makes cleanup easy.
- Baking sheet – a standard size that fits most ovens and bakes the cookies evenly.
- Cooling rack – helps cookies cool evenly and keeps them from becoming soggy.
Flavor Variations & Add-Ins
- Chocolate chips or chunks – swap out the white chocolate for dark or milk chocolate for different sweetness levels.
- Sprinkles or edible glitter – add for a fun, festive look, especially for holidays.
- Chocolate cream cheese frosting – pipe in the center or top for an extra decadent treat.
- Crushed nuts – mix into the dough or sprinkle on top for crunch and extra flavor.
- White chocolate and peppermint – add peppermint extract and crushed peppermint candies for a holiday twist.
- Vegan options – use plant-based butter and egg replacers to make them dairy- and egg-free.
Red Velvet Cookies with Cream Cheese Frosting
Ingredients You’ll Need:
For the Cookies:
- 2 and 1/4 cups all-purpose flour
- 2 tablespoons unsweetened cocoa powder
- 1 teaspoon baking soda
- 1/2 teaspoon salt
- 1 cup (2 sticks) unsalted butter, softened
- 1 cup granulated sugar
- 1/2 cup light brown sugar, packed
- 2 large eggs
- 2 teaspoons vanilla extract
- 1 tablespoon red food coloring (liquid or gel)
- 1 teaspoon white vinegar
- 1 cup white chocolate chips
For the Cream Cheese Frosting:
- 4 ounces cream cheese, softened
- 1/4 cup (1/2 stick) unsalted butter, softened
- 1 cup powdered sugar, sifted
- 1/2 teaspoon vanilla extract
Optional Garnish:
- Crushed red velvet cake crumbs or red sugar sprinkles
- Additional white chocolate chips or mini marshmallows
How Much Time Will You Need?
This recipe takes about 15 minutes to prepare, 10-12 minutes to bake, plus cooling time for the cookies (about 20 minutes). Preparing and piping the frosting adds 10 minutes. In total, plan for about 45 minutes to an hour from start to finish.
Step-by-Step Instructions:
1. Prepare to Bake:
Preheat your oven to 350°F (175°C). Line two baking sheets with parchment paper or silicone baking mats to prevent sticking and make cleanup easy.
2. Mix Dry Ingredients:
In a medium bowl, whisk together the flour, cocoa powder, baking soda, and salt. Set this bowl aside for now.
3. Cream Butter and Sugars:
In a large bowl, use a hand mixer or stand mixer with a paddle attachment to cream together the softened butter, granulated sugar, and brown sugar until the mixture is light and fluffy—this usually takes about 3 to 4 minutes.
4. Add Eggs and Flavorings:
Add the eggs one at a time, beating well after each addition to combine. Then mix in the vanilla extract, red food coloring, and white vinegar until evenly blended.
5. Combine Wet and Dry Ingredients:
Gradually add the dry ingredients into the wet mixture, mixing on low speed just until everything is combined. Avoid overmixing to keep the cookies tender.
6. Fold in White Chocolate Chips:
With a spatula, gently fold in the white chocolate chips evenly throughout the dough.
7. Shape and Bake the Cookies:
Scoop rounded tablespoons or use a cookie scoop to place dough balls on your prepared baking sheets, leaving about 2 inches between each cookie to allow room for spreading.
Bake for 10 to 12 minutes, or until the edges are set but the centers still look soft. Let cookies cool on the sheet for 5 minutes before carefully transferring them to a wire rack to cool completely.
8. Prepare the Cream Cheese Frosting:
In a medium bowl, beat the softened cream cheese and butter together until smooth and creamy.
Gradually add the powdered sugar and vanilla extract, beating on medium speed until the frosting is light and fluffy.
9. Frost the Cookies and Garnish:
After the cookies have fully cooled, use a piping bag or a spoon to add a dollop of cream cheese frosting on top of each cookie.
Sprinkle with crushed red velvet crumbs, red sugar sprinkles, and additional white chocolate chips or mini marshmallows if you like.
10. Serve and Enjoy!
These soft, chewy red velvet cookies with creamy frosting are perfect for sharing. Store them in an airtight container at room temperature for several days or refrigerate for up to a week.
Can I Use Gel Food Coloring Instead of Liquid?
Yes! Gel food coloring actually works great because it’s more concentrated and won’t thin out your dough. Use about the same amount or adjust slightly for a deeper red color.
Can I Make the Dough Ahead of Time?
Absolutely! You can refrigerate the cookie dough for up to 24 hours before baking. Chilling helps the flavors meld and prevents the cookies from spreading too much.
How Should I Store Leftover Cookies?
Store cooled and frosted cookies in an airtight container in the refrigerator. They’ll stay fresh for about a week. Let them come to room temperature before serving for the best texture.
Can I Skip the Cream Cheese Frosting?
Yes, these cookies are delicious on their own! If you prefer, you can dust them with powdered sugar or enjoy them plain without frosting.