
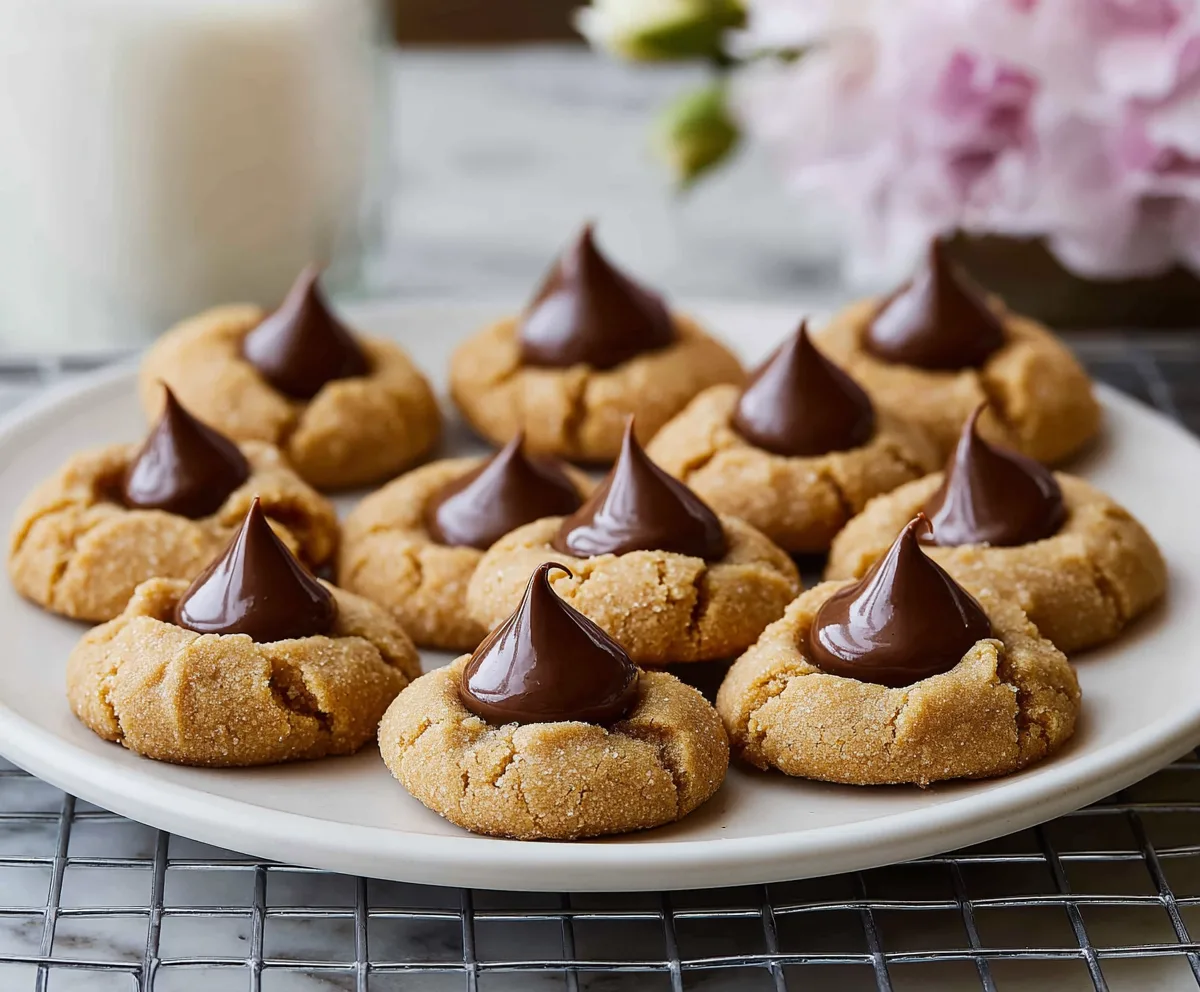
Peanut Butter Blossoms are classic cookies with a soft and chewy peanut butter base and a shiny chocolate kiss right in the center. They have a perfect mix of sweet and salty flavors and that little bit of crunch from the sugar coating. These cookies always bring a smile with their warm, familiar taste.
I love making Peanut Butter Blossoms around the holidays or whenever I want a quick treat that feels special. The best part is rolling the dough balls in sugar before baking—it gives them a nice texture and sparkle. I always think the chocolate kiss on top makes them look like little flowers ready to brighten any plate.
One of my favorite ways to enjoy these cookies is with a glass of cold milk or a cup of hot tea. They’re great for sharing with family and friends because everyone seems to have happy memories connected to these chewy, chocolate-topped treats. I find that they never last long once they’re out of the oven!
Key Ingredients & Substitutions
Peanut butter: Creamy peanut butter works best here for a smooth texture. If you prefer, natural peanut butter is fine but may affect the cookie’s softness. For a nut-free version, you can try sunflower seed butter.
Butter: Use unsalted butter so you can control the saltiness. Softened butter blends better and helps make the cookies tender.
Sugars: The mix of granulated and brown sugar gives both sweetness and a hint of moisture. Brown sugar adds chewiness, so don’t skip it. If you want a lower-sugar cookie, reduce granulated sugar a bit.
Chocolate kisses: Classic Hershey’s Kisses are the traditional choice. You can try other milk or dark chocolate candies, but kisses hold their shape nicely.
How Do You Get the Perfect Soft and Chewy Texture in These Cookies?
The key to soft, chewy Peanut Butter Blossoms is balancing the wet and dry ingredients and not overbaking.
- Soften the butter enough so it mixes smoothly with the sugars, creating a light, fluffy base.
- Don’t skip the brown sugar; it adds moisture and chew.
- Roll the dough balls in granulated sugar before baking—this adds a subtle crunch and a pretty finish.
- Bake just until the edges look set and lightly browned, usually 8-10 minutes. The centers should still be soft.
- Press the chocolate kiss in right after baking while cookies are hot to help it stick and soften just right.
Following these steps helps the cookies keep their tender texture and the chocolate stays perfectly gooey on top.
Equipment You’ll Need
- Baking sheet – Provides a flat surface for cookies to bake evenly and makes cooling easy.
- Parchment paper or silicone baking mat – Keeps cookies from sticking and makes cleanup simple.
- Mixing bowls – For whisking dry ingredients and mixing the wet ingredients separately.
- Electric mixer or whisk – Helps beat the butter and sugars until fluffy, saving time and effort.
- Cookie scoop or teaspoon – Ensures uniform-sized cookies for even baking.
- Cooling rack – To let cookies cool properly and avoid sogginess.
- Unwrapped Hershey’s Kisses – The classic topping that presses right into hot cookies.
Flavor Variations & Add-Ins
- Use semi-sweet chocolate chips instead of kisses for a more gooey, melty top.
- Add a handful of chopped peanuts or pretzels for extra crunch and flavor.
- Swirl in a bit of honey or maple syrup to add a touch of sweetness and moisture.
- Try peanut butter cups instead of kisses for a more indulgent treat.
How to Make Peanut Butter Blossoms
Ingredients You’ll Need:
- 1 ¾ cups all-purpose flour
- 1 teaspoon baking soda
- ½ teaspoon salt
- ½ cup (1 stick) unsalted butter, softened
- ½ cup granulated sugar
- ½ cup packed light brown sugar
- ½ cup creamy peanut butter
- 1 large egg
- 1 teaspoon vanilla extract
- Additional granulated sugar, for rolling
- About 36 chocolate kisses, unwrapped (like Hershey’s Kisses)
How Much Time Will You Need?
This recipe takes about 10 minutes to prepare and about 8-10 minutes to bake each batch. Cooling will take another 10-15 minutes. So, expect around 30 minutes from start to finish, perfect for a quick and tasty treat!
Step-by-Step Instructions:
1. Get Your Oven and Ingredients Ready:
First, preheat your oven to 375°F (190°C). Line your baking sheets with parchment paper or silicone mats to keep the cookies from sticking.
2. Mix Dry Ingredients:
In a medium bowl, whisk together the flour, baking soda, and salt. Set it aside for now.
3. Cream Butter and Sugars:
In a large bowl, beat the softened butter, granulated sugar, and brown sugar together until the mix is light and fluffy. This usually takes a couple of minutes with a mixer.
4. Add Peanut Butter, Egg, and Vanilla:
Add the peanut butter, egg, and vanilla to the butter mixture. Beat everything together until it’s well mixed and creamy.
5. Combine Dry and Wet Ingredients:
Slowly add the dry ingredients to the wet ingredients. Stir or beat until everything is combined, making a soft dough.
6. Shape and Sugar-Coat the Cookies:
Use a teaspoon or cookie scoop to scoop out dough and roll each piece into a ball. Then roll the balls in granulated sugar so they’re nicely coated.
7. Bake the Cookies:
Place the sugar-coated balls about 2 inches apart on your prepared baking sheets. Bake them for 8 to 10 minutes until the edges look set and the cookies are just starting to brown.
8. Add the Chocolate Kiss:
Right after taking the cookies out of the oven, gently press one chocolate kiss into the center of each cookie. The heat will soften the chocolate slightly and help it stick.
9. Cool and Enjoy:
Let the cookies cool on the baking sheets for a few minutes, then move them to a wire rack to cool completely. Now they’re ready to enjoy with friends, family, or just yourself!
Can I Use Natural Peanut Butter Instead of Creamy?
Yes! Natural peanut butter works, but it may make the cookies a bit denser and less creamy. Stir it well before measuring and consider chilling the dough slightly if it feels too soft.
How Should I Store Peanut Butter Blossoms?
Store them in an airtight container at room temperature for up to 5 days. If you want them softer, add a slice of bread to the container to keep them moist. You can also freeze baked cookies for up to 3 months.
Can I Make the Dough Ahead of Time?
Absolutely! You can prepare the dough, shape it into balls, and refrigerate for up to 24 hours before baking. Just add the chocolate kisses immediately after baking for best results.
What Can I Use if I Don’t Have Hershey’s Kisses?
You can substitute with mini chocolate chips, chocolate chunks, or your favorite small chocolate candies. Just press them gently into the warm cookies right after baking so they soften and stick well.