
No Bake Oreo Cheesecake Cups are a delightful treat that’s as simple to make as it is delicious. These little cups feature a creamy, smooth cheesecake filling mixed with crushed Oreo cookies, all sitting on a crunchy Oreo crust. They’re perfect for anyone who loves that classic cookies and cream flavor but wants something quick and fuss-free.
I love making these when I want a sweet treat without turning on the oven. The best part is how easy they come together—just mix, layer, and chill! I often find myself sneaking a bite straight from the bowl before it even sets because it’s that good. Plus, the little crushed Oreos on top add just the right touch of crunch and extra chocolatey goodness.
These cups are great for parties or when friends drop by unexpectedly because you can prepare them ahead of time. I like serving them chilled with a cup of coffee or a cold glass of milk. They always bring smiles, and somehow, they disappear faster than I expect. It’s a quick dessert that feels special every single time.
Key Ingredients & Substitutions
Oreos: These are the star of the show! I like using classic Oreos for the perfect chocolate and cream combo. If you need a gluten-free option, look for gluten-free sandwich cookies that work similarly.
Cream Cheese: Use full-fat cream cheese for the best texture and richness. If you want a lighter version, try reduced-fat cream cheese, but the dessert may be a bit less creamy.
Heavy Whipping Cream: This makes the filling light and fluffy. You can substitute with whipped coconut cream for a dairy-free version, though the flavor changes slightly.
Butter: Melted butter helps bind the crumbs into a crust. If you prefer, you can swap it for coconut oil for a dairy-free twist.
How Do You Get a Smooth and Fluffy No Bake Cheesecake Filling?
Getting the right texture is key for this no bake cheesecake. Here’s how:
- Start by beating the cream cheese until it’s soft and lump-free. This makes mixing easier and smoother.
- Add powdered sugar and vanilla next, and mix until just combined—overmixing can make it watery.
- Whip your heavy cream separately until stiff peaks form. This means when you lift the whisk, the cream holds its shape.
- Fold the whipped cream gently into the cream cheese mixture using a spatula. Folding (not stirring) keeps the air in, making the filling light and fluffy.
- Mix in crushed Oreos carefully, so they’re evenly spread without breaking down the cream structure.
This method keeps your cheesecake filling creamy with a nice, airy texture that sets perfectly in the fridge.
Equipment You’ll Need
- Mixing bowls – I use these to beat and fold the ingredients easily and keep everything organized.
- Electric hand mixer or stand mixer – makes whipping the cream and blending the cheese quick and smooth.
- Graham cracker or cookie crimper (optional) – helps press the crushed Oreos into the cups evenly for a firm crust.
- Serving spoons or small spatulas – perfect for scooping the filling into cups and spreading it neatly.
- Sweetened condensed milk or piping bag (optional) – for decorating or adding extra toppings in a pretty way.
- Refrigerator – essential for chilling and setting your cheesecake cups!
Flavor Variations & Add-Ins
- Swirl in caramel or peanut butter before chilling for a richer, nutty flavor.
- Add mini chocolate chips or chopped nuts into the filling for extra crunch and texture.
- Use different cookies like graham crackers or chocolate chip cookies for the crust for a different taste.
- Top with fresh berries or fruit compote to add a fresh, tangy contrast to the creamy cheesecake.
No Bake Oreo Cheesecake Cups
Ingredients You’ll Need:
For The Crust:
- 12 Oreo cookies (cream removed and crushed finely)
- 4 tablespoons unsalted butter, melted
For The Cheesecake Filling:
- 8 ounces (225g) cream cheese, softened
- 1 cup heavy whipping cream
- ½ cup powdered sugar
- 1 teaspoon vanilla extract
- 8 Oreo cookies, chopped into small pieces
For Topping:
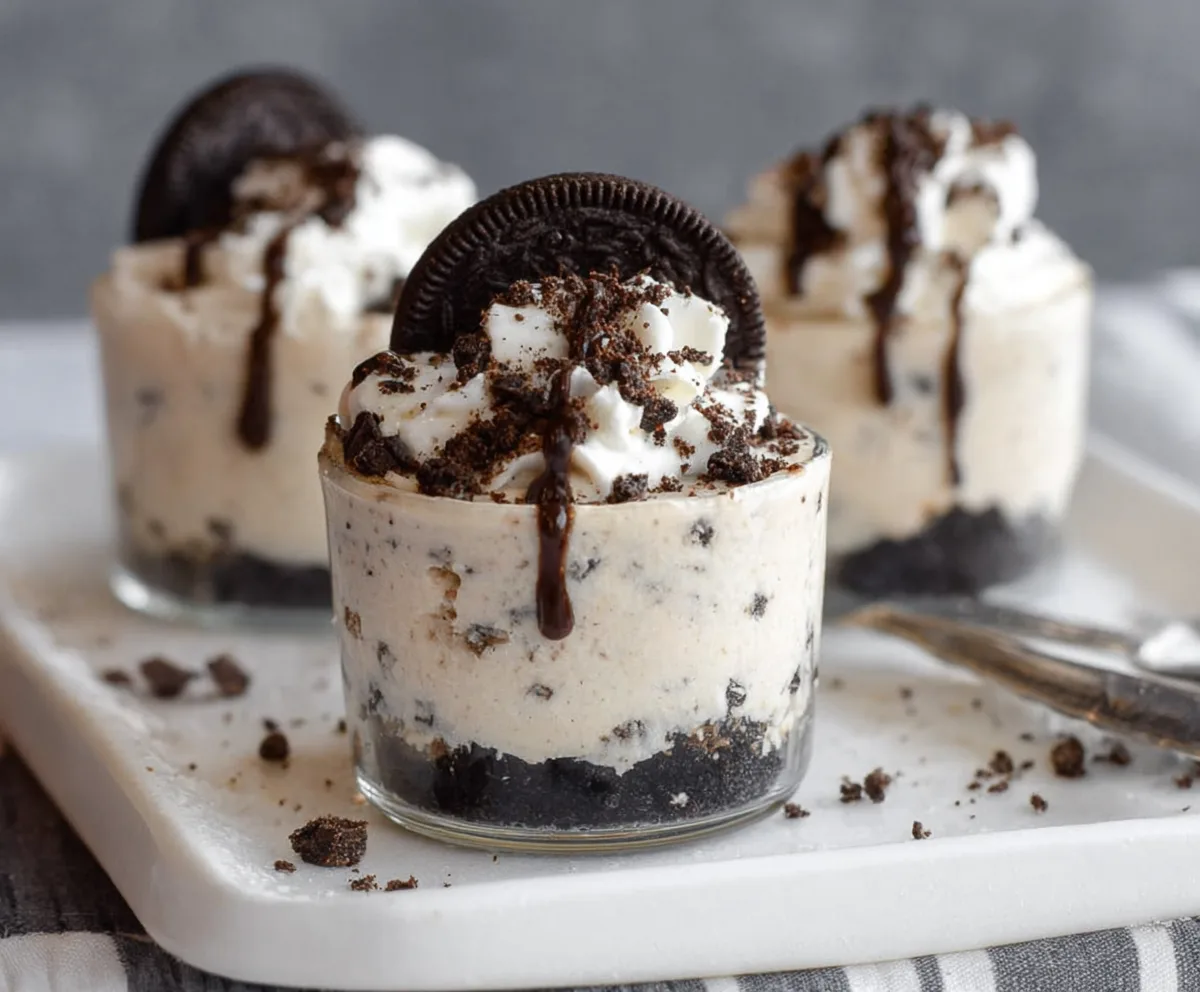
- Whipped cream
- Whole Oreo cookies (for garnish)
- Chocolate syrup or melted chocolate
How Much Time Will You Need?
This recipe will take about 15 minutes to prepare. After assembling the cups, you’ll need to refrigerate them for at least 2 hours to let the cheesecake filling set and become nice and firm. Once chilled, they’re ready to enjoy!
Step-by-Step Instructions:
1. Make the Oreo Crust:
Remove the cream from 12 Oreos and crush the cookies finely using a food processor or by placing them in a bag and crushing with a rolling pin. Mix the crushed Oreos with the melted butter until combined. Press this mixture firmly into the bottom of small serving cups to create the crust layer.
2. Prepare the Cheesecake Filling:
Beat the softened cream cheese in a bowl until smooth and creamy. Add powdered sugar and vanilla extract, mixing well. In a separate bowl, whip the heavy cream until it forms stiff peaks. Gently fold the whipped cream into the cream cheese mixture until smooth and fluffy. Then, fold in the chopped Oreos carefully.
3. Assemble and Chill:
Spoon the cheesecake filling evenly over the Oreo crust in each cup. Add a dollop of whipped cream on top, place a whole Oreo cookie in each as garnish, and drizzle with chocolate syrup or melted chocolate. Refrigerate all the cups for at least 2 hours to allow the filling to set before serving. Enjoy your delicious, no-bake Oreo cheesecake cups!
Can I Use Frozen Cream Cheese for This Recipe?
It’s best to use cream cheese that’s fully thawed and softened at room temperature. This makes it easier to beat and results in a smoother cheesecake filling.
How Long Can I Store These Cheesecake Cups?
Store them in an airtight container in the refrigerator for up to 3 days. For the best texture and flavor, enjoy them within this time frame.
Can I Substitute Oreos with Another Cookie?
Absolutely! You can use any sandwich cookie or chocolate cookie you like, such as chocolate chip cookies or graham crackers, to change up the flavor and texture.
Is It Okay to Make These Ahead of Time?
Yes! These cheesecake cups actually develop better flavor and texture after chilling overnight, making them perfect for preparing in advance for parties or gatherings.