
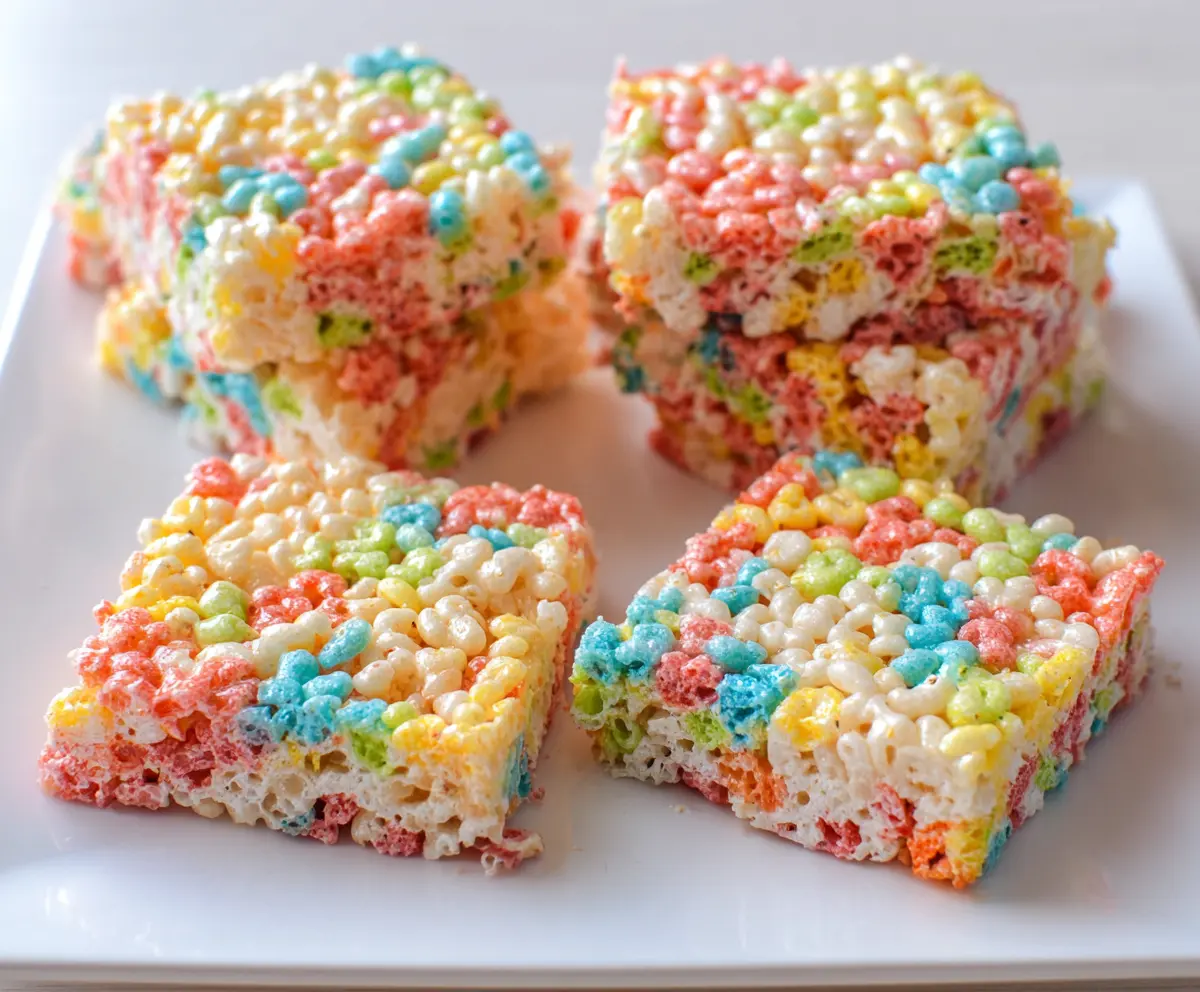
Jelly Bean Rice Krispie Treats are a fun twist on the classic crispy, chewy marshmallow snack that we all know and love. Packed with colorful jelly beans, these treats bring a sweet pop of fruity flavor and a burst of color in every bite. The crunchy rice cereal combined with gooey marshmallows and little jelly bean surprises makes them a cheerful and tasty treat for kids and adults alike.
I love making these especially around the holidays or for birthday parties because they’re so easy to whip up and always bring smiles to everyone’s faces. One tip I have is to fold in the jelly beans gently so they don’t melt or get crushed too much in the warm marshmallow mix. It keeps them looking bright and tasting fresh.
These treats are perfect to pack in lunchboxes, bring to potlucks, or just keep on hand for a quick sweet snack. I often find myself nibbling on them while watching a movie or sharing them with friends over a cup of tea. They remind me of simple joys and make any day just a little sweeter!
Key Ingredients & Substitutions
Rice Krispies cereal: This cereal is light and crispy, perfect for that classic crunch. If you can’t find it, try puffed rice cereal as a substitute.
Mini marshmallows: They melt smoothly and create the gooey texture that holds everything together. You can use regular-sized marshmallows, but chop them smaller for even melting.
Butter: Unsalted is best to control saltiness. If you prefer, margarine or a plant-based butter works well too.
Jelly beans: They add sweet bursts and fun color. Chop them roughly to spread flavor evenly. If you want less sweetness, try fruit snacks or chopped dried fruit instead.
Vanilla extract (optional): Adds a subtle warmth and depth that balances the marshmallow sweetness. Feel free to leave it out if you want a purer marshmallow taste.
How Can I Get the Perfect Texture Without Squishing My Treats?
Avoid pressing the mixture too hard in the pan. Press gently with a buttered spatula or wax paper just enough to make the surface even. Over-compressing makes treats dense and less chewy.
- Grease your spatula or wax paper to prevent sticking.
- Press the mixture evenly but softly, don’t push down hard.
- Work quickly—marshmallow cools and hardens fast.
Following these steps will give you light, chewy treats with lots of crispy texture and pockets of jelly bean flavor!
Equipment You’ll Need
- Large mixing bowl – I recommend it because it gives plenty of space to combine all the ingredients easily.
- Large pot – perfect for melting butter and marshmallows evenly without spills.
- 9×9-inch baking pan – ideal for holding the treats; lining it with parchment makes cleanup a breeze.
- Rubber spatula or wax paper – helps press the mixture evenly without sticking.
- Mixing spoon – for folding in the jelly beans and optional toppings easily.
Flavor Variations & Add-Ins
- Use different candies like M&Ms or Reese’s Pieces instead of jelly beans for more chocolate or peanut flavor.
- Add chopped nuts such as peanuts, almonds, or pecans for crunch and extra flavor.
- Mix in a few drops of food coloring to create layered or rainbow-colored treats for a fun look.
- Stir in chocolate chips or mini Reese’s cups after melting the marshmallows for a chocolate twist.
How to Make Jelly Bean Rice Krispie Treats?
Ingredients You’ll Need:
- 6 cups Rice Krispies cereal
- 4 cups mini marshmallows
- 3 tablespoons unsalted butter
- ½ teaspoon vanilla extract (optional)
- About ½ cup assorted jelly beans, roughly chopped or whole
- About 2 tablespoons decorative sprinkles (optional)
- Food coloring (optional, for layered colors)
How Much Time Will You Need?
You’ll spend about 15 minutes preparing and mixing your treats, plus about 1 hour letting them cool and set before cutting. This makes a quick and fun sweet snack that’s easy to enjoy any time!
Step-by-Step Instructions:
1. Prepare Your Pan:
Start by greasing a 9×9-inch baking pan with butter or line it with parchment paper. This helps your treats come out easily when they’re ready.
2. Melt Butter and Marshmallows:
In a large pot over low heat, melt the butter gently. Then add the mini marshmallows, stirring constantly until they melt completely and become smooth. Remove the pot from heat.
3. Add Flavor and Cereal:
If you want, stir in the vanilla extract for extra flavor. Quickly fold in the Rice Krispies cereal, mixing until every bit is coated in the marshmallow mixture.
4. Mix in Jelly Beans:
Gently fold in the chopped jelly beans, reserving a few whole ones if you want to put them on top for decoration.
5. Press the Mixture into the Pan:
Transfer the sticky mix to your pan. Using a buttered spatula or a piece of wax paper, press it gently but evenly. Try not to press too hard to keep the treats light and chewy.
6. Optional Layering and Topping:
For fun, separate the melted marshmallow mixture into portions, add different food colorings, and layer each colored mixture in the pan one after the other, pressing gently after each layer. Then sprinkle with decorative sprinkles or reserved jelly beans.
7. Let It Cool and Cut:
Let your treats sit at room temperature for at least 1 hour to firm up. Once set, cut into squares and enjoy! Store leftovers in an airtight container to keep them fresh.
Can I Use Frozen Jelly Beans in This Recipe?
It’s best to use fresh or room-temperature jelly beans. If you have frozen ones, thaw them completely and pat dry to avoid adding extra moisture that can affect the treat’s texture.
Can I Make Jelly Bean Rice Krispie Treats Ahead of Time?
Yes! You can prepare them a day in advance. Store the finished treats in an airtight container at room temperature to keep them chewy and fresh.
How Should I Store Leftovers?
Keep the treats in an airtight container at room temperature for up to 3 days. Avoid refrigerating, as this can make them hard and less enjoyable.
Can I Substitute Other Candies for Jelly Beans?
Absolutely! M&Ms, chocolate chips, or chopped dried fruit work well and add different flavors or textures to your treats.