
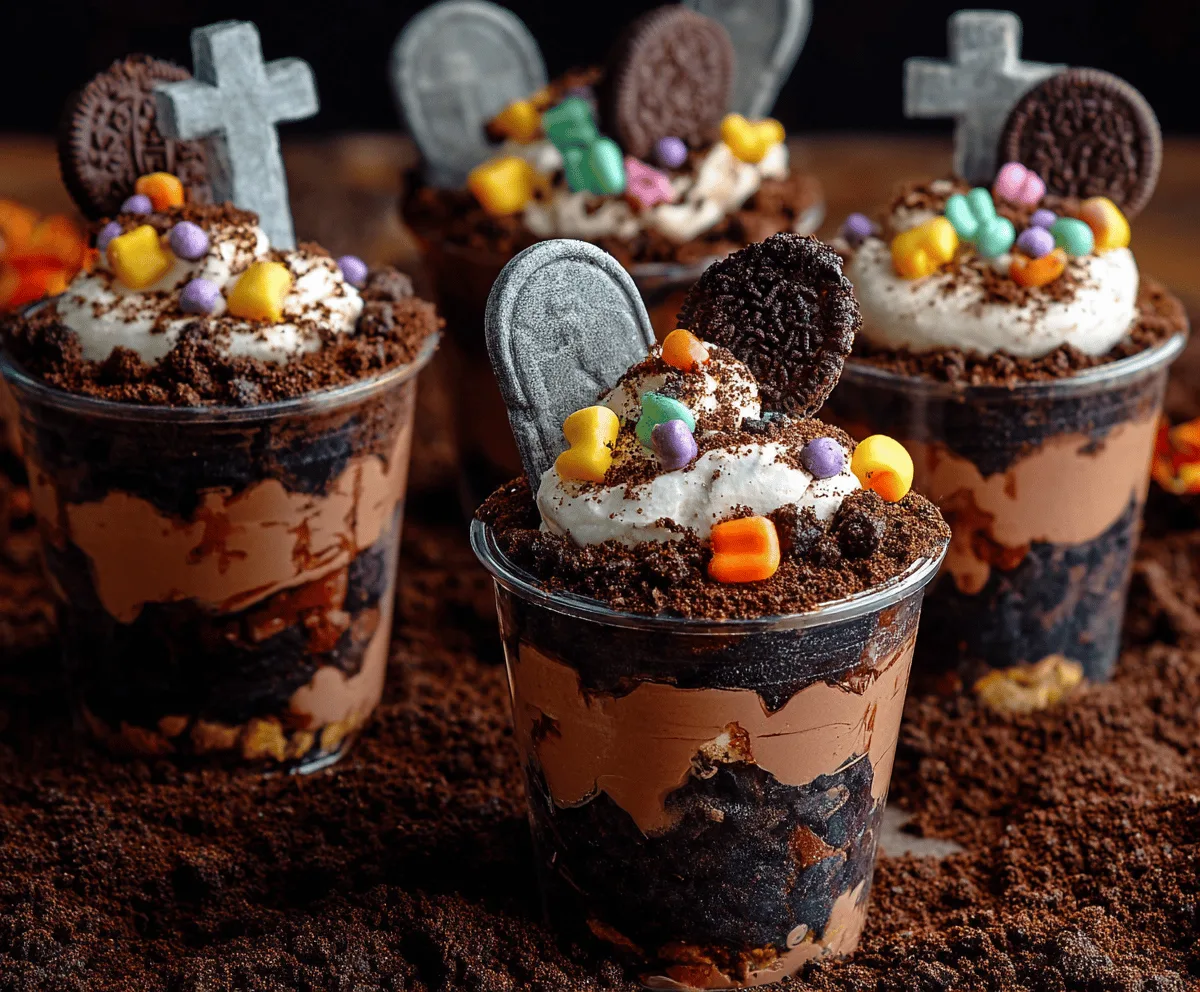
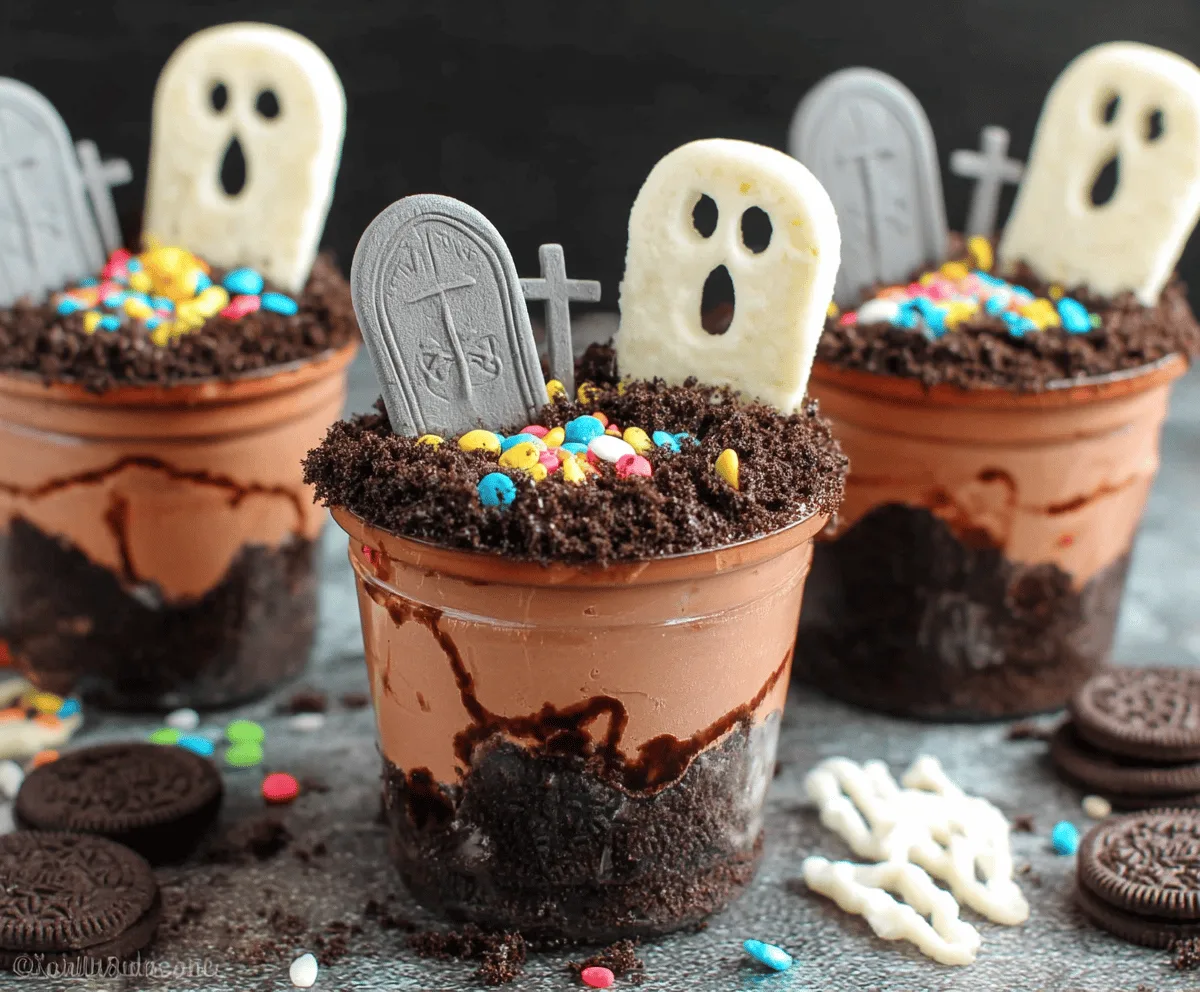
Graveyard Dirt Cups are a fun and spooky treat that’s perfect for Halloween or any creepy-themed party! Imagine rich, creamy chocolate pudding layered with crushed Oreo cookies that look just like dirt. Then, with little gummy worms and cookie tombstones on top, it feels like you’re digging into a tiny, delicious graveyard.
I love making these because they’re so simple but always get a big reaction, especially from kids. It’s a fun way to add a little weird and wacky twist to dessert time. Plus, you can easily change up the toppings to match your own spooky style or whatever candies you have on hand.
When I serve Graveyard Dirt Cups, I usually make a bunch in clear cups so everyone can see the layers. It makes the treat extra special to watch as they dig in with a spoon, uncovering all those yummy layers. They’re a great mix of creamy and crunchy, and honestly, you don’t have to wait for Halloween to enjoy them—they’re good any time you want a playful dessert!
Key Ingredients & Substitutions
Chocolate Sandwich Cookies: These give the “dirt” texture and color. Oreos are classic, but any chocolate wafer cookie works. For a gluten-free option, look for gluten-free chocolate cookies.
Instant Chocolate Pudding Mix: This makes the creamy filling quick and easy. If you prefer, you can make homemade pudding, but instant saves time. Vanilla or chocolate flavor both work well here.
Heavy Cream: Whipping cream is key to making the pudding light and fluffy. You can substitute with coconut cream to make it dairy-free and still get that rich texture.
Halloween Candy Decorations: Edible tombstones and ghost-shaped candies add fun. If you don’t find them, use any spooky-themed candies or simple chocolate pieces. Gummy worms are a playful addition too!
How Do You Make the Chocolate Pudding Mousse Light and Fluffy?
To get a mousse-like pudding that’s creamy and airy:
- Whip cold heavy cream with powdered sugar and vanilla until stiff peaks form. This means the cream should hold shape on its own.
- Fold the whipped cream gently into the prepared instant pudding. Use a spatula and move slowly, folding from the bottom so you don’t lose the air you added while whipping.
- Mix just until combined—this keeps the mousse light rather than dense.
This technique makes the pudding smooth and fluffy, perfect for layering with the crunchy “dirt” cookies.
Equipment You’ll Need
- Mixing bowls – I use a medium bowl for the pudding and a large one for whipping the cream, making prep easier.
- Electric mixer or whisk – helps whip the cream to fluffy peaks quickly and easily.
- Spatula – perfect for gently folding the whipped cream into the pudding without deflating it.
- Clear serving cups or small jars – let you see the layered “dirt” and pudding, making the dessert look fun and spooky.
- Measuring spoons and cups – for precise ingredient amounts and easy assembly.
- Cookie crusher or plastic bag and rolling pin – optional, for crushing cookies into fine crumbs easily.
Flavor Variations & Add-Ins
- Extra Flavors: Mix in a spoonful of peanut butter or cream cheese with the pudding for a richer taste. You can also add a splash of peppermint extract for a wintry twist.
- Different Proteins: Swap the candy decorations for gummy worms or spider gummies for more spooky fun. Add mini cookies or pretzels for extra crunch.
- Cheese or Fruit: Add crumbled cream cheese cookies or top with fresh berries for a fruity contrast that still looks creepy.
- Spice It Up: Sprinkle a dash of cinnamon or chili powder into the cookie crumbs for a surprising kick.
How to Make Graveyard Dirt Cups
Ingredients You’ll Need:
For the Dirt and Cup:
- 1 package (about 15 oz) chocolate sandwich cookies (e.g., Oreos), finely crushed
- Chocolate syrup, for drizzling (optional)
For the Chocolate Pudding Mousse:
- 2 cups milk (whole or 2%)
- 1 package (3.9 oz) instant chocolate pudding mix
- 1 cup heavy cream, cold
- 2 tablespoons powdered sugar
- 1 teaspoon vanilla extract
For Topping and Decorating:
- Halloween-themed candy decorations (edible tombstone candies or cookie tombstones, ghost-shaped marshmallows or candies, colorful sprinkles or candy-coated chocolates, small candy crosses – optional)
How Much Time Will You Need?
This fun graveyard dessert takes about 15-20 minutes to prepare and then needs at least 1 hour in the fridge to chill and set well. So, plan ahead to get the spooky layers ready for your party or treat time!
Step-by-Step Instructions:
1. Make the Chocolate Pudding:
In a medium bowl, whisk the instant chocolate pudding mix and cold milk together for about 2 minutes until it thickens. Once thickened, set the pudding aside.
2. Whip the Cream:
In a large bowl, use an electric mixer to whip the cold heavy cream, powdered sugar, and vanilla extract at high speed until you get stiff peaks. This will add a light and fluffy texture to your pudding.
3. Combine Pudding and Whipped Cream:
Gently fold the whipped cream into the thickened pudding using a spatula. Fold slowly so that the mixture stays light and airy. Your mousse-like chocolate filling is now ready.
4. Prepare the Cookie Crumb “Dirt” and Base:
Set aside about 1 cup of crushed cookies for topping. Mix the remaining crushed cookies (about 2 cups) with a few tablespoons of chocolate syrup (if using) to create a moist dirt base.
5. Assemble Each Cup:
If you like, drizzle some chocolate syrup along the inside of clear serving cups for a decorative effect. Press a layer of the cookie crumb dirt into the bottom of each cup.
6. Add the Chocolate Mousse Layer:
Spoon or pipe the chocolate pudding mousse on top of the cookie layer in each cup, filling almost to the top for a nice layered look.
7. Add the Dirt Topping:
Sprinkle the reserved crushed cookies over the mousse layer to mimic fresh dirt.
8. Decorate Your Graveyard:
Stick in tombstone candies, ghost-shaped candies, and any other spooky candy decorations you have. Add colorful sprinkles or candy-coated chocolates to create a fun and festive graveyard scene.
9. Chill Before Serving:
Refrigerate the assembled cups for at least 1 hour so the layers set and the flavors blend well.
10. Enjoy Your Spooky Treats!
Grab a spoon and dig into your delicious Graveyard Dirt Cups filled with creamy mousse, crunchy cookie dirt, and fun creepy decorations!
Can I Use Frozen Whipped Cream or Pudding?
It’s best to use fresh, cold heavy cream for whipping and freshly prepared pudding for the best texture. If you have leftover whipped cream, thaw it gently in the fridge and re-whip before folding in.
Can I Make Graveyard Dirt Cups Ahead of Time?
Yes! You can prepare the entire dessert a day in advance and keep it covered in the refrigerator. The flavors actually develop well overnight, and the cookie “dirt” layers stay crunchy.
How Should I Store Leftovers?
Keep leftovers in airtight containers in the fridge for up to 2-3 days. The cookie topping might get a bit softer over time, but the cups will still taste delicious.
What Are Good Substitutes for the Candy Decorations?
If you can’t find themed candies, gummy worms, mini chocolate chips, or small cookies can make fun and spooky alternatives to decorate your dirt cups.