
Broiled Tilapia Parmesan is a simple and tasty dish that combines flaky white fish with a crispy, cheesy topping. The tilapia gets a quick broil under a golden layer of Parmesan cheese and breadcrumbs, giving it a nice crunch without much fuss. It’s a great way to enjoy fish that’s light but still full of flavor.
I love making this dish when I want something quick but still feel like I’m having a little treat. The best part for me is the combination of the mild fish with the sharp Parmesan and a hint of garlic or herbs in the topping. It’s easy to prepare, and I usually find myself going back for seconds.
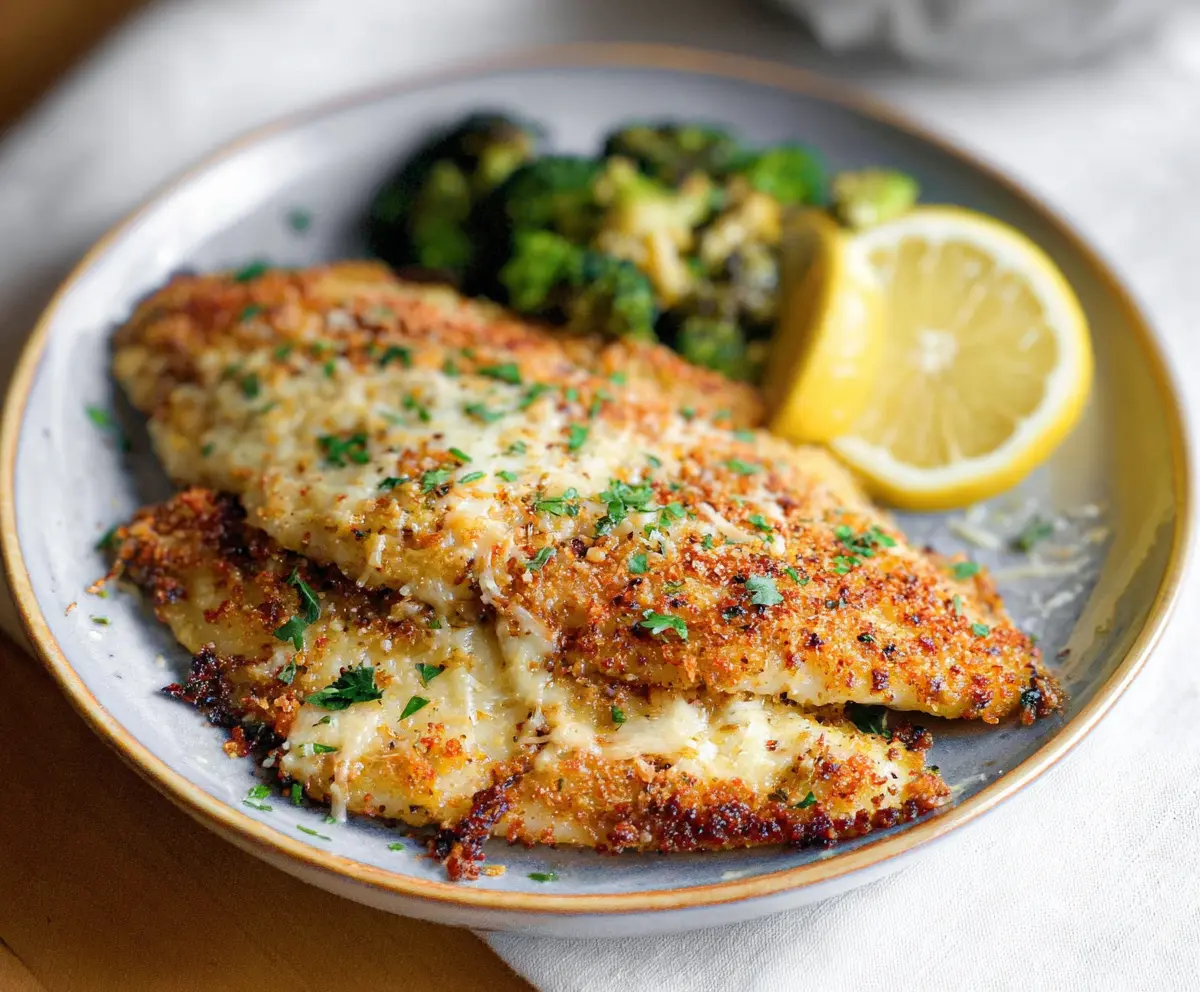
One of my favorite ways to serve Broiled Tilapia Parmesan is with a side of steamed veggies or a fresh salad. It’s fresh, satisfying, and perfect for a weeknight dinner when you want something healthy yet comforting. Plus, with the broiler doing most of the work, cleanup is a breeze!
Key Ingredients & Substitutions
Tilapia: This mild fish works great here but you can swap it with cod, sole, or even haddock. Just pick fillets that cook quickly under the broiler.
Parmesan cheese: Adds a nutty flavor and helps the crust crisp up. If you want less salt, try Pecorino Romano or some finely grated Asiago.
Breadcrumbs: Panko breadcrumbs give a nice crunch. If you don’t have panko, regular breadcrumbs work but the coating won’t be as crispy.
Italian seasoning: A mix of dried herbs boosts flavor without much effort. You can use fresh herbs instead, like basil and oregano, but add them after broiling to keep their brightness.
Olive oil: Helps the crust brown and keeps fish moist. You could use melted butter instead for a richer taste.
How Do You Broil the Tilapia for a Perfect Crust Without Burning It?
Broiling is fast and intense. Keep an eye on the fish to avoid burning the topping.
- Place the oven rack about 6 inches from the broiler. This distance balances fast cooking and gentle browning.
- Use a broiler-safe tray lined with foil or parchment for easy cleanup.
- Watch the fish closely during the last 2 minutes. The cheese and breadcrumbs should turn golden but not black.
- Check the fish with a fork—it should flake easily when done.
- If you like extra crispiness, you can broil a minute longer but be ready to pull it out quickly.
Broiling is a quick way to get a crispy topping while keeping the fish moist and tender. Just keep your attention on the process for the best results!
Equipment You’ll Need
- Broiler-safe baking sheet – I prefer this because it helps the fish cook quickly and gets the topping crispy without extra dishes.
- Mixing bowls – for combining Parmesan, breadcrumbs, and herbs easily and neatly.
- Small spoon or spatula – to press the breadcrumb mixture onto the fish evenly.
- Kitchen tongs or a wide spatula – for turning or removing the fish safely after broiling.
- Measuring spoons and cups – to measure oil, cheese, and seasonings accurately.
Flavor Variations & Add-Ins
- Swap Parmesan for Pecorino Romano or Asiago for a different cheesy flavor. It’s a simple way to change the taste.
- Add crushed red pepper flakes or smoked paprika to the breadcrumb mix for a little spice or smoky flavor.
- Top the fish with a slice of mozzarella or fontina during the last minute of broiling for a melty, cheesy twist.
- Serve with a drizzle of lemon butter or a dollop of garlic aioli for extra flavor and richness.
Broiled Tilapia Parmesan
Ingredients You’ll Need:
For the Fish:
- 4 tilapia fillets (about 6 oz each)
- 1/2 cup grated Parmesan cheese
- 1/2 cup breadcrumbs (preferably panko for extra crunch)
- 2 tablespoons olive oil
- 1 teaspoon garlic powder
- 1 teaspoon dried Italian seasoning (or mix of dried basil, oregano, thyme)
- Salt and freshly ground black pepper, to taste
- 1 lemon, cut into wedges (for serving)
Optional Sides:
- 1 cup cherry tomatoes, halved
- 1 cup broccolini or asparagus
- 1 tablespoon butter (for sautéing broccoli/asparagus)
- 1 tablespoon fresh parsley or basil, chopped (for garnish)
How Much Time Will You Need?
This recipe takes about 10 minutes for preparation, and about 5-7 minutes for broiling the fish. If you choose to prepare the sides, add another 5-7 minutes for steaming or sautéing. Overall, expect about 20 minutes from start to finish.
Step-by-Step Instructions:
1. Prepare and Season the Fish:
Preheat your oven’s broiler to high and place the oven rack about 6 inches from the heating element. Rinse the tilapia fillets under cold water and pat them dry with paper towels. Season both sides of each fillet with salt, pepper, and garlic powder.
2. Make the Parmesan Breadcrumb Coating:
In a shallow bowl, mix together the grated Parmesan cheese, breadcrumbs, and dried Italian seasoning. Drizzle olive oil on both sides of each tilapia fillet, then press each fillet firmly into the breadcrumb mixture to coat evenly. Place the coated fillets on a broiler-safe baking sheet lined with foil or parchment paper.
3. Broil the Tilapia:
Put the baking sheet under the broiler and cook the fish for 5 to 7 minutes. Watch it closely so the Parmesan breadcrumb topping turns golden and crispy but doesn’t burn. The fish is done when it flakes easily with a fork.
4. Prepare Optional Veggie Sides:
While the fish is broiling, steam or sauté your choice of broccolini or asparagus in a bit of butter or olive oil until they’re tender but still crisp. Warm the cherry tomatoes by tossing them gently in a pan or serving fresh.
5. Serve and Enjoy:
Serve the hot broiled tilapia on plates with lemon wedges and a sprinkle of fresh parsley or basil. Arrange the sautéed broccolini or asparagus and cherry tomatoes on the side for a colorful, healthy complement.
Can I Use Frozen Tilapia for This Recipe?
Yes! Just make sure to fully thaw the fillets in the refrigerator overnight or under cold running water before cooking. Pat them dry well to help the breadcrumb coating stick and crisp up.
Can I Substitute the Breadcrumbs?
Absolutely! If you don’t have panko breadcrumbs, regular breadcrumbs will work too, though the topping may be less crunchy. For a gluten-free option, use crushed gluten-free crackers or almond meal.
How Should I Store Leftovers?
Store any leftover fish and veggies in an airtight container in the fridge for up to 2 days. Reheat gently in the oven or microwave to keep the crust from getting soggy.
Can I Make This Ahead of Time?
You can prep the breaded fish ahead and keep it in the fridge for a few hours but broil right before serving for the best crispy crust and fresh flavor.